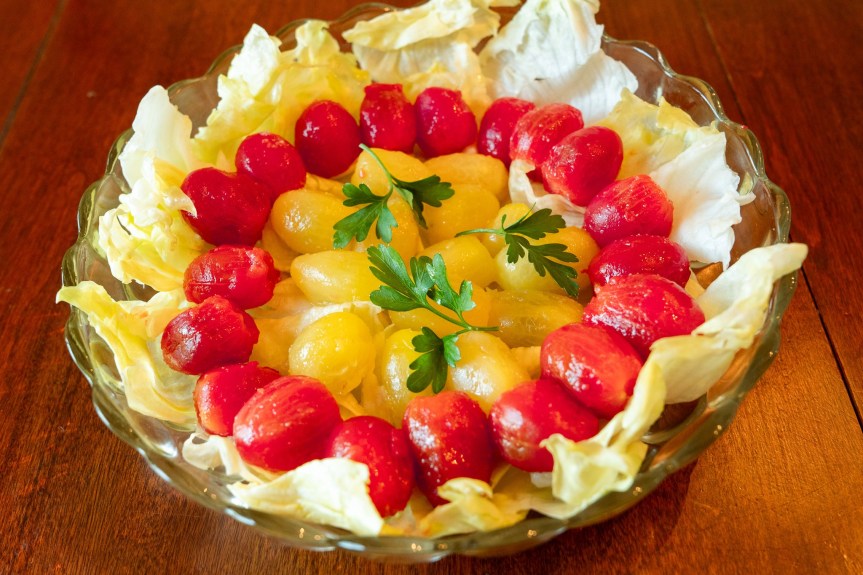
Green Bean Salad (with Nasturtiums)

Green Bean Nasturtium Salad

Cooking with edible flowers is a fun and playful way to change a mundane dish into a  really special, beautiful dish that is a work of art.

I planted nasturtiums this year for the first time in many years. The reason I planted them is because I saw a recipe in a hundred-year-old cookbook for a green bean salad that called for nasturtiums. I’ve been anxiously waiting for the nasturtiums to bloom,  and, finally, they are blooming and I was able to make the recipe.

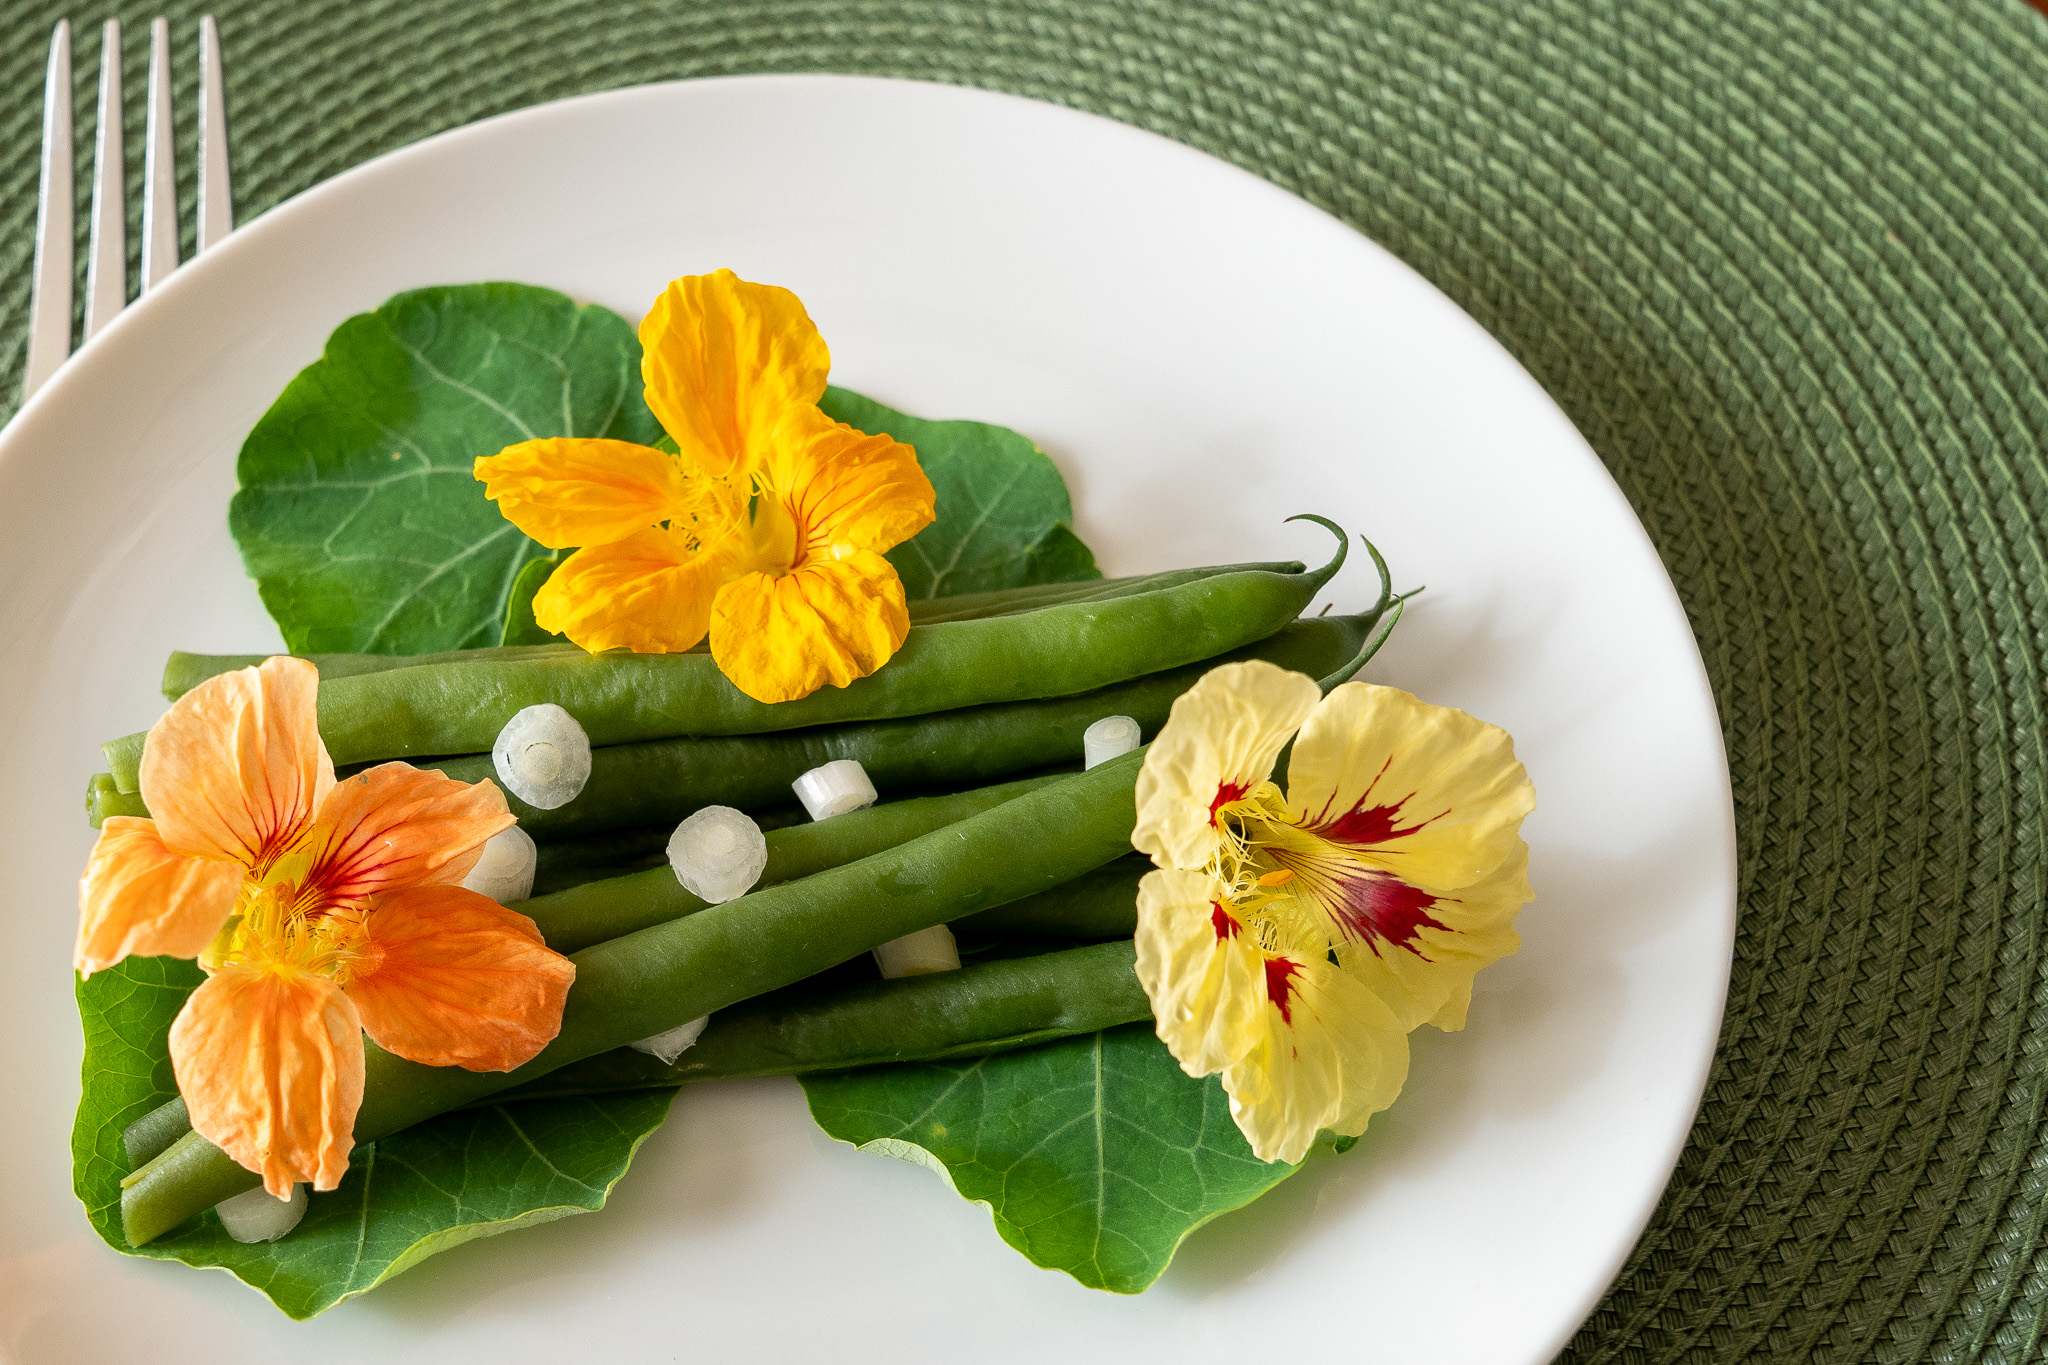
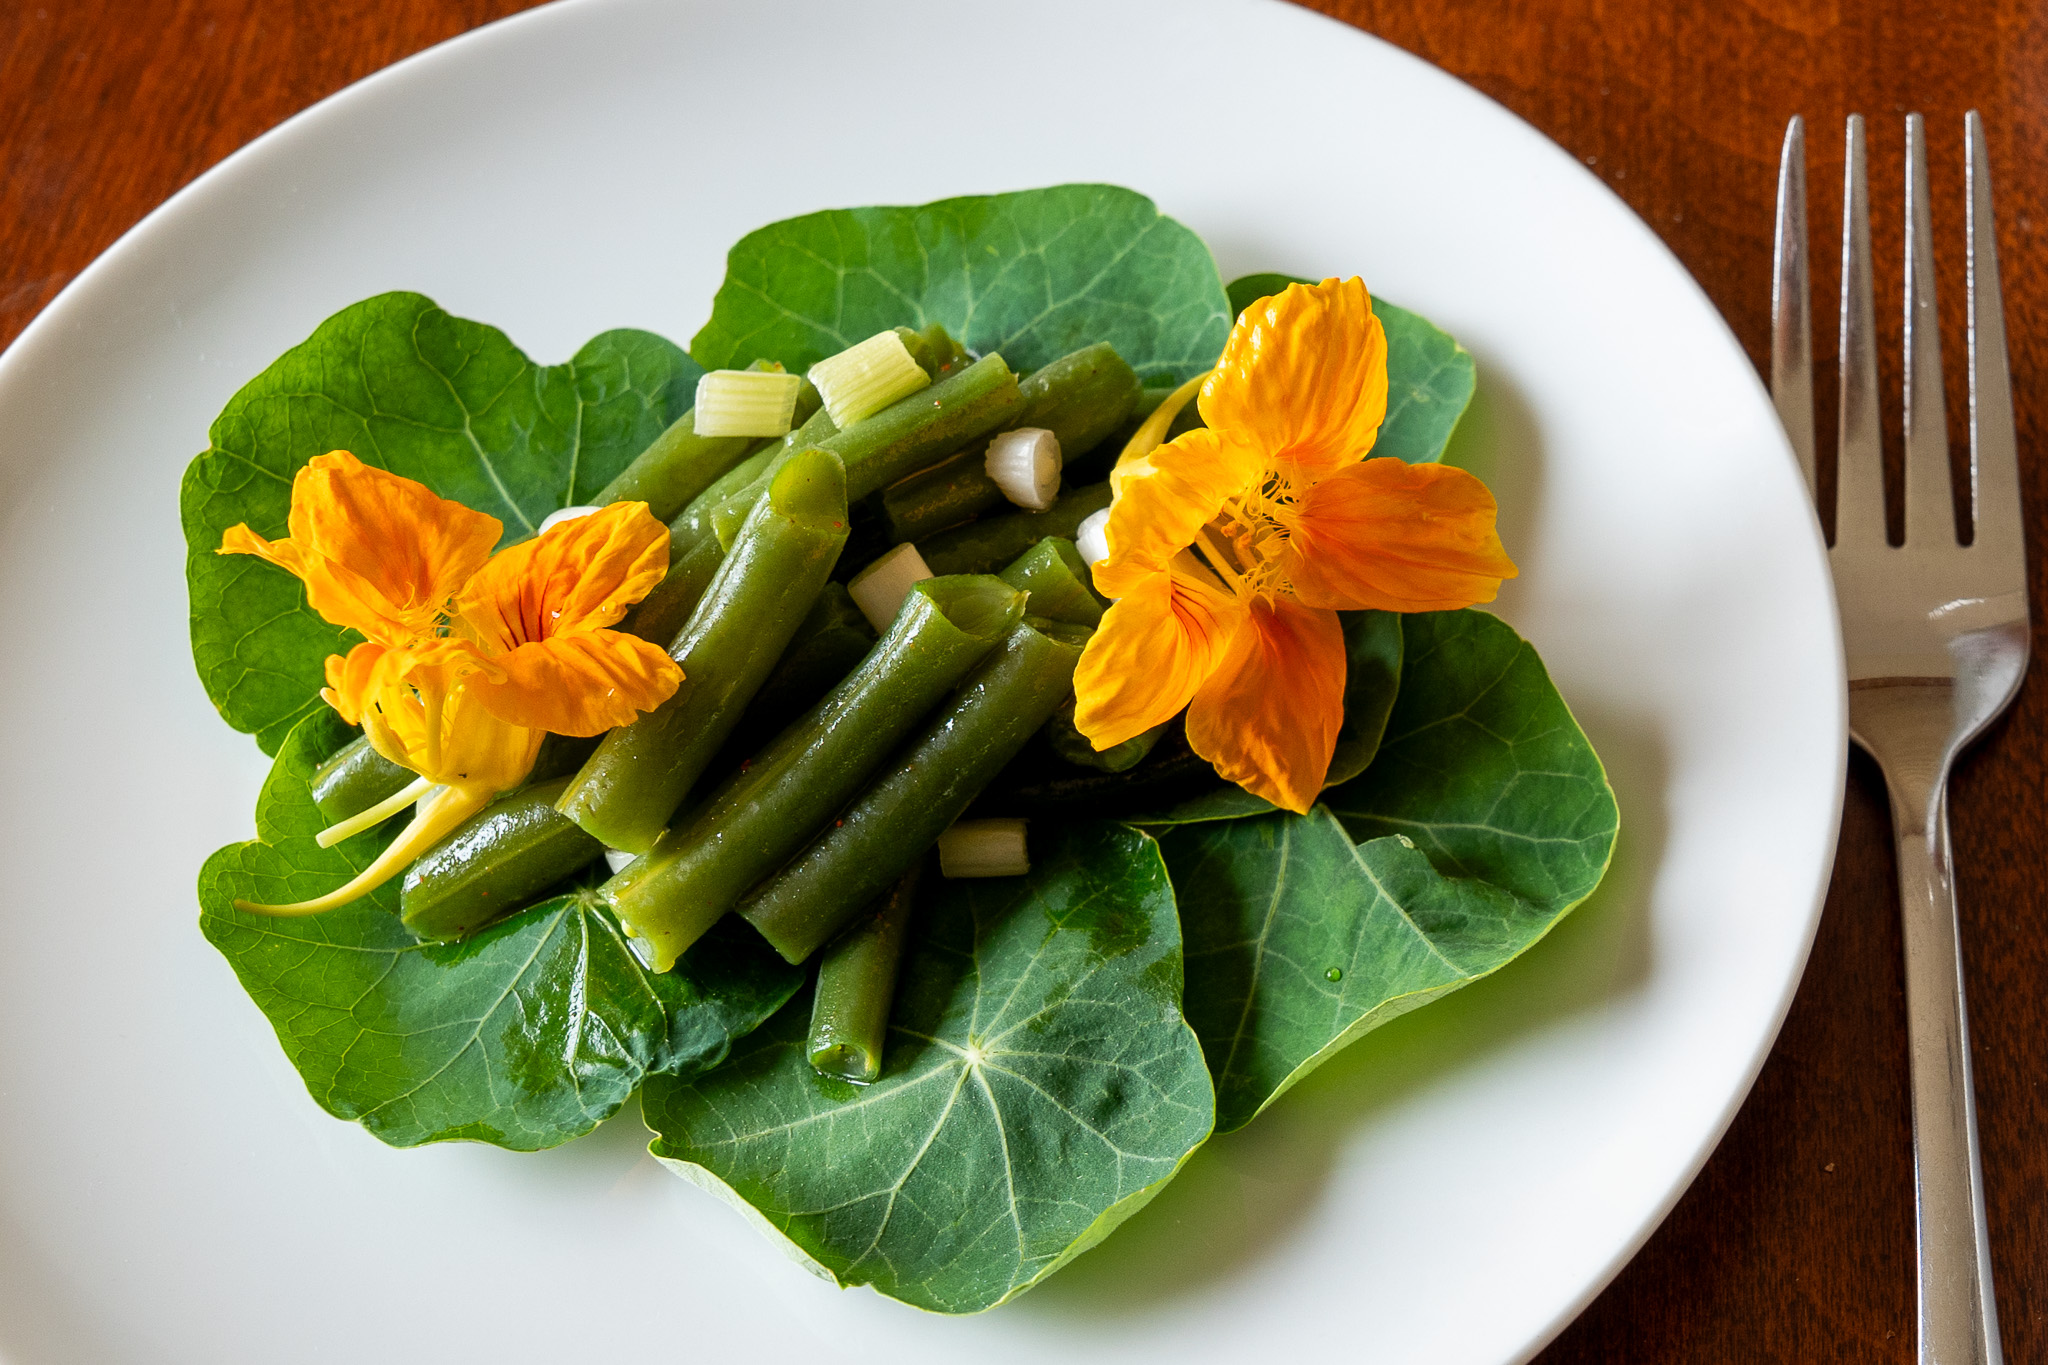
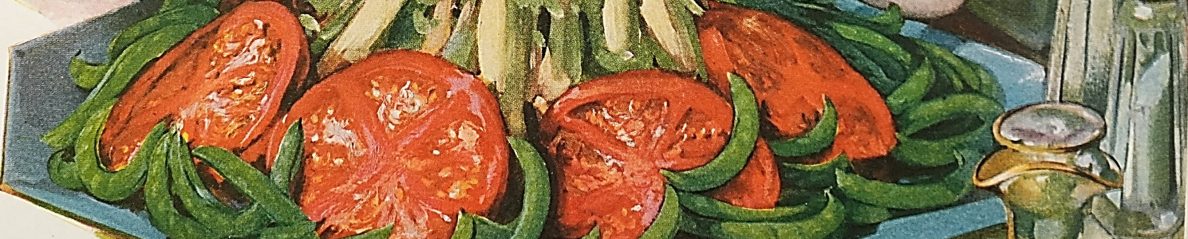
The Green Bean Salad (with Nasturtiums) was easy to make and tasty, and made a lovely presentation. The green beans are arranged on top of nasturtium leaves. Green onion slices are then sprinkled on top of the green beans, and the salad is garnished with nasturtium flowers. The green beans were lightly coated with a lovely vinaigrette dressing, and the nasturtium leaves have a nuanced sweetness, and mild peppery kick.

I made this salad twice. The first time I snapped the beans into short pieces, which is how I think cooks a hundred years ago would have made the salad. It looked lovely, but then I thought about how green beans often are left whole today, and decided to also make it that way. The salad with the unsnapped beans also looked great, and had a more modern look. (As you can see, I was having fun with this recipe.)

String Bean Salad with nastartiums

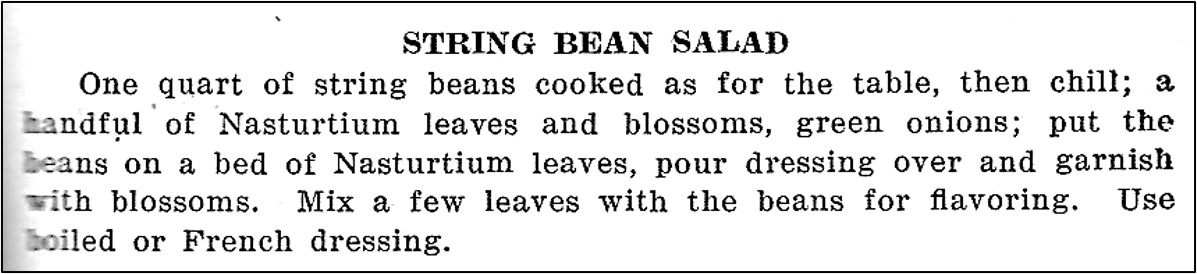
Here is the original recipe:

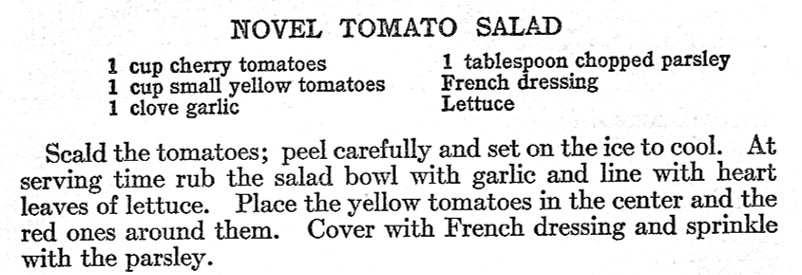
String Bean Salad (with Nasturtiums)
Source: Methodist Ladies Aid Cook Book: 1926 (Culbertson, Nebraska)

The original recipe was called String Bean Salad. Today we often refer to string beans as green beans (and they generally don’t even have strings anymore), so when I updated the recipe, I called it Green Bean Salad. I also included “with nasturtiums” in the recipe title since that is a unique part of this recipe.

I individually plated each serving, but the salad could be put in a serving bowl.

The old recipe called for serving the salad with French Dressing. A hundred years ago, French Dressing was a vinaigrette dressing, and quite different from the commercial, orange-colored French dressing that is common today. There was no recipe for French Dressing in the cookbook that contained the salad recipe, so I used a French Dressing recipe that was  in another 1926 cookbook:

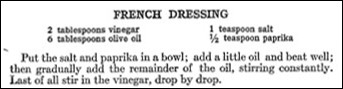
Recipe for French Dressing
Source: The New Winston Cook Book of Guaranteed Recipes (1926)

The French Dressing made more dressing than I needed so I halved the recipe.

Here’s the recipe updated for modern cooks:

Green Bean Salad (with Nasturtiums)

  • Servings: 3-4
  • Difficulty: easy
  • Print

1 quart (about 1 pound) green beans

4 small green onions, thinly sliced

approximately 1 cup nasturtium leaves

nasturtium flowers (for garnish)

Step 1. Trim green beans. If desired, snap the beans (or they can be left whole). Lightly steam or boil the beans for about 5 minutes, then chill until cold.

Step 2. Pour French Dressing over the beans (see recipe below), and gently stir to coat beans with the dressing. (If desired, mix a few nasturtium leaves with the beans).  If there is excess dressing on the beans, drain the beans to remove it.

Step 3. Arrange nasturtium leaves on individual serving plates (or they can be arranged in a serving bowl). Top with the green beans that have been coated with French Dressing.

Step 4. Sprinkle the sliced green onions over the green beans.

Step 5. Garnish with nasturtium flowers.

French Dressing (Vinaigrette  Dressing)

1/2 teaspoon salt

1/4 teaspoon paprika

3 tablespoons olive oil

1 tablespoon vinegar

Step 1. Put the salt and paprika in a small bowl.

Step 2. Gradually add the olive oil while stirring constantly.

Step 3. Then slowly add the vinegar, a small amount at a time, while continuing to stir.

http://www.ahundredyearsago.com

Old-Fashioned Raspberry Muffins

Several months ago, I saw a recipe for Raspberry Muffins in a hundred-year-old magazine, and have been anxiously waiting to try it. Finally, the black raspberries in my backyard are ripe, and I dug the recipe out and made it.

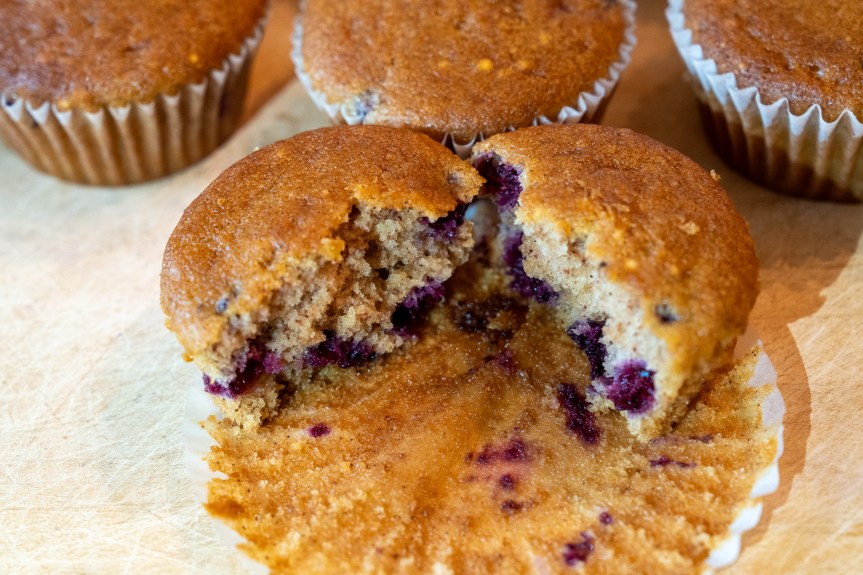
The recipe was a winner. The Raspberry Muffins were soft, moist, and tasty. They had just the right amount of sweetness, and a hint of cinnamon which worked perfectly with the sweet tartness of the berries.

I served these muffins with coffee to a group of friends. There was a discussion about whether I used blackberries (that are commonly sold in stores) or black raspberries (which are almost never seen in stores) when making the muffins. At least one person in the coffee group hadn’t even known that there was a fruit called black raspberries until I made the muffins.

The original recipe does not indicate whether red or black raspberries should be used. I used black raspberries, but red ones would also work well.

Here’s the original recipe:

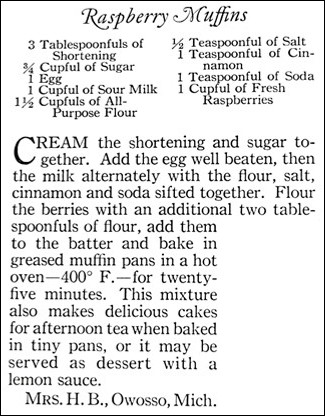
Recipe for Raspberry Muffins
Source: Ladies Home Journal (June, 1926)

A hundred-years-ago many families still lived on farms; and, even in towns, much of the milk that was sold was not pasteurized. Back then, if the non-pasteurized milk was not used quickly, the “good” bacteria in the milk would turn it into a sour milk suitable for use in recipes that used baking soda as the leavening agent. Today’s pasteurized milk can be turned into a sour milk by adding a little vinegar or lemon juice to create a slightly curdled acidic milk that results on bubbles of carbon dioxide gas when combined with the baking soda which causes the baked good to rise.

The raspberries are coated with flour to make them less likely to sink to the bottom of the batter while baking.

Here’s the recipe updated for modern cooks:

Raspberry Muffins

  • Servings: approximately 12
  • Difficulty: moderate
  • Print

1 cup raspberries (either red or black raspberries can be used)

1 1/2 cups flour + 2 tablespoons flour

1 cup milk

1 tablespoon vinegar or lemon juice

3 tablespoons shortening or butter, softened

3/4 cup sugar

1 egg

1/2 teaspoon salt

1 teaspoon cinnamon

1 teaspoon baking soda

Step 1. Preheat oven to 400° F.

Step 2. Put the raspberries in a small bowl and sprinkle with the 2 tablespoons flour; gently stir/roll the berries to lightly coat with flour. Set aside.

Step 3. Put the milk in a small bowl and stir in the vinegar/lemon juice. Set aside.

Step 4. Put shortening/butter and sugar in mixing bowl, then cream them together.

Step 5. Add egg, soured milk, salt, cinnamon, and baking soda; stir to combine.

Step 6. Add 1 1/2 cup flour, and stir until just combined.

Step. 7.  Add flour-coated raspberries; gently stir to distribute evenly throughout batter.

Step 8. Grease muffin tins (or use paper liners), and then fill each muffin cup 3/4th full with batter. Bake for approximately 25 – 30 minutes or until lightly browned.

http://www.ahundredyearsago.com

Old-Fashioned Cherry Custard Pie (with Meringue)

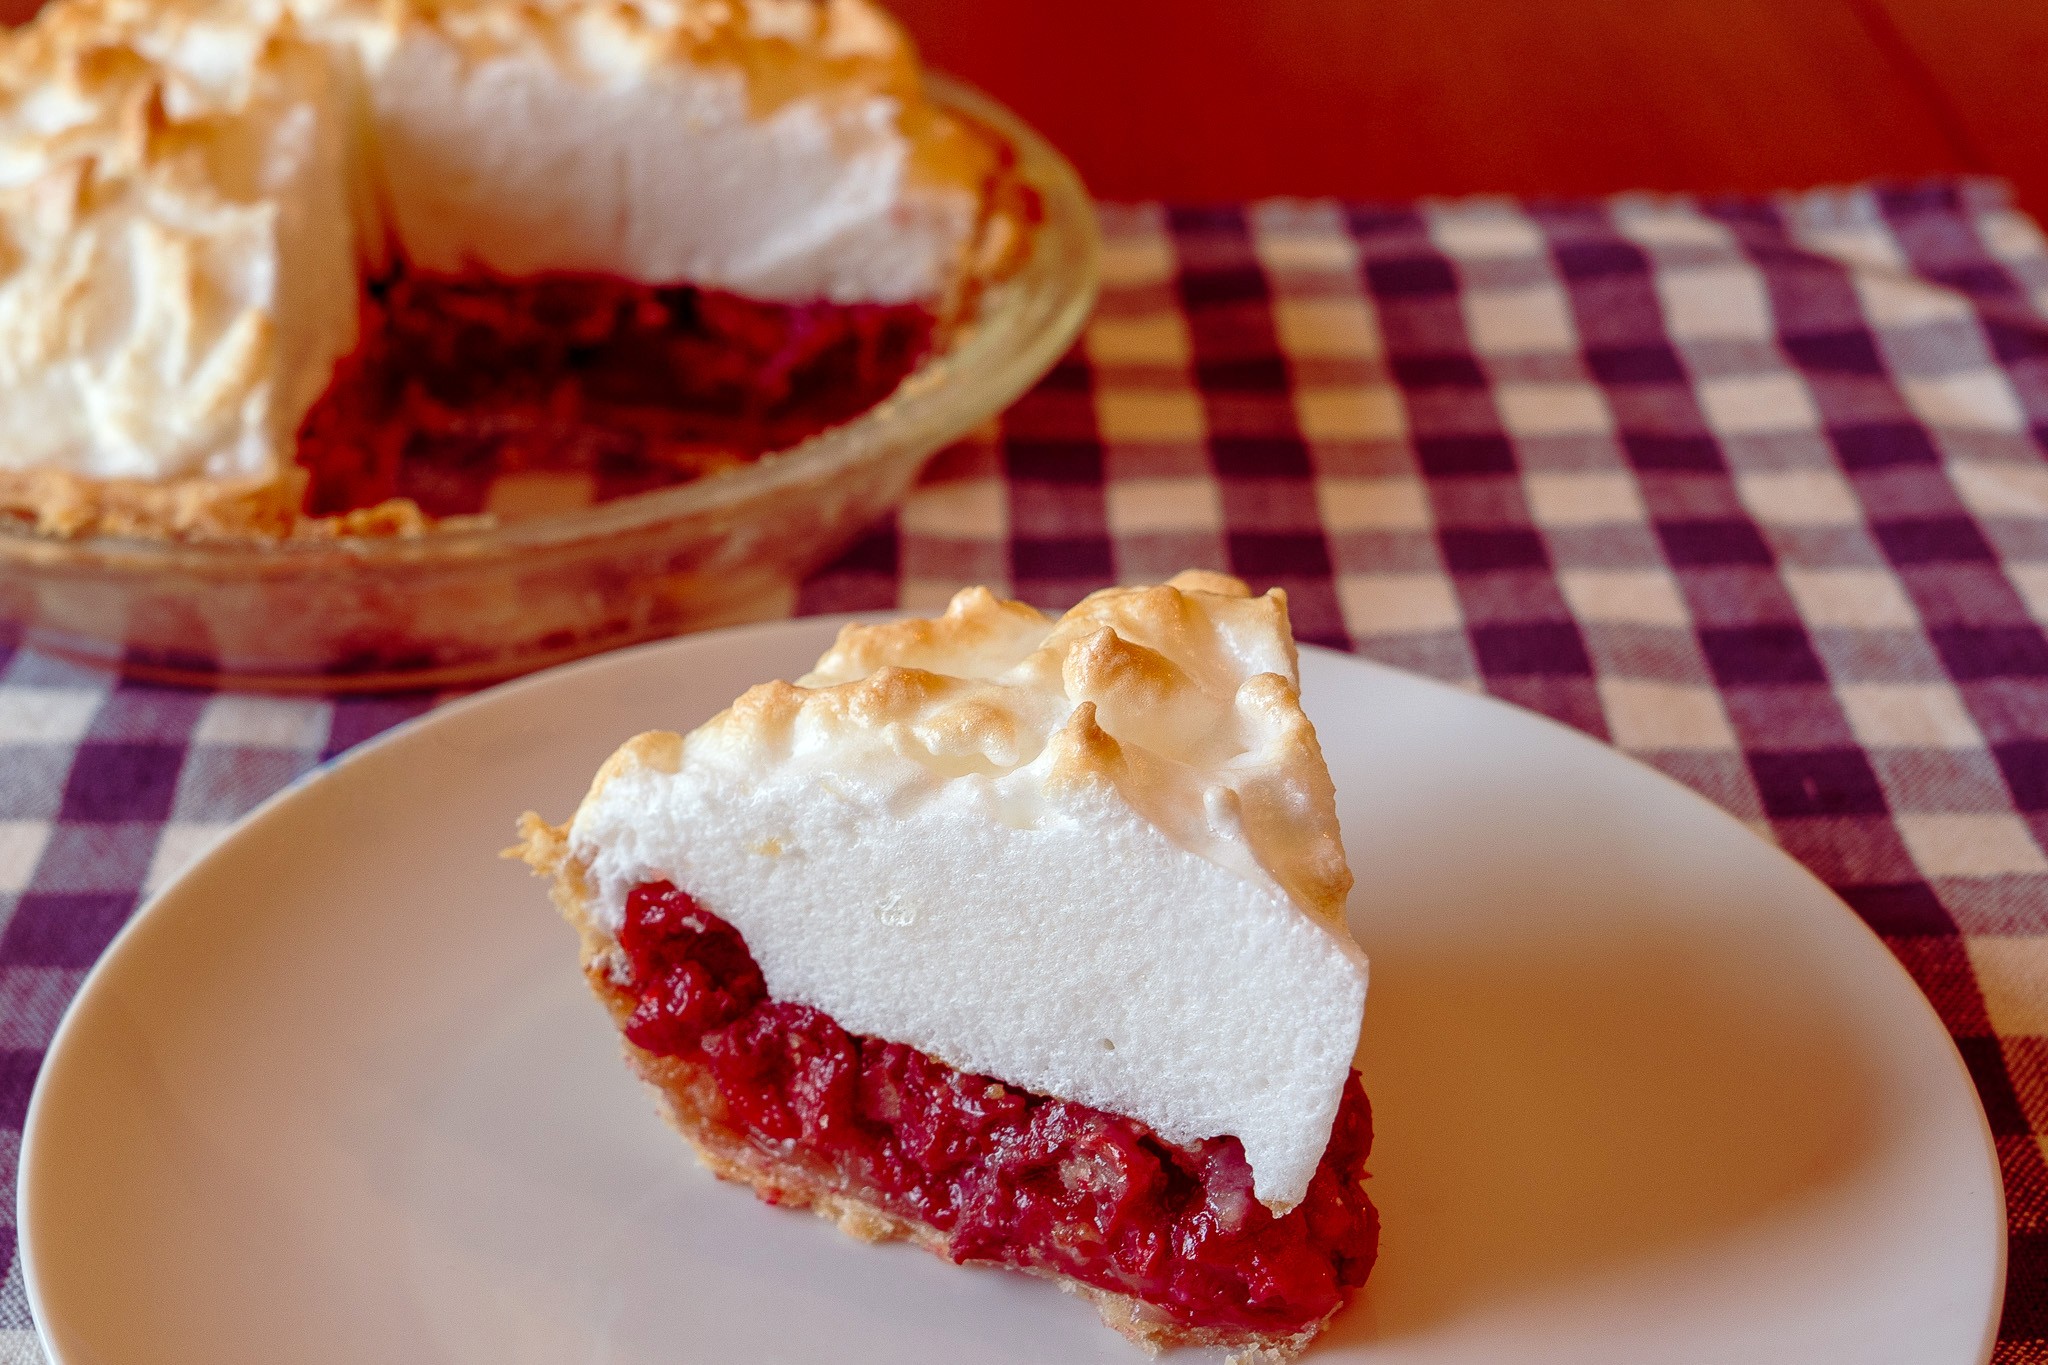
Piece of Cherry Custard Pie on plate

The cherries on the sour cherry tree in my back yard are ripe, so it’s time to make cherry pie. I found a recipe in a hundred-year-old cookbook for Cherry Custard Pie, and decided to give it a try.

I need to say right up front that I’m not sure this pie is actually a custard pie because the recipe didn’t call for any milk. The recipe called for thickening the pie filling using egg yolks (plus a little flour). The resulting cherry pie was richer and maybe a bit more custard-like then most cherry pies.

If I had been the recipe author, I would have called this pie Cherry Meringue Pie because the cherry filling is topped with meringue.

Regardless of the pie name, the pie was delicious, and I would make it again.

Here’s the original recipe:

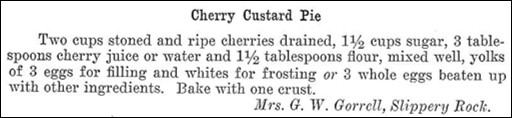
Recipe for Cherry Custard Pie
Source: Pennsylvania State Grange Cook Book (1926)

This recipe makes a small 8-inch pie.

The recipe says to use the egg whites for “frosting.” I interpreted this to mean that the whites should be used to make a meringue to top the pie. I sweetened the meringue with a little sugar.

Here’s the recipe updated for modern cooks:

Cherry Custard Pie (with Meringue)

  • Servings: 5 - 7
  • Difficulty: moderate
  • Print

2 cups sour cherries, pitted and drained*

1 1/2 cups sugar + 1/4 cup sugar

1 1/2 tablespoons flour

3 eggs, separated

3 tablespoons cherry juice or water

1 8-inch (small) pie shell

Step 1. Preheat oven to 425° F.

Step 2. Put 1 1/2 cups sugar and the flour in a mixing bowl; stir to combine. Add the egg yolks and stir until smooth. Then stir in the cherry juice or water, and finally add the cherries and stir.

Step 3. Place the cherry mixture in the pie shell, and put into the oven.

Step 4. Bake for 10 minutes, then reduce oven temperature to 350° F., and bake until the filling is set and the top of the pie is lightly browned (about an additional 30-35 minutes). Then remove pie from oven.

Step. 5. In the meantime, make the meringue. Place egg whites in a bowl, and beat the egg whites until they form stiff peaks. Then, gradually add  1/4 cup sugar while continuing to beat.

Step 6. Spoon meringue on top of the pie and swirl.

Step 7. Reduce oven temperature to 325° F., and return pie to the oven.

Step. 8.  Cook for an additional 10 – 12 minutes or until the meringue is lightly browned.

* Canned  or frozen (thawed) sour cherries can be substituted for fresh cherries. If they contain sugar, reduce the amount of sugar when making recipe.

http://www.ahundredyearsago.com

Old-Fashioned Cherry and Cantaloupe Fruit Cocktail

Cherry and Cantaloupe Fruit Cocktail in dish

I’m enjoying summer fruits, so when I saw a hundred-year-old recipe for Cherry and Cantaloupe Cocktail, I decided to give it a try. This recipe is actually actually a recipe for a fruit mixture, or a fruit cocktail.

Pre-prohibition fruit cocktails often contained a little alcohol, but during prohibition (and afterwards), fruit juice or sugar syrups were instead used.  In this recipe, pitted sweet cherries are mixed with cantaloupe balls, and then a mixture of orange and lemon juices is poured over it.

The Cherry and Cantaloupe (Fruit) Cocktail was tasty and refreshing. It is a lovely summer fruit salad.

Here’s the original recipe:

recipe for Cherry and Cantaloupe Cocktail
Source: Mrs. Peterson’s Simplified Cooking (1926)

My melon baller scoop has two scoops; one at each end. I used the smaller scoop to make the cantaloupe balls. To make a nice round ball, press the scoop deeply into the cantaloupe before twisting to make the ball.

The old recipe’s implied serving size seems small. In the directions, it says that the cherries and cantaloupe mixture should be served with 1 tablespoon of orange and lemon juice mixed. There is 1 cup of the juice mixture (1/2 cup orange juice + 1/2 cup lemon juice) and there are 16 tablespoons in a cup, which suggests this recipe makes 16 servings. However, 6 cups of cherries and cantaloupe divided by 16 would make each serving only a little over 1/3 cup which seems really small. I think that a serving size of 3/4 cup would be more reasonable, which suggests that 2 tablespoons of juice should be spooned over each serving.

In any case, this recipe makes a lot of servings, so when I updated it, I halved the recipe, and used 3/4 cup as the serving size.

Here’s the recipe updated for modern cooks:

Cherry and Cantaloupe Cocktail

  • Servings: 4
  • Difficulty: moderate
  • Print

1 1/2 cups sweet cherries, pitted

1 1/2 cups cantaloupe balls

1/4 cup orange juice

1/4 cup lemon juice

Step 1. Arrange the pitted cherries and cantaloupe balls to make an attractive fruit mixture in serving cups or bowls

Step. 2. Put the orange juice and lemon juice in a small bowl.

Step 3. Spoon 2 tablespoons of juice over each serving of the fruit mixture.

http://www.ahundredyearsago.com

Old-Fashioned Blackberry Cake

Blackberry Cake on plate

Berries, berries everywhere. I flipped through a hundred-year-old cookbook to see if there were any berry recipes, and came across a lovely recipe for Blackberry Cake.

Blackberry Cake is a spice cake that contains blackberries. The combination works really well, and the cake was delicious. It makes a lovely summer dessert.

Here’s the original recipe:

Recipe for Blackberry Cake
Source: Pennsylvania State Grange Cook Book (1926)

A hundred years ago, canned blackberries were readily available. In those days, before home freezers, many cooks canned blackberries to preserve them. Commercially canned blackberries were also sold in many stores.

Since it’s difficult to find canned blackberries today, I substituted fresh blackberries for canned ones when I made the recipe. I used a pint package of blackberries and cooked them with a little sugar prior to using in this recipe. The blackberries I used were very large, so I cut each berry into 2 or 3 pieces before cooking. After they were cooked, they had a consistency (and liquid) similar to canned blackberries.

Here’s the recipe updated for modern cooks:

Blackberry Cake

  • Servings: 8 - 10
  • Difficulty: moderate
  • Print

1 cup canned blackberries, including liquid (or use 1 pint (8 ounces) fresh blackberries + 1/4 cup sugar)

1 cup sugar

1/2 cup butter, softened

1/4 cup water

2 eggs

1 teaspoon baking soda

2 cups flour

1 teaspoon cinnamon

1/2 teaspoon cloves

1/2 teaspoon allspice

Step 1. If using fresh blackberries, put blackberries in a saucepan. (If the blackberries are very large, first cut each one into 2 or 3 pieces.) Stir in 1/4 cup sugar. Let sit for 5 minutes to allow time for juice to be drawn out of the berries, then heat, using medium heat until the liquid begins to boil; reduce heat and simmer until the berries are soft (about 5 minutes). Remove from heat.

Step 2. Drain the blackberries. Reserve both the berries and liquid. (Regardless of whether canned or cooked berries are used, they will need to be drained.)

Step 3. Preheat oven to 350°  F.

Step 4. Grease and flour a loaf pan or a 9-inch square baking pan. (I used a square pan.).

Step 5. Cream butter and 1 cup sugar. Add water, and eggs; beat to combine. Add flour, baking soda, cinnamon, cloves, and allspice; beat until thoroughly mixed.  Add blackberry juice; beat until well blended.

Step 6. Then stir in the cooked blackberries. Pour into prepared pan.

Step 7. Bake 40 to 45 minutes, or until wooden pick inserted in center comes out clean.

http://www.ahundredyearsago.com

Old-Fashioned Jellied Rhubarb

Can a recipe failure be a success? I think that I have a case where the dish I made didn’t turn out as expected, but I absolutely love the food I ended up with.  Let me explain.

I decided to make a hundred-year-old recipe for Jellied Rhubarb. To illustrate the post, I planned to show a picture of a beautifully molded gelatin ring with the piped whipped cream on top. Instead, I ended up with a bright, sunny rhubarb sauce that contained delightful notes of lemon.

I think that this is the first time that I’ve ever made a recipe that called for both rhubarb and lemon juice (and lemon rind). The combination works! Both the rhubarb and the lemon are tart and tangy, while the lemon brings an additional subtle sweetness and refreshing citrus taste. I can’t figure out why it’s not a common combination.

Each spring and early summer, I make lots of rhubarb dishes, and I’m certain I’ll make this recipe again.

Recipe for Jellied Rhubarb (Rhubarb Gelatin)
Source: Ladies Home Journal (May, 1926)

I’m still trying to figure out why the gelatin did not firmly set. As I go over how I made the recipe in my head, I think that there might be several factors that caused the problems. First, I took some short cuts when making the recipe. To cook the rhubarb, the recipe calls for mixing the rhubarb pieces, sugar, and water, and then baking for 50 minutes. This seemed like an odd (and very slow) way to get cooked rhubarb, so I put the rhubarb, sugar, and water in a pan and cooked it for a few minutes until the rhubarb was soft.

Second, I may have inadvertently not used as much unflavored gelatin as the recipe called for.  It calls for 2 1/2 tablespoons of gelatin; I used 2 packets of gelatin. At the time, I thought that 2 packets contained a lot of gelatin and that it must contain at least 2 1/2 tablespoons. In hindsight (and after I researched it following my recipe failure), I realized that each 0.25 ounce packet only contains about a tablespoon of gelatin. (Note to self: Measure don’t guess when making recipes.)

Third, the recipe is a bit vague. It mentions straining the rhubarb juice at one point in the recipe, but at a later point, it mentions that the jellied rhubarb can be an excellent tart filling if it is not strained too thoroughly. This led me to decide to strain the cooked rhubarb, put the juice back in the pan, add the gelatin, and reheat until the gelatin was dissolved. I then stirred the rhubarb that I’d strained out back in. Perhaps I shouldn’t have done that. The recipe mentions the tart filling in connection with “not thoroughly strained” rhubarb, not molded gelatin. In any case, adding the rhubarb back in would have increased the volume of the mixture, and it may have required additional gelatin if I wanted a firmly molded gelatin.

Bottom line, the series of mistakes and shortcuts that I took resulted in the recipe not turning out as the recipe author intended. After the rhubarb and gelatin mixture failed to properly jell, I considered reheating the mixture, straining it, and adding additional gelatin; but, in the end, I decided that I was happy with the dish that I got and didn’t do that.

Here’s the recipe updated for modern cooks:

Jellied Rhubarb

  • Servings: 5 - 7
  • Difficulty: moderate
  • Print

4 cups red rhubarb cut into 1-inch pieces

2 cups sugar

2 cups water

juice and grated rinds of 2 lemons

2 packets (0.25-ounce packets) unflavored gelatin

1/2 cup cold water

Step 1. Put the diced rhubarb, sugar, and 2 cups of water in a large saucepan. Using medium heat, bring to a boil; reduce temperature and simmer until tender (about 5 minutes); stir occasionally. Remove from heat.

Step 2. In the meantime, put the 1/2 cup cold water in a small bowl. Sprinkle the gelatin on top of the water, and let soak for 15 minutes.

Step 3. Strain the cooked rhubarb. Keep both the rhubarb and the juice.

Step 4. Put the rhubarb juice back in the pan; add the gelatin that has been soaked in water.

Step 5. Bring back to a boil while stirring constantly.

Step 6. Remove from heat, and stir in the lemon juice, grated lemon rind, and the cooked rhubarb that previously had been strained out.

Step 7. Put in a bowl and put in the refrigerator; chill for at least 3 hours.

http://www.ahundredyearsago.com

Old-Fashioned Chicken Roll (Chicken and Olive Roll)

A recipe for Chicken Roll in a 1926 magazine intrigued me. The roll was made using Baking Powder Biscuit dough, then filled with a chopped chicken and olive mixture and rolled similarly to how a jelly roll is made.

The roll can be cut into rounds prior to baking. After it is baked, it is served with White Sauce.

The recipe turned out well. The Chicken Roll rounds made a nice presentation and were tasty. The tangy, briny olives provided the predominate flavor, with the taste of the chicken being much more nuanced. If I had been the recipe author, I would have called this food a Chicken and Olive Roll.

Chicken Roll Recipe
Source: Ladies Home Journal (June, 1926)

One-half teaspoon of scraped onion did not seem like very much, so I used 2 tablespoons of finely chopped onions.

I assumed that “olives” in the recipe referred to green stuffed olives.

I have made White Sauce so many times over the years that I didn’t need a recipe for it, but I did need a recipe for Baking Powder Biscuits. Here’s a hundred-year-old that I found for them:

Recipe for Baking Powder Biscuits
Source: Pennsylvania State Grange Cook Book (1926)

As directed in the original Chicken Roll recipe, I doubled the amount of shortening when making the Baking Powder Biscuit dough.

After I added the milk, I mixed the dough with a fork rather than a knife.

When I rolled the dough to 1/3-inch thickness, it seemed rather thick, so I rolled it a little more to make it about 1/4-inch thick.

I cut the roll into rounds prior to baking. Two-inch thick rounds are very thick, so I cut them into 1-inch rounds.

My husband and I ate half the rounds one day, and I reheated the remainder the next. I made a half recipe of white sauce each day that we poured over the baked rounds of Chicken Roll.

Here’s the recipe updated for modern cooks:

Chicken Roll (Chicken Olive Roll)

  • Servings: 3 - 5
  • Difficulty: moderate
  • Print

Filling

1 1/4 cups cold cooked chicken, finely chopped

1/3 cup chopped stuffed green olives

2 tablespoons finely chopped onion

1/8 teaspoon paprika

Baking Powder Biscuit Dough

2 cups flour

4 teaspoons baking powder

1/2 teaspoon salt

1/4 cup shortening

2/3 cup milk

White Sauce

1/4 cup butter

1/4 cup flour

1 teaspoon salt

2 cups milk

Step 1. Preheat oven to 450° F.

Step 2. Put the chopped chicken, olives, onions, and paprika in a bowl. Stir to combine. Set aside.

Step 3. Make the Baking Powder Biscuit dough by combining the flour, baking powder, and salt in a mixing bowl, then cut in the shortening; add milk, and stir with a fork until the dough forms.

Step 4. Put the biscuit dough on a prepared surface, and roll the dough into a rectangle about 1/4 inch thick (approximately 9″ X 12″).

Step 5. Spread the chicken and olive mixture on the dough, then roll the dough starting at one of the short edges (similarly to how a jelly roll is rolled).

Step 6. Cut the roll into 1-inch thick rounds, then place the rounds on a lightly greased backing sheet.

Step. 7. Put in oven and bake for 12 – 15 minutes or until the rounds are lightly browned.

Step 8. In the meantime, make the White Sauce. In another pan, using medium heat, melt butter, then stir in the flour and salt. Gradually, add the milk while stirring constantly. Continue stirring until the white sauce begins to thicken.

Step 9. To serve, put the baked Chicken Roll rounds on a plate, and serve with the White Sauce (or, if desired, pour the White Sauce on the baked rounds prior to serving).

http://www.ahundredyearsago.com