Candlelight evokes so many warm, cozy feelings. Candles are calming and make me feel peaceful and hopeful. And, sometimes candles help create a lovely romantic atmosphere. I recently was browsing through several hundred-year-old magazines, and was surprised to see two items that featured candles.
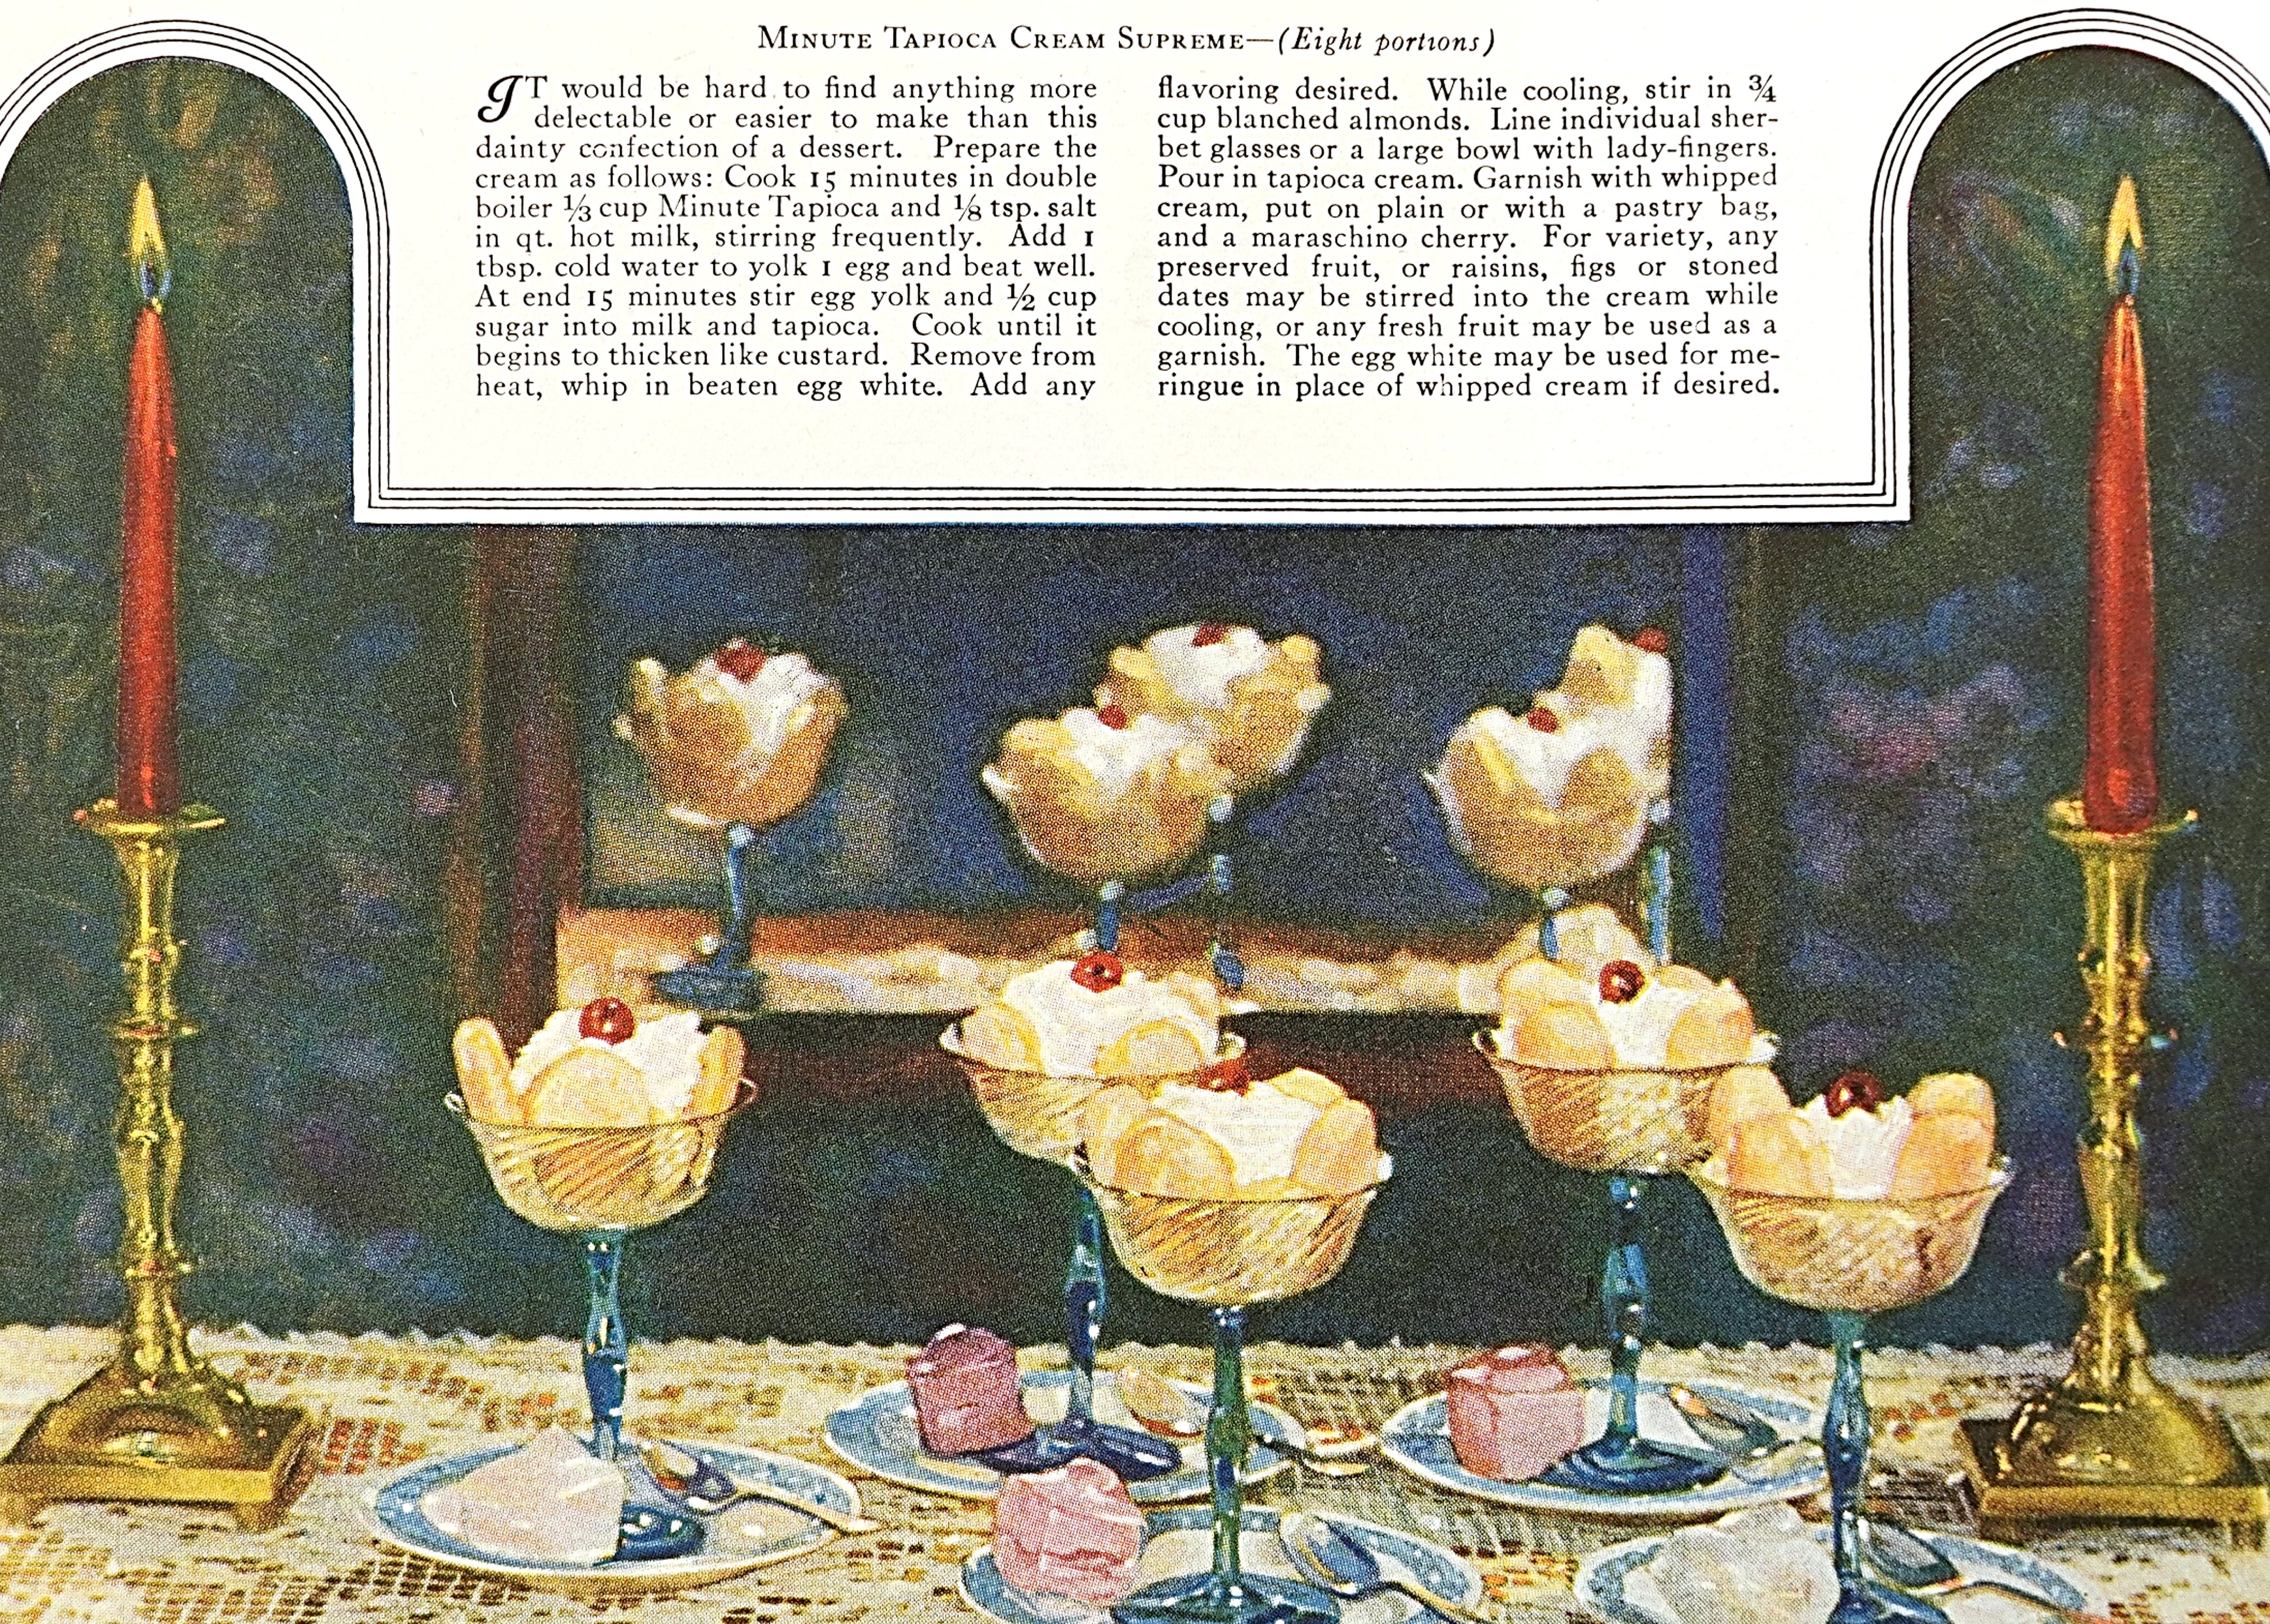
The first was an advertisement for Minute Tapioca in a 1926 issue of Ladies Home Journal. It included a recipe for Cream Supreme that was embedded in an image of a beautiful tablescape with candles. I probably will never make that recipe, but my eyes lingered for several minutes on the picture. It was so relaxing, and it made me remember times long gone when I ate a special dessert in a room decorated with candles.
A few minutes later, I flipped through a hundred-year-old issue of American Cookery and was surprised to find an article titled “The Charm of Candles.” Here are some excerpts:
The Charm of Candles
Candlelight and the romantic evolution of lighting devices is a truly fascinating thing to think about.
The romance of candlelight remained a shadowy companion to progress. Like some silvery-haired, gentle-faced old lady, candlelight kept alive hallowed memories that linked the present with the past.
Within my own memory is the friendship of candlelight – that little bedside candle of childhood, linking us to a world of reality, with its warm glow after prayers were said.
Have you never lain in a big-four-poster bed watching the dancing shadows your candle cast on the old, hard-hewn timbers? If you have never seen your candle “burn blue with terror”, as the wind steals in noisy gusts about the house, then you certainly have missed a deep, undefinable kinship with the past.
Candlelight against our modern backgrounds has a soothing, quieting influence, like old hands. It offers a sort of antidote for that ache of antiquity which sends us on passionate quests after old furniture, old books, old ships, old pictures, and old things. It indicates our inability to quite sever our life cord from the past.
American Cookery (August September, 1926)
Much has changed over the past hundred years, but some things stay the same. Candlelight still has a soothing, quieting influence.
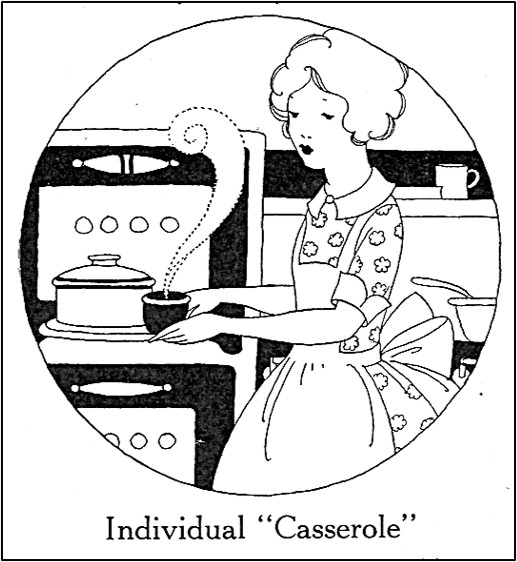
Many children are picky eaters, though a recently published book, Picky: How American Children Became the Fussiest Eaters in History, says that it wasn’t always that way. Years ago, children ate the same foods as adults, but with changing technology and the abundance of food, there was a shift toward children eating a narrower diet of “children’s foods.” This shift was already occurring by the 1920’s. A short article in a 1926 magazine suggests making individual casseroles for children:
Individual “Casserole”
I have found that it is an easy thing to fill a little ramekin or custard cup and bake it separately when preparing a casserole dinner. Often the grown-ups must have their heavy meal in the evening, and by doing this I can give my child his most substantial meal at noon. A “fussy” child is often tempted to eat when his own special little dish is set before him, and another point is that one often uses seasoning and spices in the grown-ups’ casserole that he will be better off without.
Children appreciate pretty dishes and well-served meals as much as grown people, though many mothers do not seem to realize this. Children who are served from “left-over” China often have table manners to correspond, whereas dainty food set before them has a wholesome effect on their morale at mealtime.
A hundred years ago, as more and more homes got electricity, kitchens were rapidly modernizing. By 1926, many homes, especially in the more urban areas, had an electric (or gas) stove and a refrigerator. Some were also getting an electric dishwasher. This is what a magazine said:
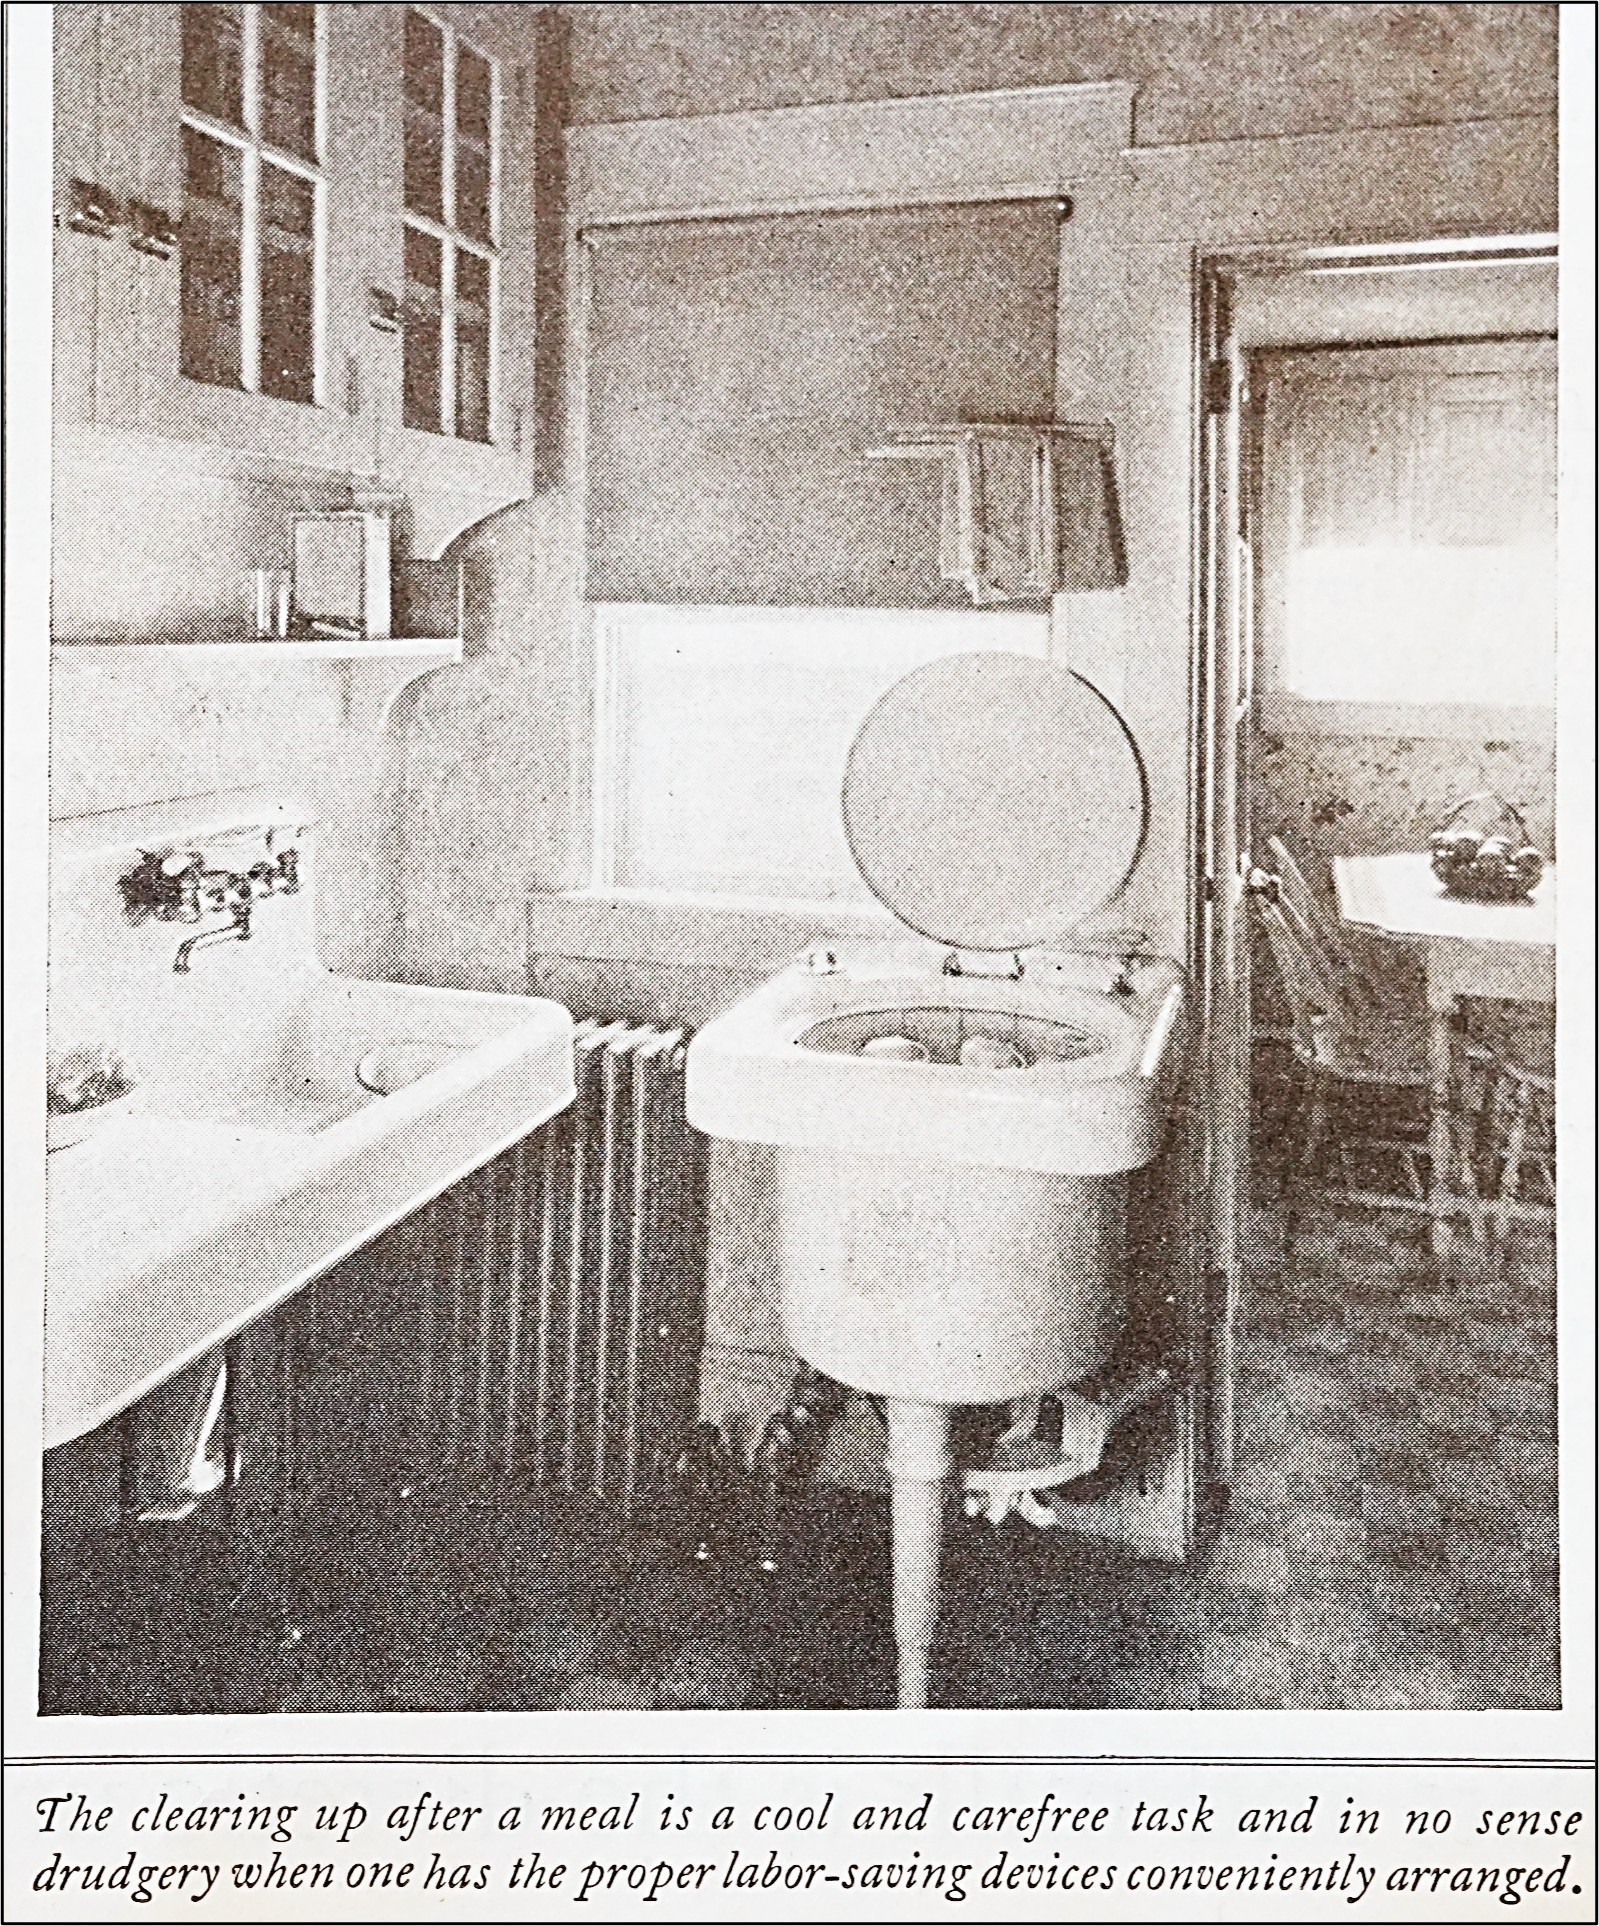
The electric dishwasher has eliminated our dishwashing troubles until that happy millennium comes when we will eat our calories and carbohydrates out of pill boxes. Ours, as the picture shows, is a built-in type, connected to the hot water and drain — to my mind, the only efficient way to use a dishwashing machine.
When we are alone or have only one or two guests, the lunch and dinner dishes are scraped and stacked in the dishwasher and then washed with the next morning’s breakfast dishes. Housekeeping experts are in complete accord with this process, because it really is the logical thing to do, and when you are paying for your hot water, it is a matter of economy.
Many people have a mistaken idea of the electric dishwasher — they think the dishes move. The dishes remain stationary; it is the hot water swirling in and out among them which cleanses them. So you see there is no danger of breakage. By using very hot rinse water the dishes in the machine will be dry by the time you have dried the glasses and silver. Very little hot water is used — about two dish-pansful for the washing and rinsing.
The machine, of course, is automatically cleaned as the dishes are washed, so that it requires no extra care. We feel that a labor saver is a labor saver only when properly applied, so we arrange to wash whatever cooking utensils are not taken care of by the machine as the dishes are being washed. As the dishes stay in the machine five minutes, we have time to wash the pots and pans. Then the dishes are rinsed –and a few minutes later finds us leaving the kitchen shipshape.
Wow! The dishes are washed in just 5 minutes. I want one. My dishwasher runs for about two hours.
That said, I found this article difficult to follow. One place in the article, I think that it says that the dishes in the dishwasher are rinsed; another place it sounds like they may not be. It also was not clear whether the author was recommending that glasses and silverware be washed by hand or if they could be put in the dishwasher.
Source: Ladies Home Journal (October, 1926)
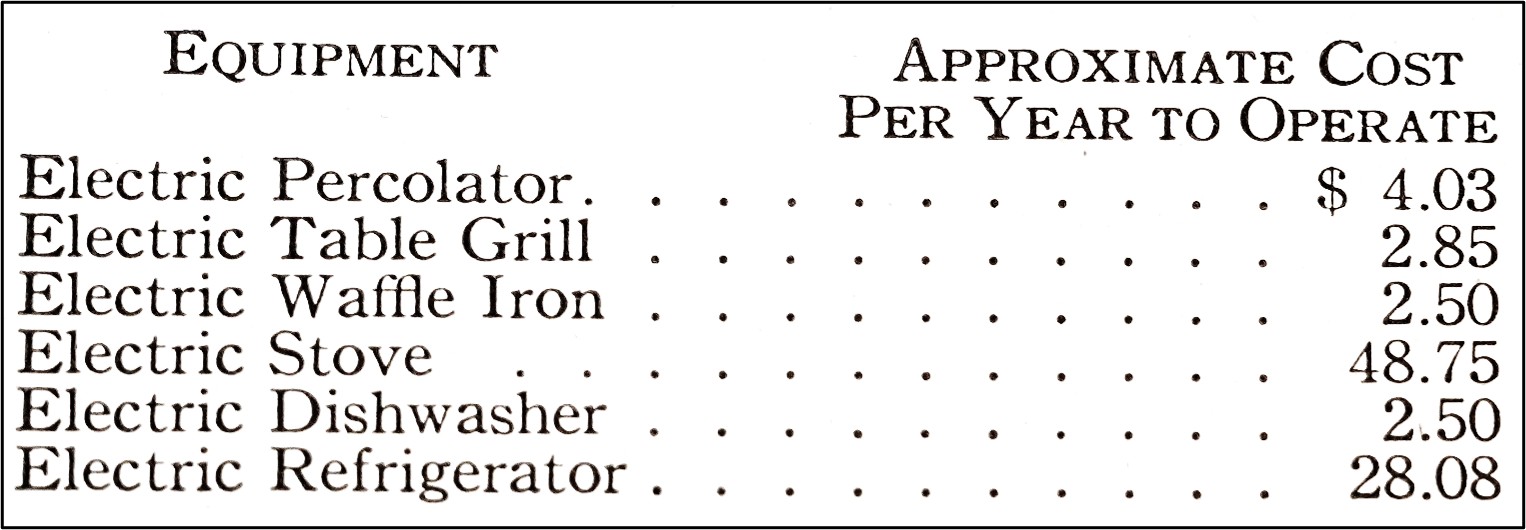
The article also discusses the cost of operating an electric dishwasher. In 1926, it only cost about $2.50 a year to operate it. A dollar in 1926 is worth about $ 18.93 today. So, in today’s dollars, it would cost about $47.33 to operate it for a year. This compared favorably with current dishwasher operating costs.
According to the Appliance Running Cost website, today the cost of operating a dishwasher ranges from $47 to $152 a year depending upon which cycle is used. The use of an eco/air dry cycle is the least expensive and the heavy/heated cycle is the most expensive.
The farmers’ market is chock full of wonderful, fresh ,local vegetables. Green peppers and corn are at their peak. So, when I came across a hundred-year-old recipe for Baked Corn in Green Peppers, I decided to give it a try.
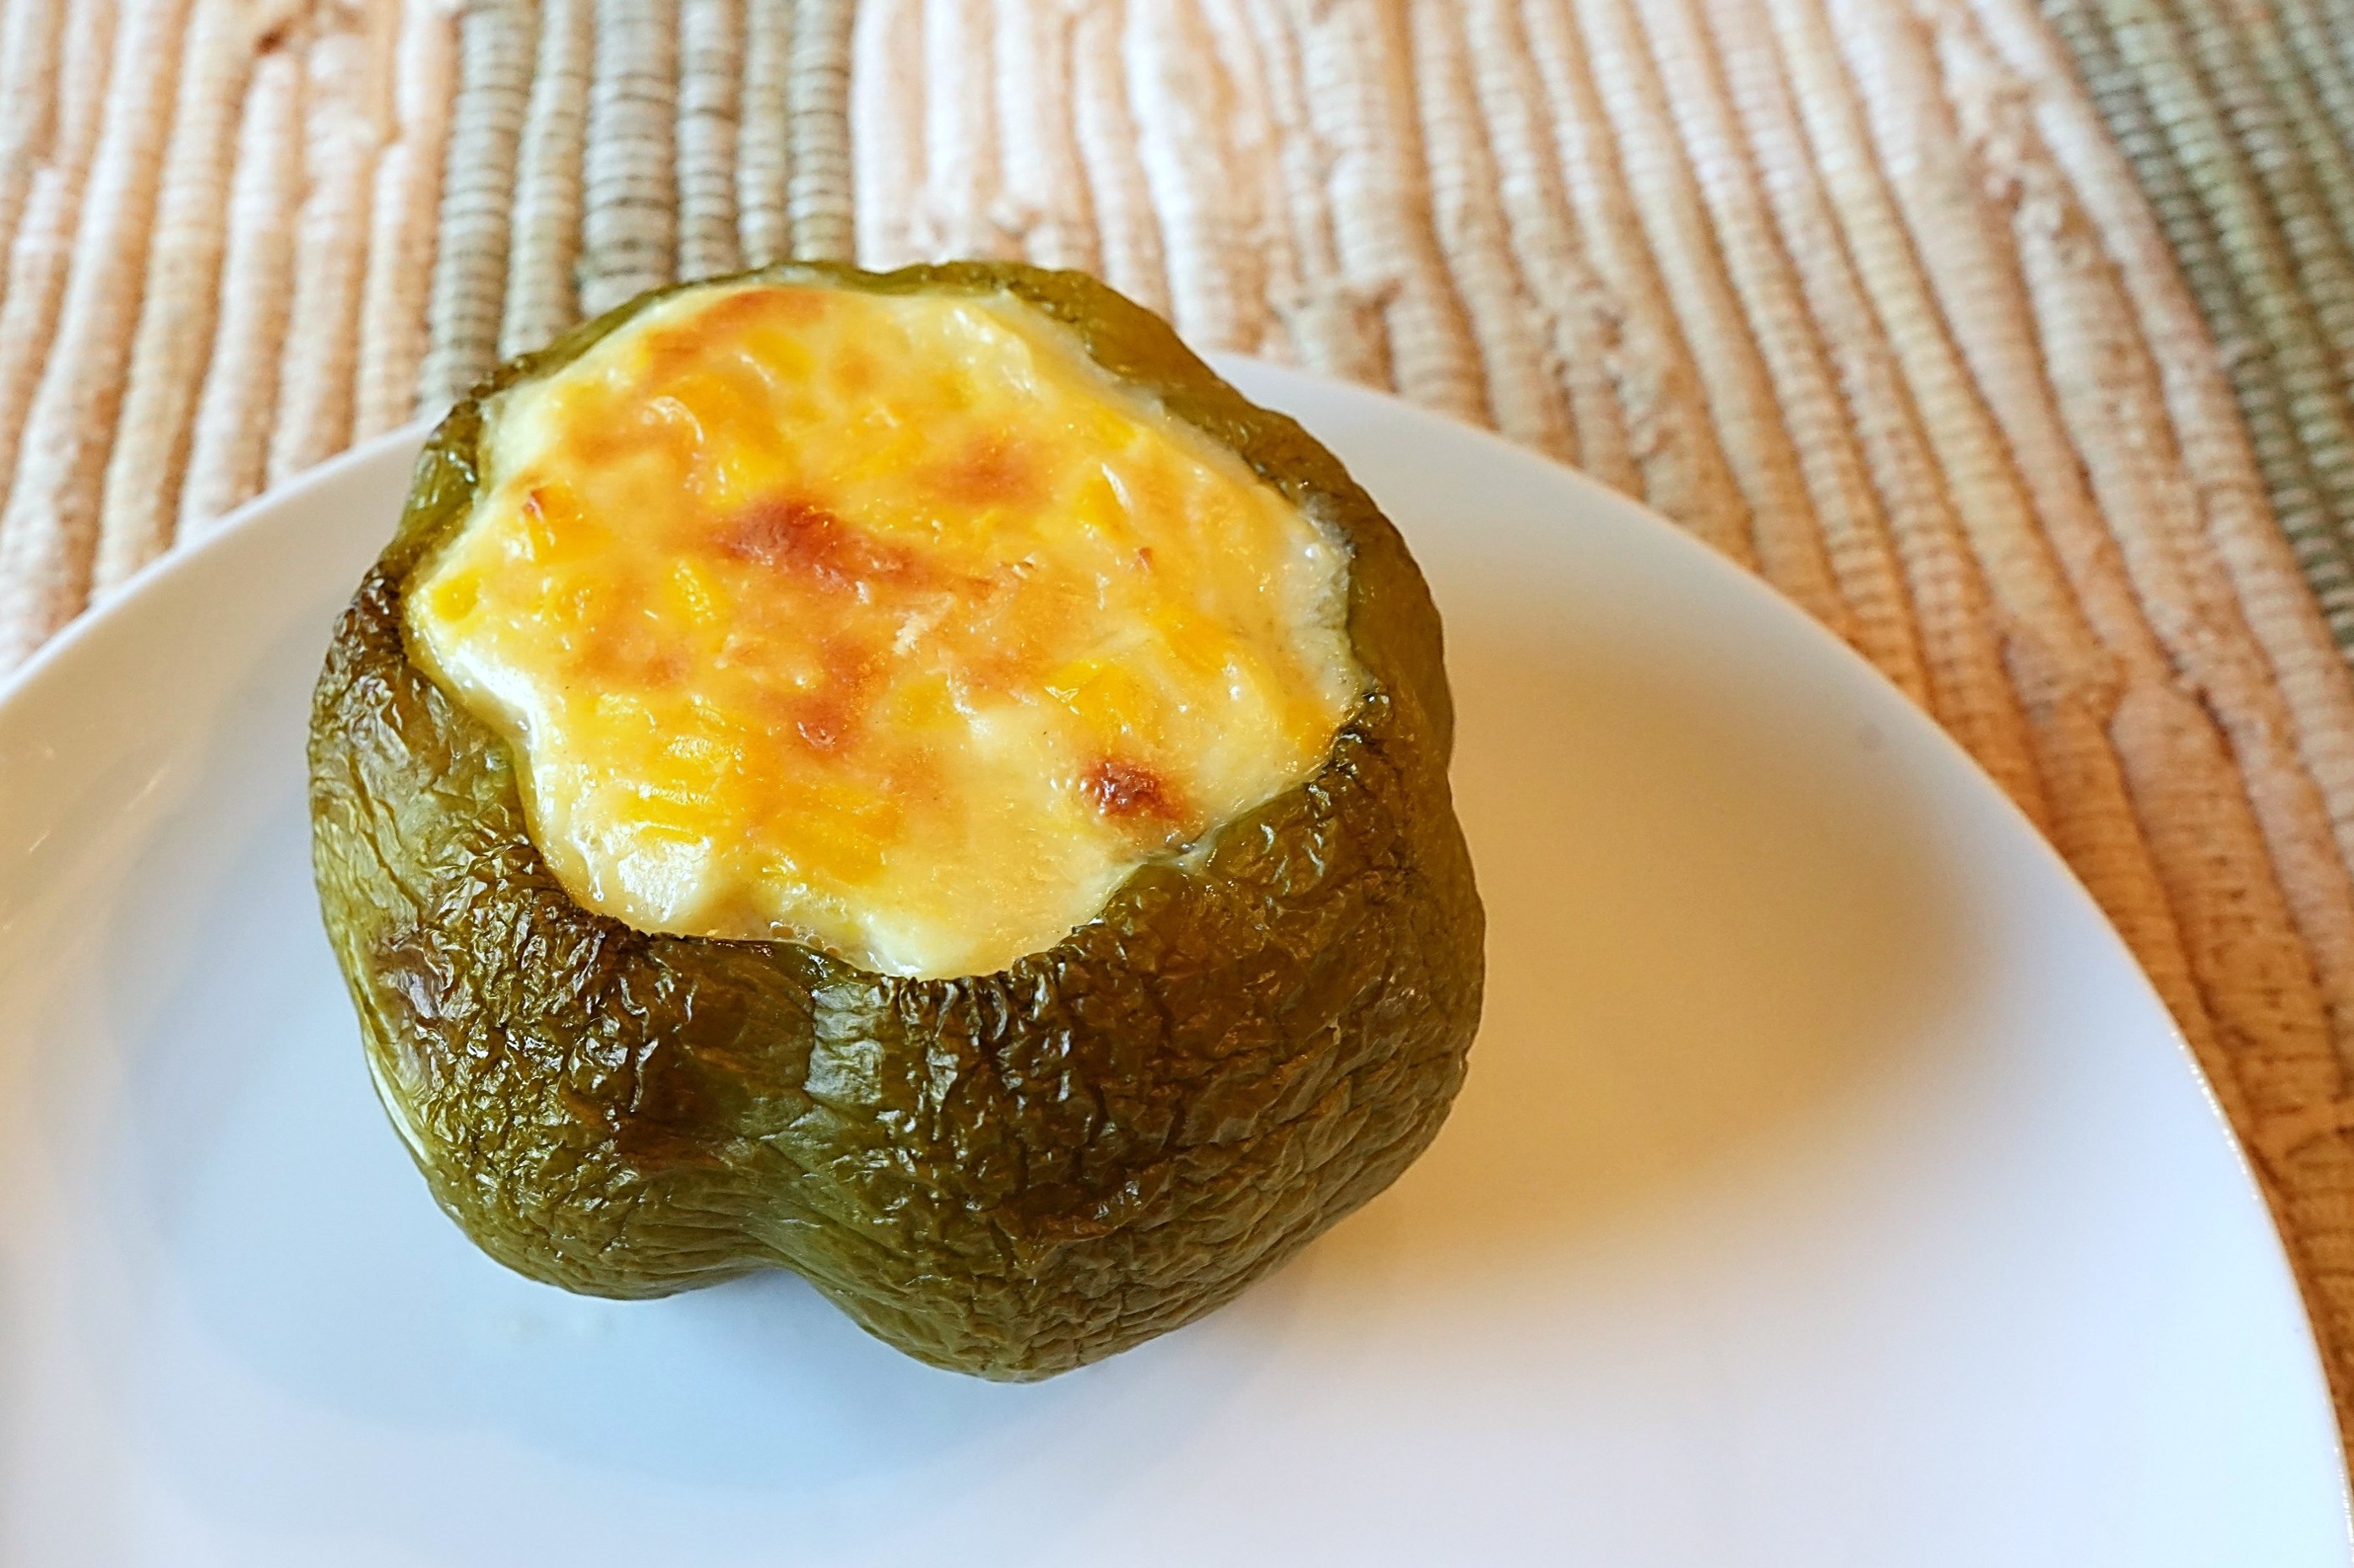
I’ve made stuffed peppers numerous times over the years; but, until I saw this recipe, I never thought about stuffing the peppers with a creamy baked corn mixture. This recipe is a tasty stuffed pepper variation. The corn and green peppers work well together.
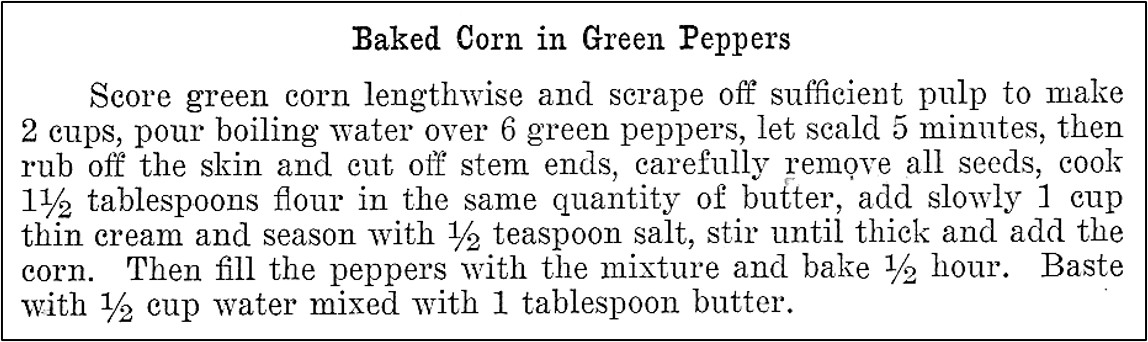
Here’s the original recipe:
Source: Pennsylvania State Grange Cook Book (1926)
This is a nice recipe, but it needed some tweaking. I think that green peppers were generally much smaller a hundred years ago than they are today. When I made this recipe, I used some medium-sized green peppers which I found at the farmers’ market. They were much smaller than most green peppers sold in supermarkets. Even though the peppers that I used were smaller than most, the recipe only made enough of the corn mixture to fill three green peppers, not six. When I updated the recipe, I indicated that three green peppers should be used rather than six.
I think that this recipe may be missing an ingredient. Whenever I have made Baked Corn in the past, the recipe called for eggs. I don’t think that Baked Corn will properly set without eggs, so I added an egg when I made the recipe. Even with the added egg, it took more than an hour for the baked corn in the green peppers to set, so when I updated the recipe, I indicated that two eggs should be used.
I wasn’t sure how to baste the corn and pepper with water and butter while they baked. Until the baked corn was set and became firm, the top of the Baked Corn in Green Peppers was very wet and did not need any additional liquid. I ended up pouring hot water and melted butter around the green peppers in the baking dish, though I’m not sure that is what the recipe author intended (and I don’t think it was needed, so I didn’t include basting when I updated the recipe).
When I have previously made stuffed peppers, I cut the tops off them and removed the seeds and membranes prior to cooking. I then put them in boiling water, and simmered for 5 minutes or so. I’m not sure why this recipe calls for pouring boiling water over the green peppers before the top, membranes, and skin are removed. That said, it worked fine to scald the green peppers by putting boiling water on the entire peppers. After the stuffed peppers were baked, the peppers were more wrinkled that some other stuffed peppers I have made in the past, but they still had a nice texture. Perhaps this was due to the scalding process, but I’m not sure.
I’m not sure why the recipe author said to “rub off the skin” of the peppers. It sounds like a lot of work, and that it would be easy to tear the green peppers in the process. It is very important to very carefully remove the green peppers’ membranes and seeds, since the corn mixture is very juicy before it is baked, and it would be problematic if the liquid leaked from a tear in a pepper.
I used milk rather than light cream when I made this recipe.
The corn from two fairly large ears made approximately 2 cups of corn.
2 cups fresh corn (the corn and pulp cut from 2 previously cooked large ears of corn) or use 1 16-ounce can of creamed corn
1 1/2 tablespoons butter
1 1/2 tablespoons flour
1/2 teaspoon salt
1 cup milk or light cream
2 eggs
Step 1. Preheat oven to 375° F.
Step 2. Put enough water in a saucepan to fill it about 2/3’s full. Heat water to a boil, then remove from heat and add the green peppers; cover pan, and let sit for 5 minutes.
Step 3. Remove peppers from the hot water, and dunk in cold water to cool enough to handle. Cut the tops off the scalded peppers, then carefully remove the seeds and membranes. Use care not to tear the skin of the peppers.
Step 4. In the meantime, melt the butter in a saucepan. Stir in flour and salt. Gradually stir in milk or light cream. Heat to boiling, while stirring constantly. Remove from heat.
Step 5. Put eggs in a small bowl; stir until smooth. Place a small amount (approximately 1 – 2 tablespoons) of hot milk/cream mixture into dish with egg; stir quickly. (The egg is first combined with a little of the hot mixture to prevent it from turning into scrambled eggs when introduced into the hot combination.) Add egg mixture to the remaining hot mixture in the saucepan; stir. Add the corn and stir.
Step 6. Set the prepared green peppers in a baking dish, and spoon the corn mixture into the green pepper cavities to fill them
Step 7. Bake in oven uncovered until the corn mixture is firm and set (approximately 30 – 40 minutes.)
Cooking with edible flowers is a fun and playful way to change a mundane dish into a really special, beautiful dish that is a work of art.
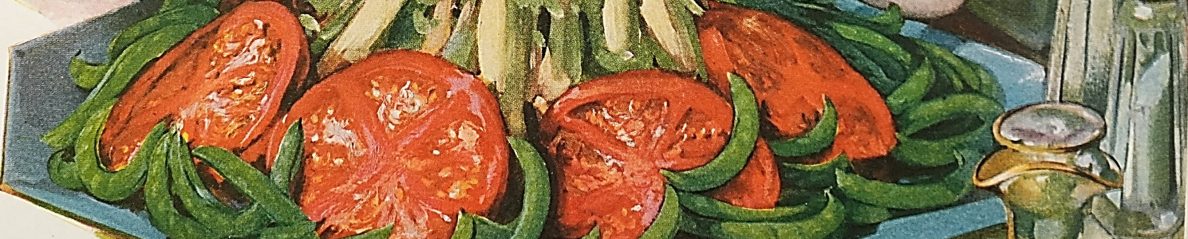
I planted nasturtiums this year for the first time in many years. The reason I planted them is because I saw a recipe in a hundred-year-old cookbook for a green bean salad that called for nasturtiums. I’ve been anxiously waiting for the nasturtiums to bloom, and, finally, they are blooming and I was able to make the recipe.
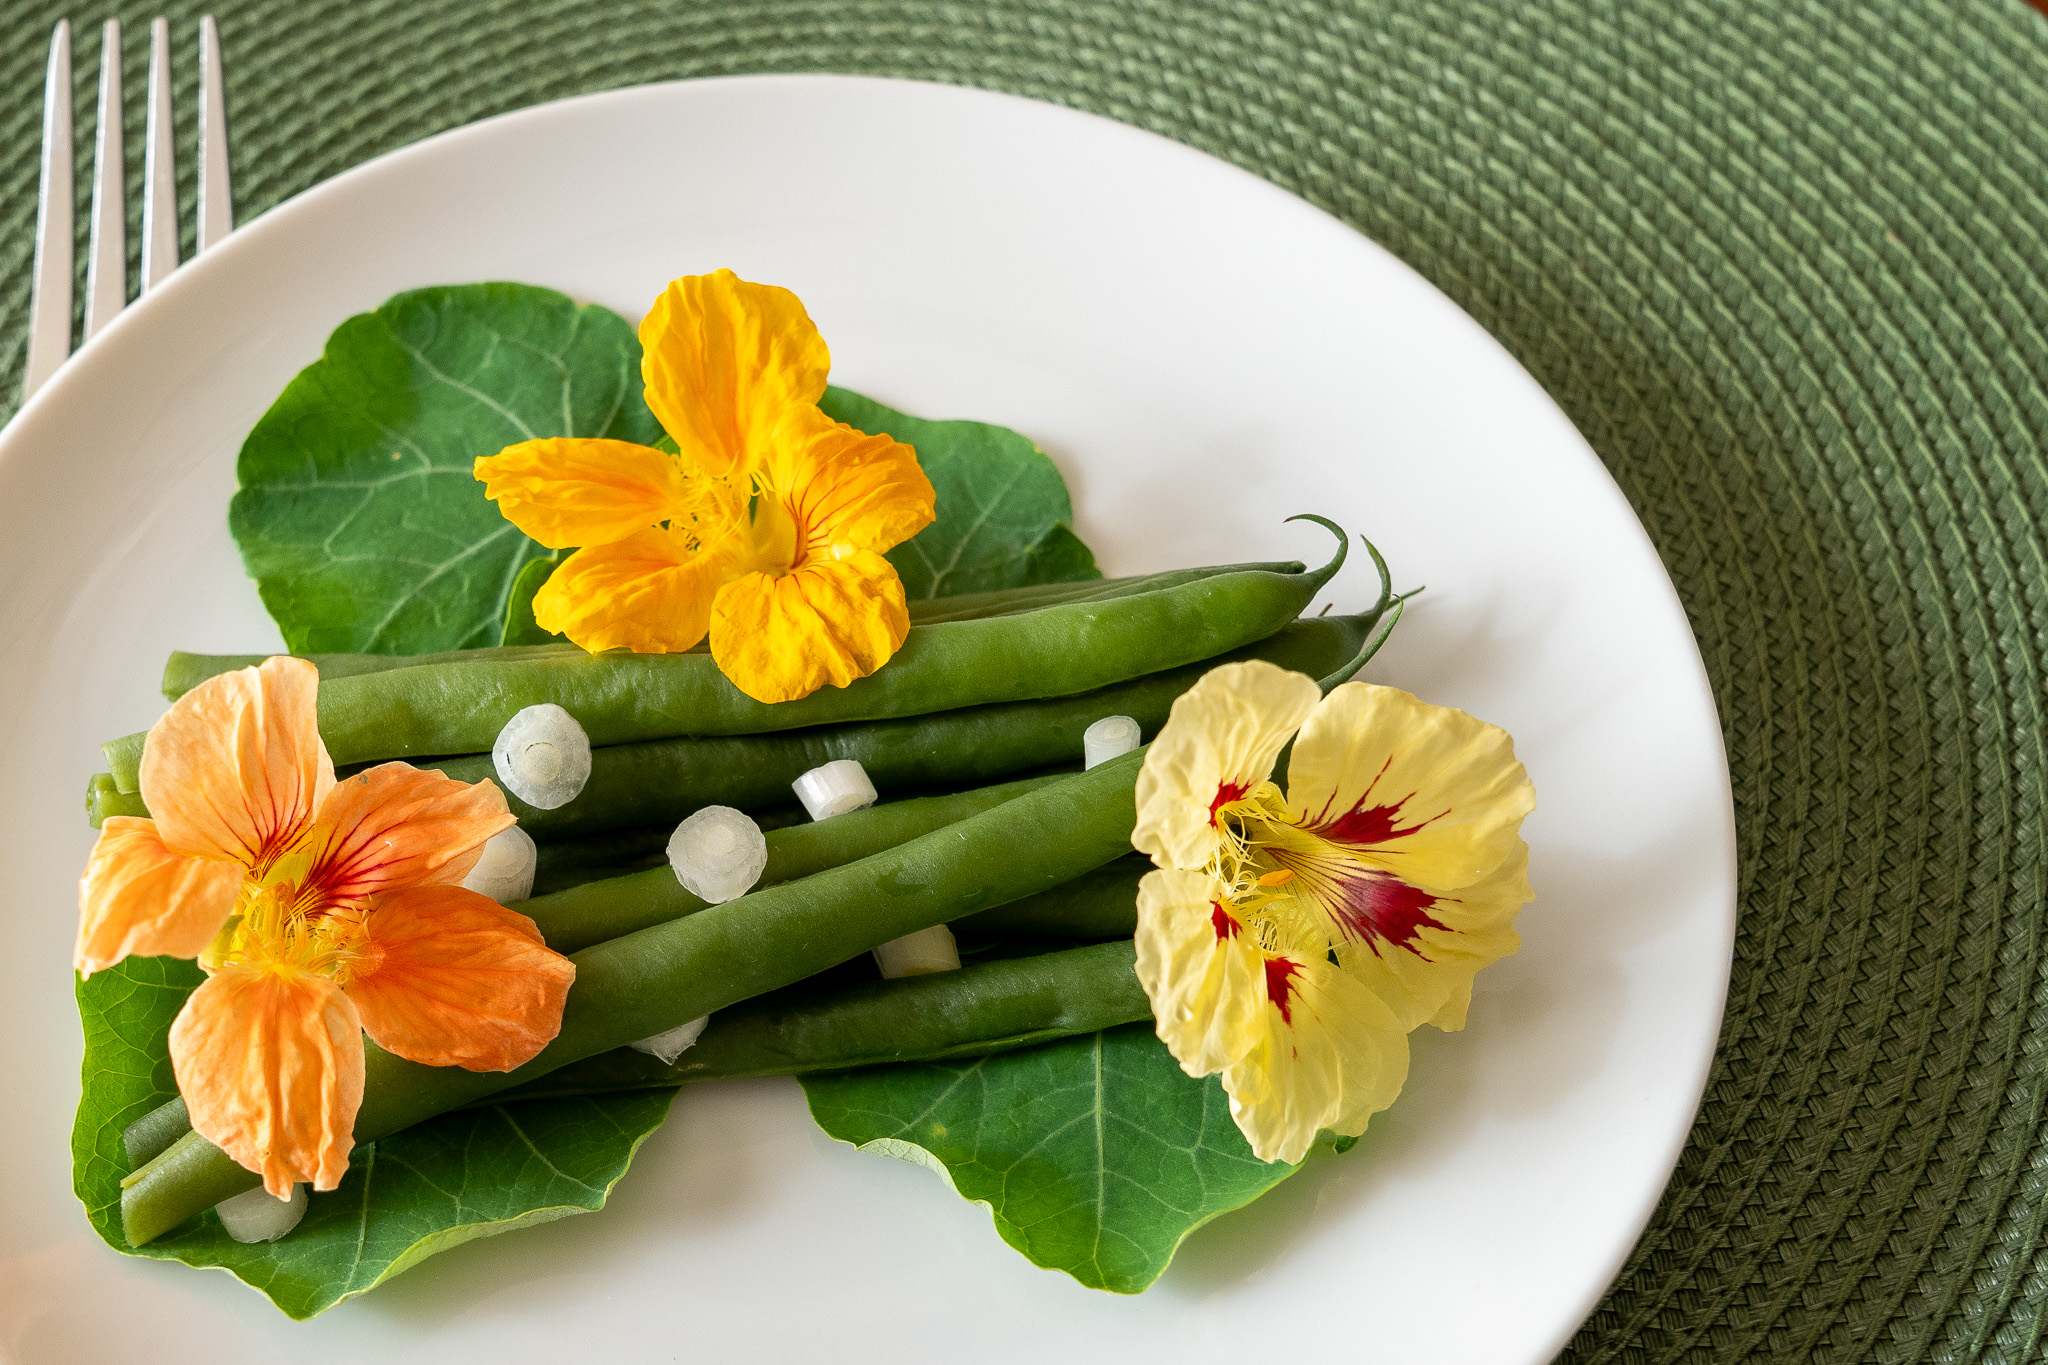
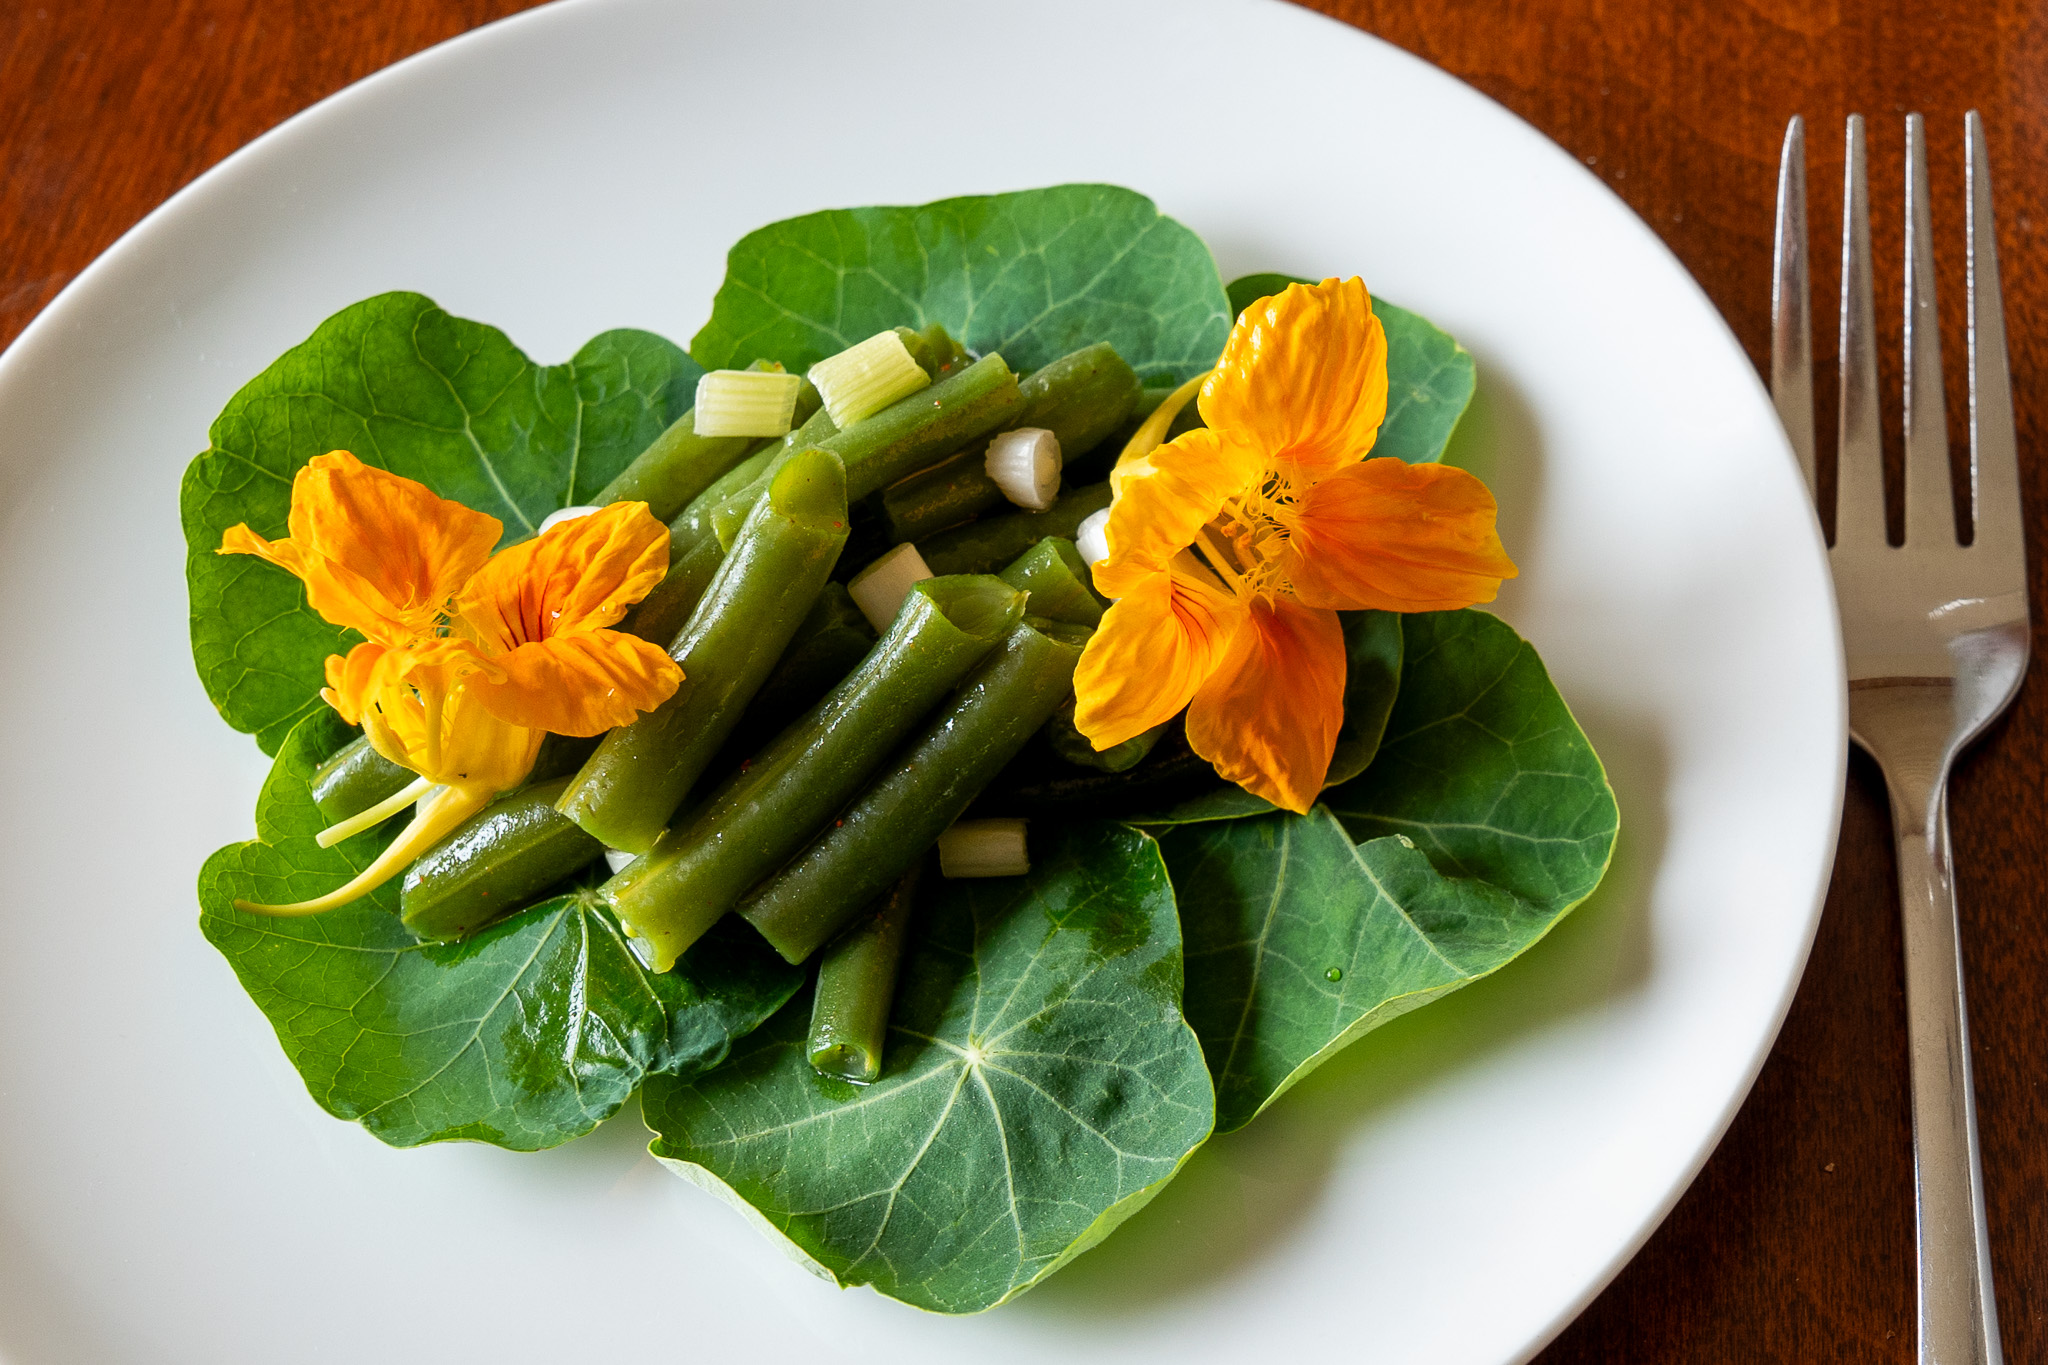
The Green Bean Salad (with Nasturtiums) was easy to make and tasty, and made a lovely presentation. The green beans are arranged on top of nasturtium leaves. Green onion slices are then sprinkled on top of the green beans, and the salad is garnished with nasturtium flowers. The green beans were lightly coated with a lovely vinaigrette dressing, and the nasturtium leaves have a nuanced sweetness, and mild peppery kick.
I made this salad twice. The first time I snapped the beans into short pieces, which is how I think cooks a hundred years ago would have made the salad. It looked lovely, but then I thought about how green beans often are left whole today, and decided to also make it that way. The salad with the unsnapped beans also looked great, and had a more modern look. (As you can see, I was having fun with this recipe.)
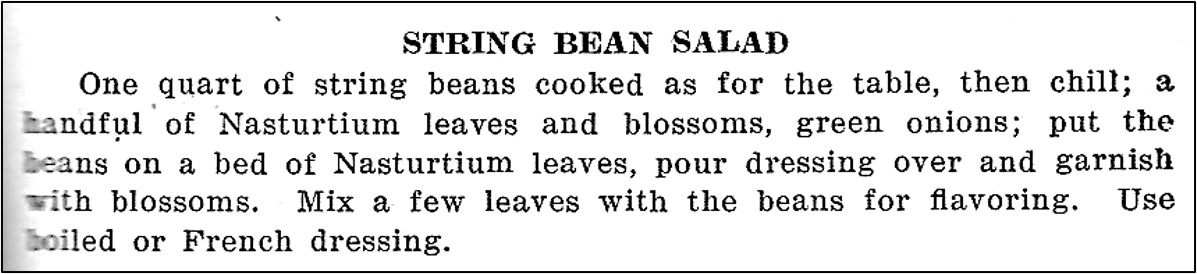
Here is the original recipe:
Source: Methodist Ladies Aid Cook Book: 1926 (Culbertson, Nebraska)
The original recipe was called String Bean Salad. Today we often refer to string beans as green beans (and they generally don’t even have strings anymore), so when I updated the recipe, I called it Green Bean Salad. I also included “with nasturtiums” in the recipe title since that is a unique part of this recipe.
I individually plated each serving, but the salad could be put in a serving bowl.
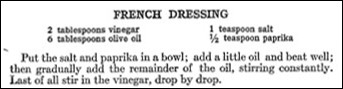
The old recipe called for serving the salad with French Dressing. A hundred years ago, French Dressing was a vinaigrette dressing, and quite different from the commercial, orange-colored French dressing that is common today. There was no recipe for French Dressing in the cookbook that contained the salad recipe, so I used a French Dressing recipe that was in another 1926 cookbook:
Source: The New Winston Cook Book of Guaranteed Recipes (1926)
The French Dressing made more dressing than I needed so I halved the recipe.
Step 1. Trim green beans. If desired, snap the beans (or they can be left whole). Lightly steam or boil the beans for about 5 minutes, then chill until cold.
Step 2. Pour French Dressing over the beans (see recipe below), and gently stir to coat beans with the dressing. (If desired, mix a few nasturtium leaves with the beans). If there is excess dressing on the beans, drain the beans to remove it.
Step 3. Arrange nasturtium leaves on individual serving plates (or they can be arranged in a serving bowl). Top with the green beans that have been coated with French Dressing.
Step 4. Sprinkle the sliced green onions over the green beans.
Step 5. Garnish with nasturtium flowers.
French Dressing (Vinaigrette Dressing)
1/2 teaspoon salt
1/4 teaspoon paprika
3 tablespoons olive oil
1 tablespoon vinegar
Step 1. Put the salt and paprika in a small bowl.
Step 2. Gradually add the olive oil while stirring constantly.
Step 3. Then slowly add the vinegar, a small amount at a time, while continuing to stir.
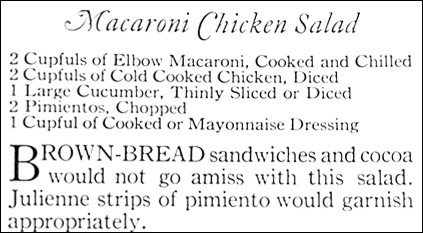
The season for picnics, reunions, grilling outside, and potlucks is upon us. It is also the season for old-fashioned pasta salads. A hundred-year-old issue of Ladies Home Journal contained a recipe of Macaroni Chicken Salad, and I decided to give it a try.
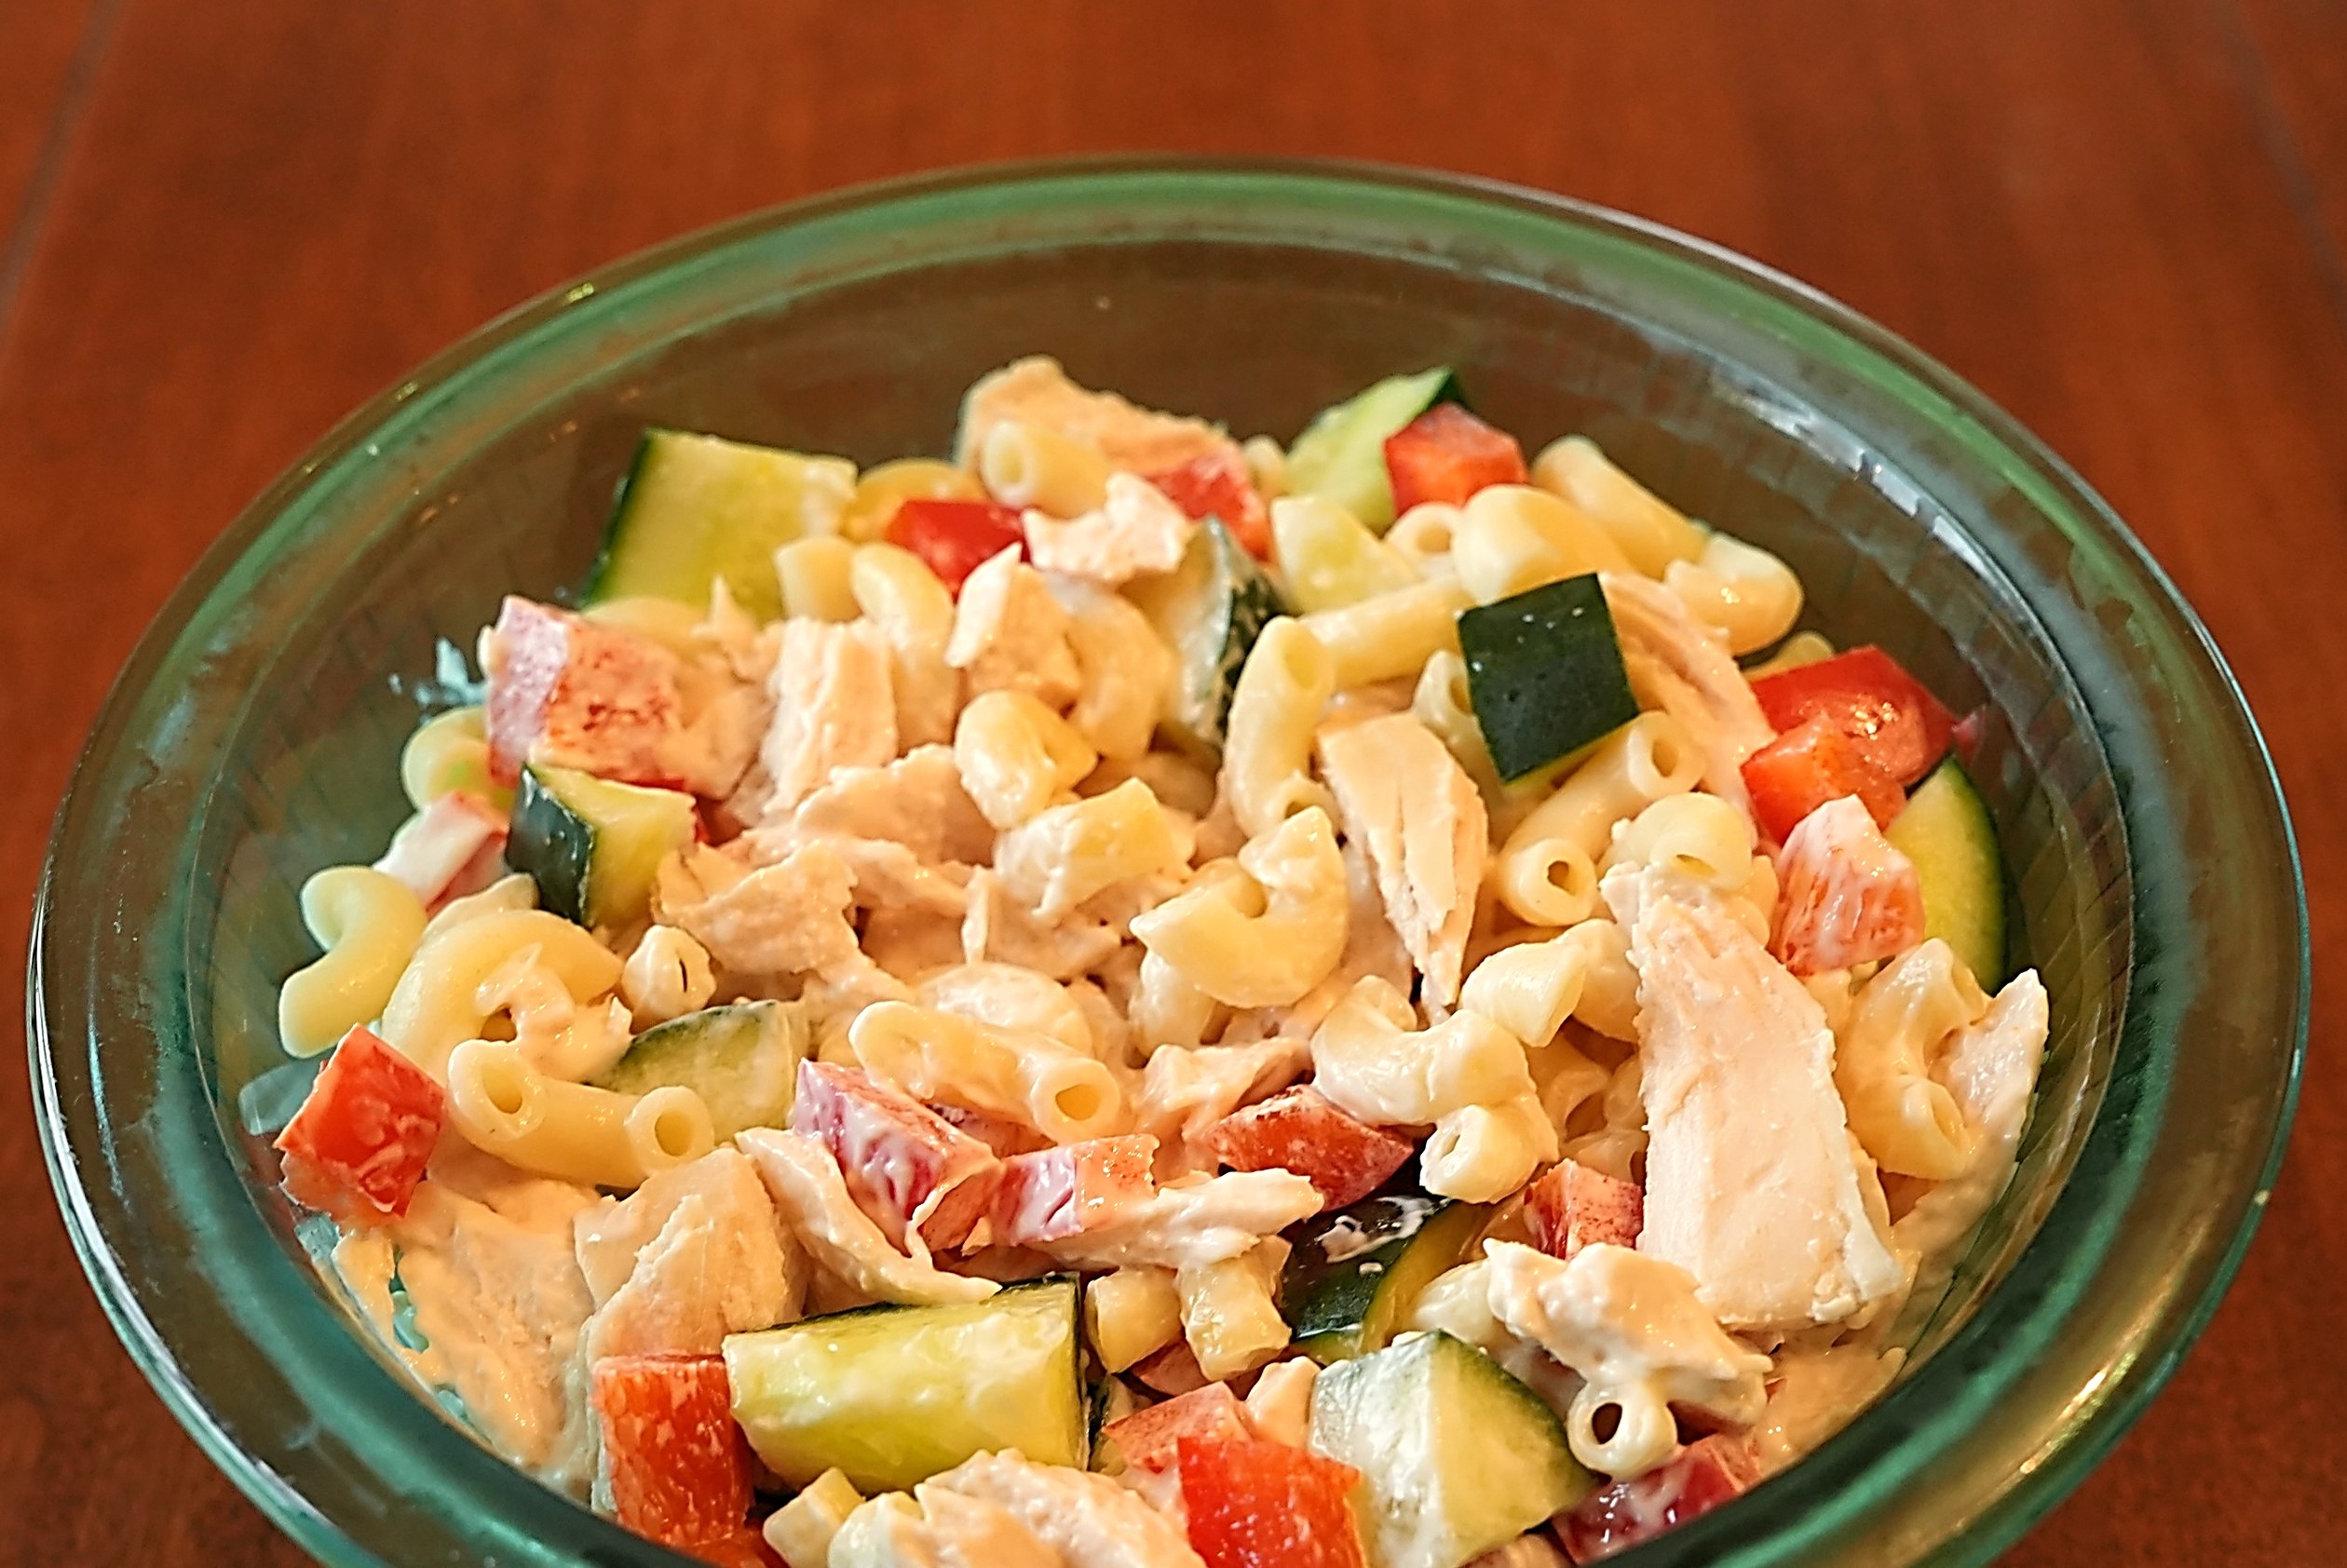
The Macaroni Chicken Salad differed from many modern pasta salads in that it contained no celery or onion. Instead, the recipe called for a cucumber, as well as for two chopped pimentos (which I interpreted to mean red peppers), in a mayonnaise dressing.
The salad was creamy, colorful, and flavorful. The chopped cucumber added a refreshing crunch, with the chicken providing a slightly savory protein. It would be a perfect side dish at a pot luck or other gathering. It is also lovely as a light lunch or dinner main dish.
Here is the original recipe:
Source: Ladies Home Journal (April, 1926)
The original recipe called for one cup of mayonnaise. If this much mayonnaise was used, the salad components would be thickly coated. I wanted a lighter dressing, so used ½ cup of mayonnaise.
I used a boneless chicken breast when making this recipe – though other parts of the chicken (or left-over rotisserie chicken) would also work well. If the water was not salted when making the macaroni (or if the diced chicken did not contain salt), a little salt might enhance the flavor.
I chopped an unpeeled cucumber rather than slicing it.
My sense is that red peppers were smaller a hundred years ago than what they are today, so I used just one red pepper.
I ignored the serving suggestions. I ate this salad for lunch, and it was sufficiently substantive without the addition of brown bread sandwiches. The salad was colorful with just the chopped red pepper and cucumbers, so I did not garnish with julienne strips of red pepper.
2 cups cold, cooked macaroni (approximately ¾ cup uncooked macaroni)
2 cups cold cooked chicken, coarsely chopped or shredded
1 cucumber, chopped or thinly sliced (about 2 cups)
1 medium red pepper
½ cup mayonnaise
½ teaspoon salt (optional)
Put the macaroni, chicken, cucumber, and red pepper in a bowl; stir gently to mix. Add mayonnaise (and, if desired, salt); stir gently to coat the other ingredients.
When dining at a restaurant or a friend’s home, I have accidently dropped a fork onto the floor more times than I can count. Whenever that happens, I’m not quite sure what to do. Should I dive under the table to retrieve it? . . . If so, should I wipe it off with my napkin and continue using it? . . . or maybe the 5-second rule applies, and I won’t need to wipe it off. (But would others think that is gross?) Or maybe I should ask for another one? . . . but would that call attention to my clumsiness?
I was surprised to discover that this seemingly minor (yet embarrassing issue) was addressed in a hundred-year-old magazine. Which then made me curious about whether the etiquette for dropped forks has changed over the years. Here is what I found.
1926: Dropped Fork Etiquette
Here’s what the hundred-year-old magazine said:
Why Not Pick Up the Fork You Dropped?
Reasons why you should not pick up that fork are: (1) Because you surely would not use it to eat with, would you, after having fallen on the floor, which – no matter how clean – is not assumed to be so clean as the table? (2) Because, relaxed or repealed as many of the old rules are, it is not yet considered polite to clean off with your table napkin, the dirt which (though invisible) has been contacted by the fallen fork from the floor. Nor would it be correct to dip said fork into your water goblet to cleanse it. (3) Because, after picking up the fork, we are blest if we know what on earth you could do with it!
It should not go right from the floor to the table; it should not be washed in the water goblet nor wiped with the dinner napkin. Neither should it be slipped into the pocket of your dinner partner, nor surreptitiously placed on your own lap. Nor should you leave your seat to take it to the sideboard, nor call a maid to relieve you of its burden.
The worst of this repealing of old rules is that many people do not know which are repealable and which are not.
Fallen utensils: Anything that falls on the floor should not go back on the table. Get the server’s attention and leave it for them to take care of. They need to get you a new utensil. (If they wipe it off with a napkin, and hand it back to you – they believe bacteria are weenies too and you’re going to the wrong class of restaurants.)
Etiquette for Dropped Forks Has Not Changed
Some etiquette rules have changed over the last hundred years while others haven’t. One that has not changed is that, both then and now, you should not retrieve a dropped fork or other flatware when dining at a restaurant or other sit-down meal. Instead ask for a new utensil.