Clover-Leaf Rolls (Sweet Rolls)

Clover-leaf Rolls 6

There’s nothing like fresh-baked rolls to make a meal really special. When I saw a picture of Clover-leaf Rolls in a hundred-year-old issue of Good Housekeeping, I knew that I had to try making them.

clover leaf rolls 2
Source: Good Housekeeping (February, 1916)

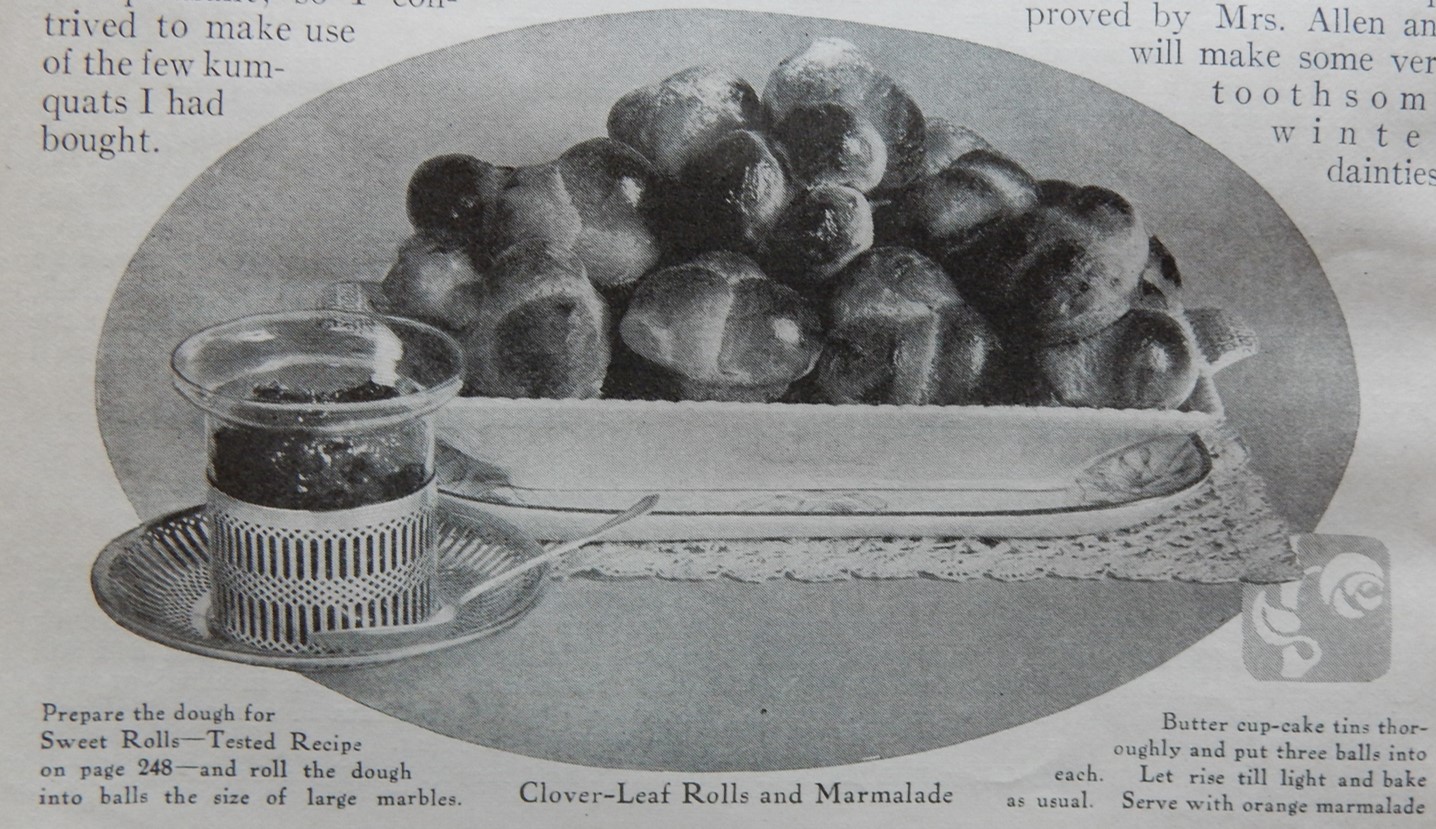
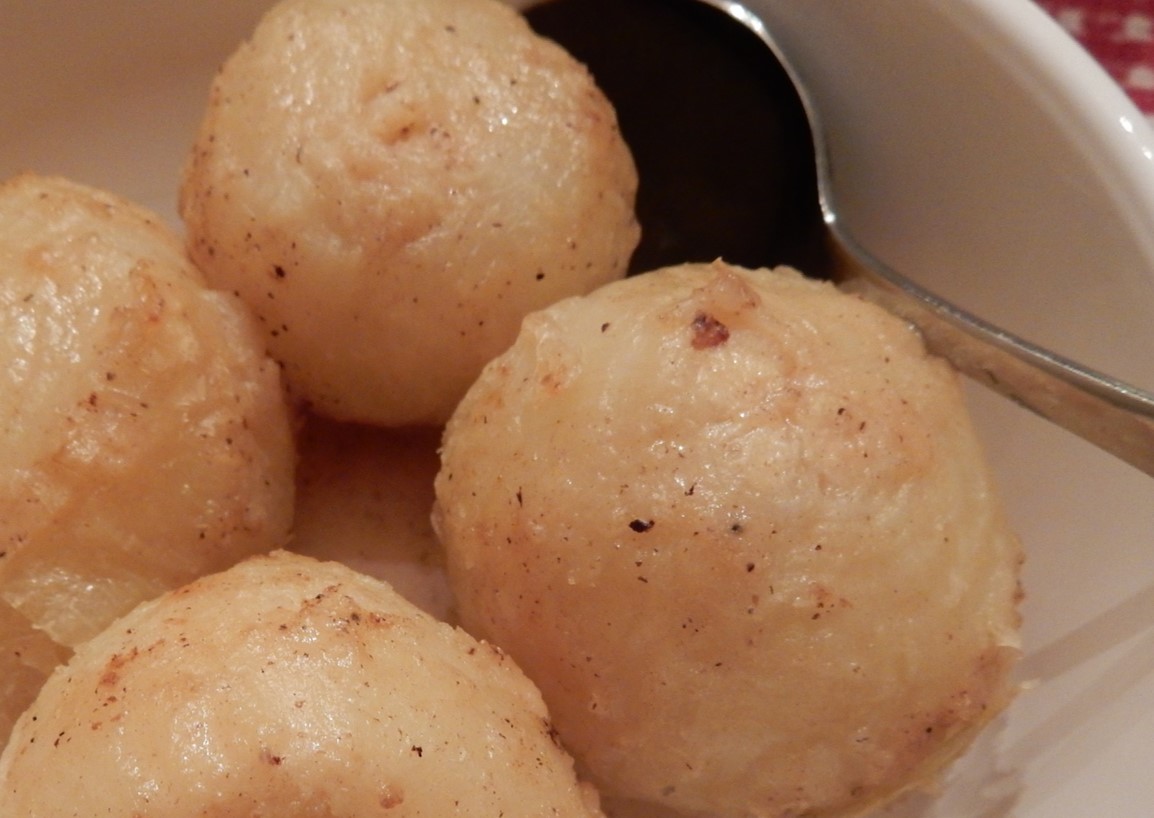
The picture in the old magazine brought back warm fuzzy memories of making Clover-leaf Rolls with my mother when I was a child. I remembered how much fun it was to roll small balls of bread dough between my fingers and put them into muffin tins — 3 balls in each cup. And, I could remember how much fun they were to eat after they were baked. Clover-leaf Rolls pull apart beautifully and are delectable with a little butter or marmalade.

The recipe did not disappoint. The rolls were easy to make and my kitchen was filled with the lovely aroma of baking bread. And, when I took the rolls out of they oven, they were light and heavenly with a hint of cinnamon.

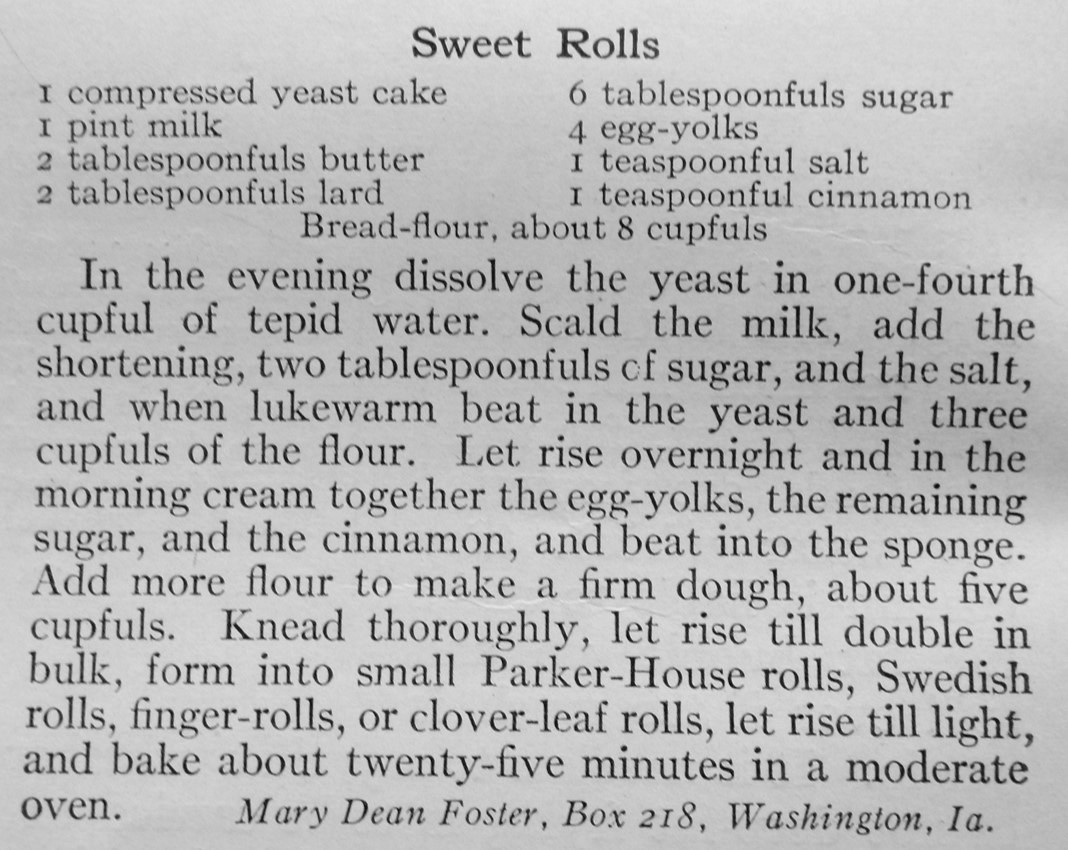
The original recipe was for Sweet Rolls, and said that it could be formed into a variety of shapes, including Clover-leaf. It called for a compressed yeast cake and 8 cups of flour. I knew I didn’t need that many rolls, so I made 2/3’s of the recipe, and substituted instant yeast for the compressed yeast.

clover leaf rolls 3

Here’s the recipe updated for modern cooks:

Clover-leaf Rolls

  • Servings: 36 rolls
  • Difficulty: moderate
  • Print

1 1/3 cups milk

2 packets instant dry yeast

1 1/3 tablespoons butter, softened

1 1/3 tablespoons shortening or lard

4 tablespoons sugar

3 egg yolks

2/3 teaspoon salt

2/3 teaspoon cinnamon

approximately 5 1/3 cups bread flour

Put milk in saucepan and scald; then cool until lukewarm (110 – 115° F.). Dissolve the yeast in the milk. Then in a large bowl combine the dissolved yeast mixture, butter, shortening, sugar, egg yolks, salt, cinnamon, and 3 cups flour. Add additional flour until the dough is easy to handle.

Knead the dough on a floured surface until it is smooth and elastic (about 8 minutes). Place in a greased bowl, cover and put in a warm spot. Let rise until doubled in size (about 1 1/2 hours).

Grease muffin pans. Punch down dough, then pinch off pieces of dough and shape into 1-inch balls. Placed 3 balls in each muffin cup, and brush with butter. Let rise until double (about 30 minutes), then place in preheated 375 ° F oven.  Bake 20-25 minutes or until lightly browned.

Clover-leaf rolls 5

Here’s the original recipe:

Sweet rolls recipe 2 1916 Good Housekeeping
Source: Good Housekeeping (February, 1916)

The Avocado: A New Fruit in the Northern States

Avocado 3

Sometimes I’m surprised by the large variety of foods that were available a hundred years ago. Apparently even farm families were beginning to eat non-local foods during the winter months. The February, 1915 issue of Farm Journal contained a serving suggestion for avocados.

The Avocado

The avocado or the “alligator pear, “ is at once one of the oldest and newest of fruits. It is an old standby in tropical countries and yet is one of the latest fruits introduced into the northern states. Just why it has not been more generally taken up and considered a staple rather than a luxury is not plain. It costs about the same as grapefruit. However, grapefruit is usually eaten as a fruit, while the avocado serves more or less as a vegetable—usually more. It may replace lettuce, though it is more tempting when served on lettuce leaves.

We in the North get our avocados from southern Florida or California. The avocado may be served in various ways. Often it is simply cut in half, lengthwise, and the stone removed. A quarter or less of a lemon or lime is put beside it, and it is then eaten with a spoon, as you would eat a cantaloupe. Some add a little powdered sugar.

Browned Whole Onions Recipe

Browned Onions

I found a hundred-year-old recipe for Browned Whole Onions that is lovely with a hearty pot roast, game, or other flavorful meat. The onions’ robust flavor nicely complements the meat.

These onions are firmer than the sliced browned onions that are often served today–and they are not at all like the breaded onion “flowers” that restaurants sometimes serve. Instead they have a delicate outer browned layer, and firmer but delicious inner layers.

Here’s my modern adaptation of the old recipe:

Browned Whole Onions

  • Servings: 8
  • Difficulty: moderate
  • Print

8 medium onions

1 teaspoon salt + 1/8 teaspoon salt

2 tablespoons flour

1/8 teaspoon pepper

2 tablespoons bacon drippings or olive oil

1/2 cup water + 1/2 cup water

Preheat oven to 400° F.  Peel onions, place in a large saucepan, cover with water, then add 1 teaspoon salt. Bring to a boil, and then reduce heat and simmer for 15 minutes. Remove from heat and drain onions.

In the meantime combine the flour, 1/8 teaspoon salt, and pepper in a small bowl. Dust the onions with the flour mixture.

Place the bacon drippings or olive oil in an oven-proof skillet, then add onions.  Pour 1/2 cup water into the pan along the edge. Place pan in oven and bake for  approximately 25 minutes. Remove from oven, and gently turn and roll the onions in the dripping in the bottom of the pan. If needed, add additional water. Return to oven and bake for an additional 15 minutes or until lightly browned.  (The amount of time is dependent upon onion size. Larger onions may need to be rolled in the drippings a second time and cooked a little longer.) Remove from oven, and place browned onions in serving dish.

Add 1/2 cup water to the drippings in the skillet, and scrape the bottom of the pan to loosen any flour or cooked pieces of onion. Place on a burner, and bring to a boil while stirring constantly. Reduce heat and cook a few minutes until the mixture has thickened slightly. Spoon the “gravy” over the onions and serve.

Here is the original hundred-year-old recipe:

Source: Ladies Home Journal (February, 1916)

The Value of Good Table Manners

Source: A Text-Book of Cooking by Carlotta C. Greer (1915)
Source: A Text-Book of Cooking (1915)

Are table manners less important now than a hundred years ago? Sometimes I think so; other times I’m not sure.

Here’s what a hundred-year-old book had to say about table manners in a chapter titled Dining Room Courtesy:

The Value of Good Table Manners

No matter how cultivated in mind and spirit one may be, if there is an absence of refinement of manners, the higher qualities are likely to be overlooked. The basis of all good manner is tact, i.e., a kindly consideration of others.

Graceful and easy table manners and a knowledge of how to serve and be served add to the comfort as well as to the pleasure of one’s associates in the dining room.

Most of the rules of table conduct have been adopted because they lend ease and grace or because they are sensible; others have been established by custom and long usage.

Source: A Text-Book of Cooking by Carlotta A Greer (1915)

etiquette 1

Old-Time Asparagus Omelet Recipe

asparagus omelet h

I have a short list of brunch dishes that I regularly make. I recently found a recipe in a hundred-year-old issue of Good Housekeeping  for Asparagus Omelet that I’m adding to my repertoire of go-to brunch recipes. It makes a stunning presentation, and has a wonderful texture and taste.

Often omelets are a little heavy, but Asparagus Omelet is not like the typical modern omelet. The recipe calls for beating egg whites into stiff peaks, and then folding the remainder of the ingredients into them.  This omelet incredibly light and airy with embedded pieces of asparagus.

The omelet was so thick that I didn’t even try to fold it over like the typical omelet, and instead just turned the unfolded omelet onto a plate (actually I turned it onto a baking sheet) and cut into wedges.

Asparagus Omelet d

Here’s the recipe updated for modern cooks:

Asparagus Omelet

  • Servings: 3-5
  • Difficulty: moderate
  • Print

2 tablespoons butter

2 tablespoons flour

1/2 teaspoons salt

1/4 teaspoon ground pepper

1 cup milk

6 eggs, separated

3/4 cup cooked  asparagus (1-inch pieces)

cooked asparagus tips for garnishing

Preheat oven to 350° F. Make a white sauce by melting the butter in small saucepan, then stir in the flour, salt, and pepper. Add a small amount of milk and make a paste. Gradually add remaining milk while stirring rapidly and continuing to heat. Continue stirring until thickens. Then remove from heat and set aside.

In a mixing bowl, beat egg whites until stiff peaks form.

In another bowl, beat the egg yolks until lemon colored. Stir in the white sauce and asparagus pieces; then fold into the beaten egg whites.

Heat a large oven-proof skillet on the top of the stove using medium-low heat. (If needed to prevent sticking, liberally grease the skillet before heating.) Pour the egg and asparagus mixture into the hot skillet, and gently cook for 1 minute. Move the skillet to the oven, and bake for about 10 minutes or until the egg mixture is set.

Remove from oven, and loosen the edges of the omelet from the skillet with a knife or spatula, then turn onto a plate. Garnish with asparagus tips and cut into wedges.

Asparagus Omelet e

Here’s the original recipe:

Source: Good Housekeeping (April, 1916)

Built-in Farmhouse Sinks a Hundred Years Ago

Source: Women's Home Companion (March, 1916)
Source: Women’s Home Companion (March, 1916)

Kitchen decorating tends come and go. Currently “farmhouse” sinks are popular. They are deep sinks which have a finished front that also serves as the front of the cabinet which houses it. Sometimes they are called apron sinks.

Farmhouse sinks have been around for a long time, and a hundred-years ago a Woman’s Home Companion reader submitted a suggestion to a household tip column about how to make an attractive built-in sink.

Under the Kitchen Sink

Our kitchen is very small. There was absolutely no place to keep scrub pails and such unsightly paraphernalia except under the sink, which had open plumbing. So, in order to hide these things from view, I had a carpenter build lattice-work beneath the sink and drain board, with a door. This is painted white and makes a light, airy place in which to store many housekeeping necessities. As one of my friends said, it’s the most effective “piece of furniture” I have in the house!

Women’s Home Companion (March, 1916)

Dutch Apple Cake (Dutch Apple Bread) Recipe

Dutch Apple Cake

I found an intriguing recipe for something called Dutch Apple Cake in a small 1911 promotional cookbook published by K C Baking Powder. Even though it was called a cake,  the serving suggestions in the original recipe said, “serve hot, with butter, as bread for supper or with hard sauce as a pudding.”

My curiosity got the best of me–What was it? . . . a cake? . . . a bread? . . . a pudding?

Well, I made the recipe, and I’m still not quite sure. When I ate it warm,  it tasted like a bread.  It had a nice texture with apples and currants embedded in a rich, sticky cinnamon-sugar syrup on top that reminded me slightly of the syrup on old-fashioned “sticky buns.”

But after it cooled, it seemed more like a coffee cake–a very nice coffee cake.  I didn’t try it with hard sauce so I’m not sure whether it also seems similar to steamed puddings–but I did post on old hard sauce recipe awhile back so maybe someone else will try that and let us know.

The rows of cinnamon-sugar coated apple slices and currants  give this bread/cake a striking, almost elegant look. It’s perfect to serve when a friend stops over for a cup of coffee. .  . and if the conversation starts to lag,  this food is a wonderful conversation starter: “Is this a cake, bread, or pudding?”

Dutch Apple Cake (Dutch Apple Bread)

  • Servings: 1 loaf
  • Difficulty: moderate
  • Print

1/4 cup sugar

1 tablespoon cinnamon

1/4 cup dried currants

2 cups flour

2 teaspoons baking powder

1/2 teaspoon salt

1/4 cup butter, softened

1 egg

3/4 cup milk

2-3 apples, peeled and sliced

Preheat oven to 375° F. In a small bowl combine sugar, cinnamon, and currants. Set aside.

In a separate bowl, combine flour, baking powder, salt, butter, egg, and milk. Stir until a thick dough forms. Put dough into a well-greased bread pan. Firmly press the narrow edges of the apple slices into the dough in parallel rows; then sprinkle with the sugar and currant mixture.  Place in oven and bake approximately 40-45 minutes–or until a wooden pick inserted into the cake (not the apples) comes out clean. Remove from oven.

Use apples that hold their shape in this recipe. I used Braeburn apples.

Here’s the original recipe:

Source: The Cook's Book (K C Baking Powder, 1911)
Source: The Cook’s Book (K C Baking Powder, 1911)