HAPPY EASTER!
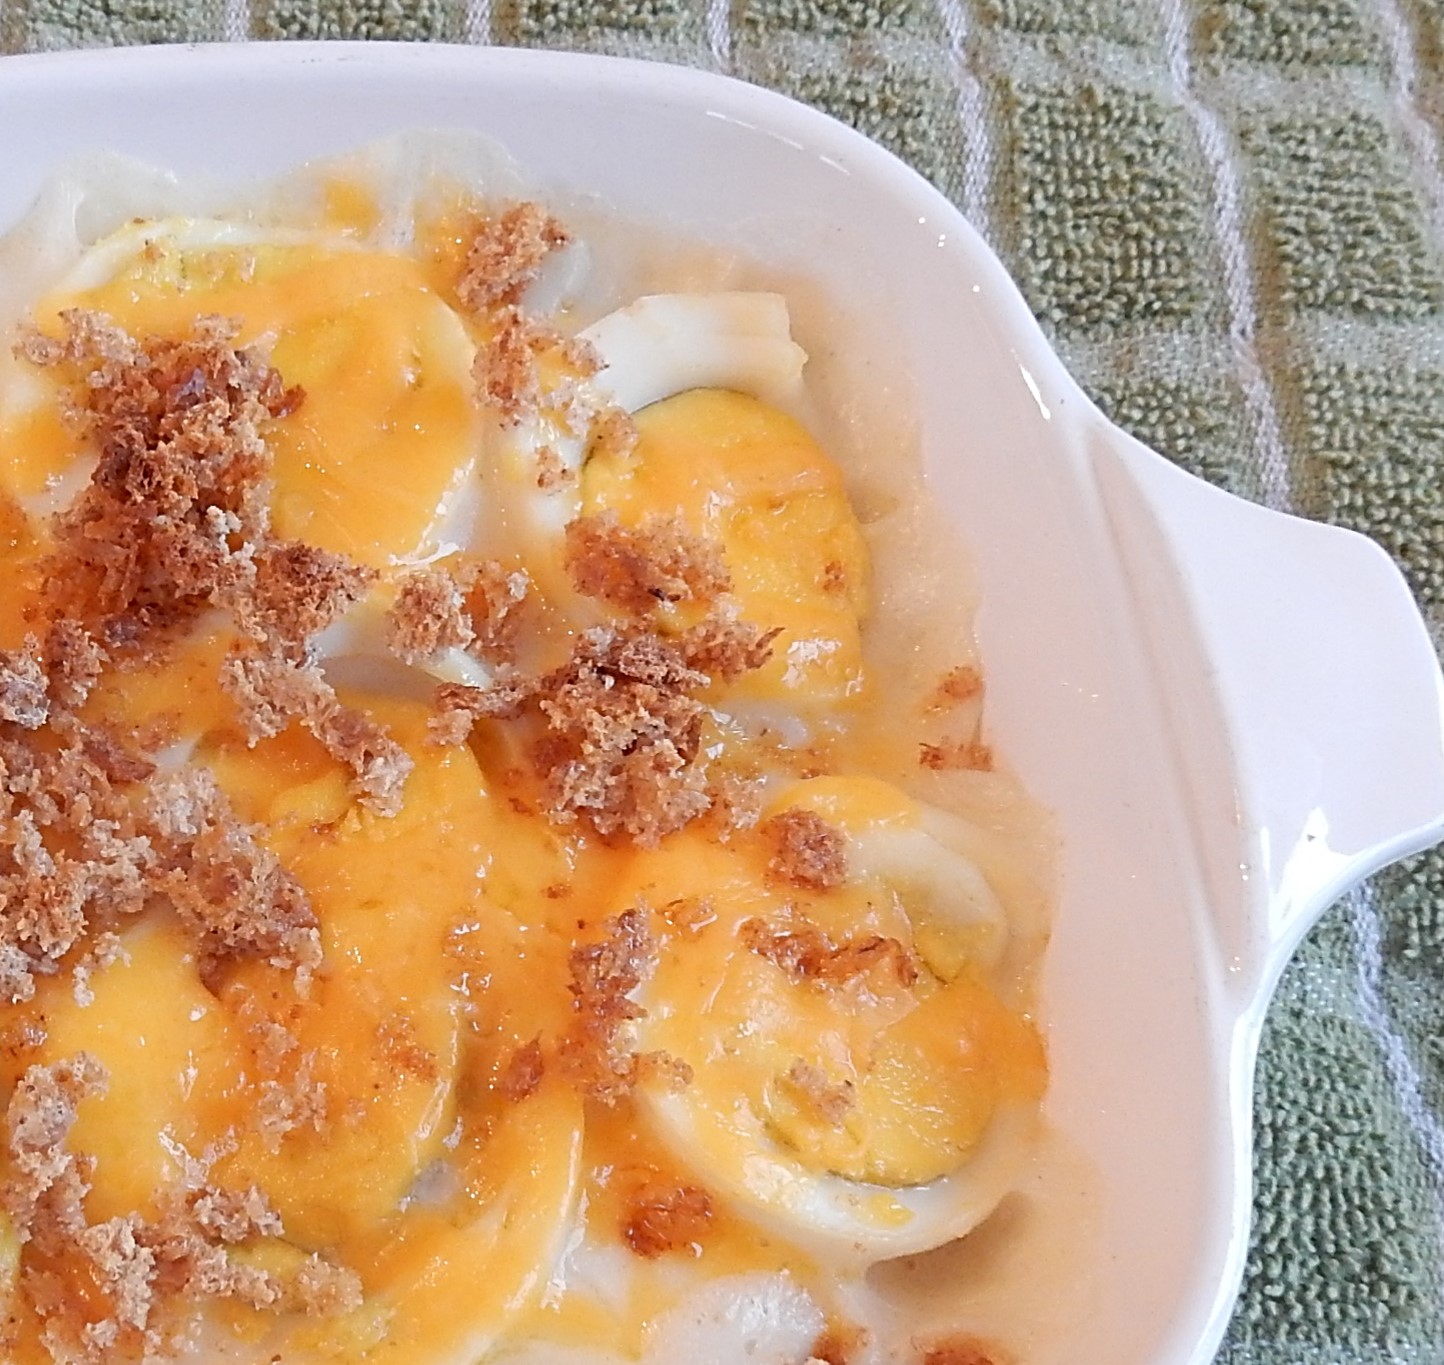
Yesterday I colored eggs with my grandsons. Today I have lots of hard boiled eggs, so looked for a hundred-year-old recipe that used hard boiled eggs. I found a lovely recipe for Eggs Au Gratin.
The Eggs Au Gratin were tasty and easy to make, and would be a perfect brunch dish. This recipe is a keeper.
Here’s the original recipe:

I made a white sauce rather than going with the “yellow sauce” option that contained an egg yolk. Two cups seemed like a lot of white sauce, so when I updated the recipe, I used 1 1/2 cups of milk rather than 2 cups.
Here’s the recipe updated for modern cooks:
Eggs Au Gratin
6 hard-cooked eggs
2 tablespoons butter + 2 teaspoons butter
2 tablespoons flour
1 1/2 cups milk
1/2 teaspoon salt
1/8 teaspoon pepper
1/3 cup cheese, shredded (I used cheddar cheese.)
1/4 cup fine bread crumbs
Preheat oven to 375° F. Slice hard-boiled eggs into a casserole dish. (I used a 750 ml dish that holds about 3 cups.)
Put 2 tablespoons butter in a saucepan, then stir in the flour, salt, and pepper. Gradually, add the milk while stirring constantly. Continue stirring until the white sauce begins to thicken. Remove from heat and gently pour over the sliced eggs.
Sprinkle cheese and bread crumbs on top, in that order. Dot with small pieces of butter (a total of about 2 teaspoons). Put in oven and bake until hot and bubbly (about 25 minutes).


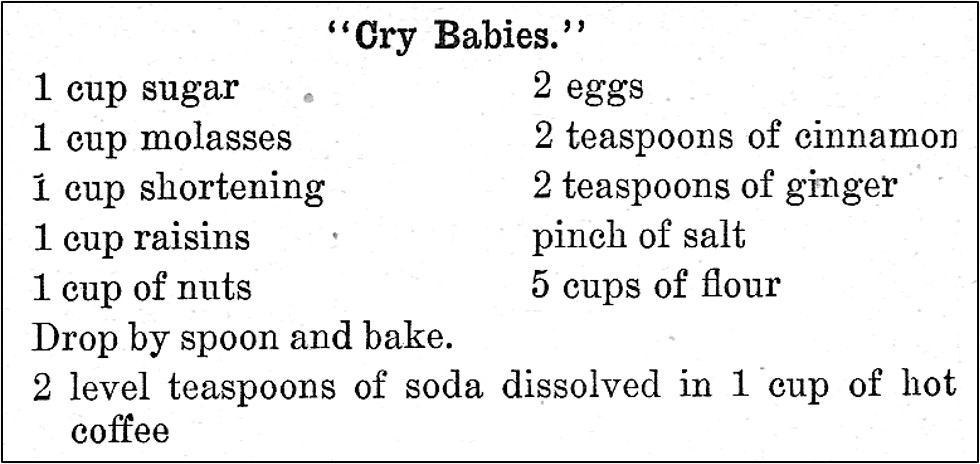
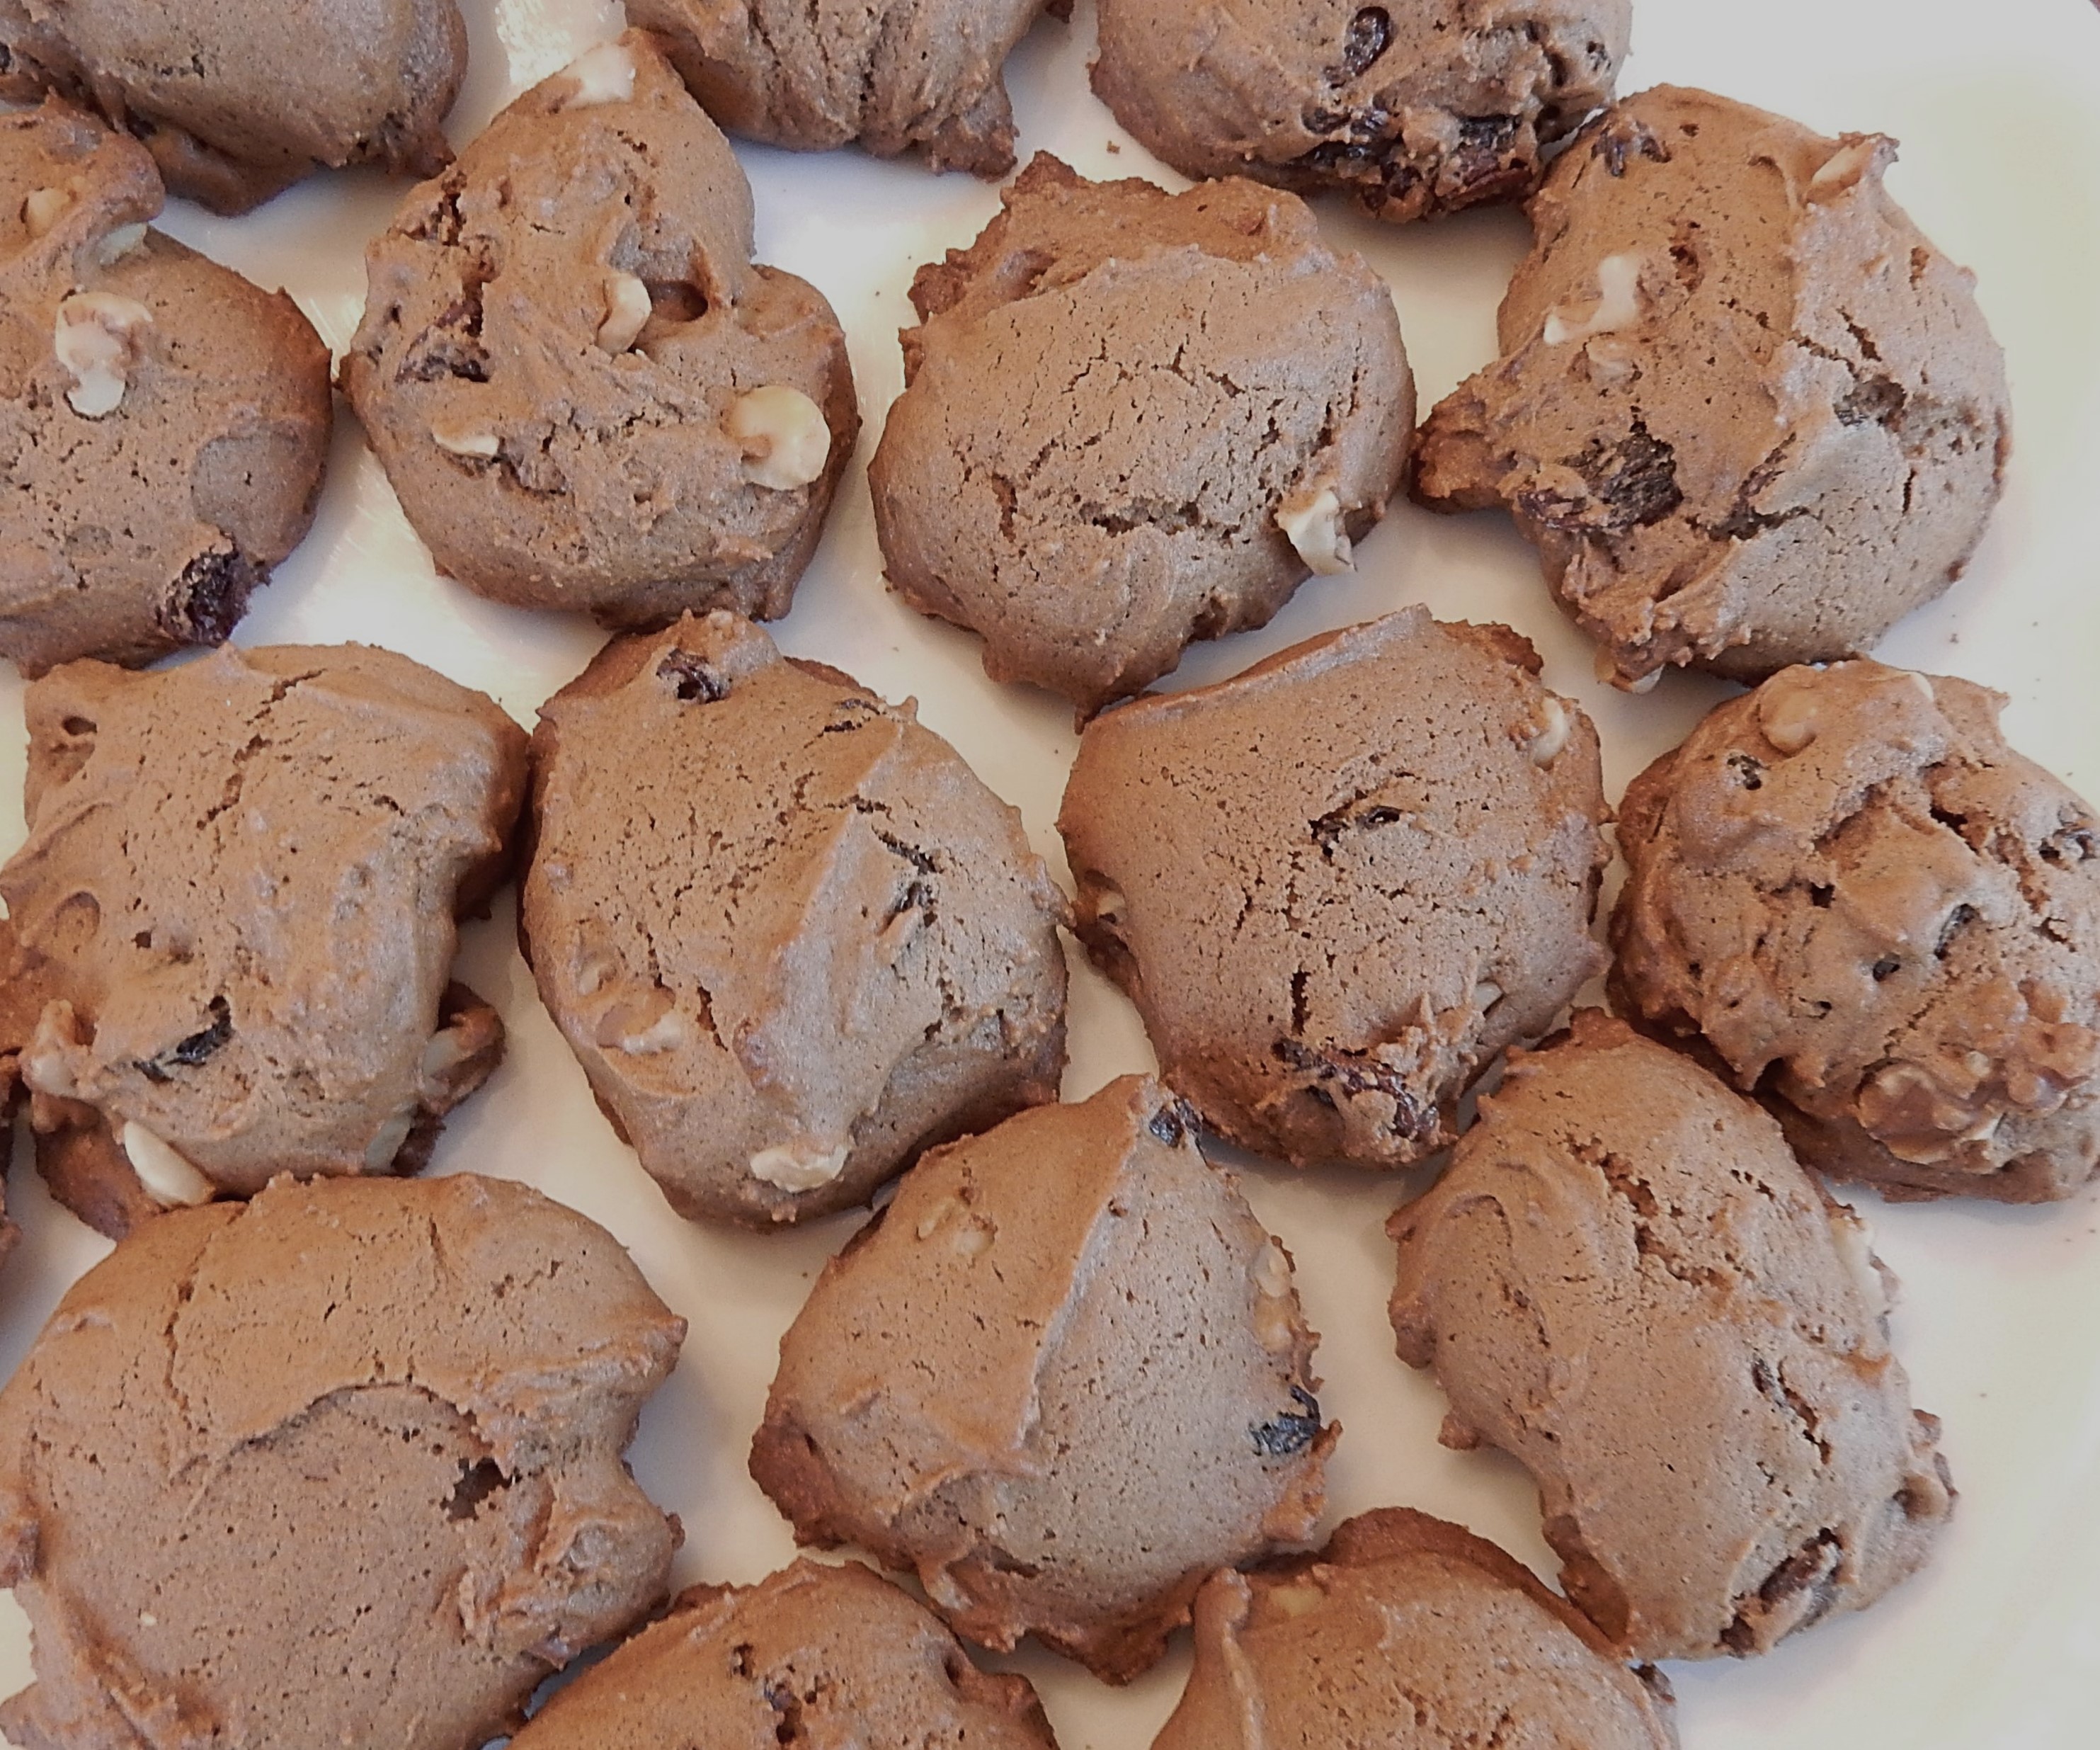 Sometimes old recipes have really fun, descriptive names. When I saw a recipe in a hundred-year-year old cookbook for “Cry Baby” cookies, I just knew that I needed to give it a try.