Brrr, it’s cold outside and I’m ready for some comfort foods. When I saw a recipe for Scotch Potatoes in the January, 1916 issue of Ladies Home Journal, I just had to try it.
Scotch Potatoes are very similar to Scalloped Potatoes, but they contain a lot more onions. The recipe calls for a 1:1 ratio of potatoes and onions (2 cups potatoes and 2 cups onions).
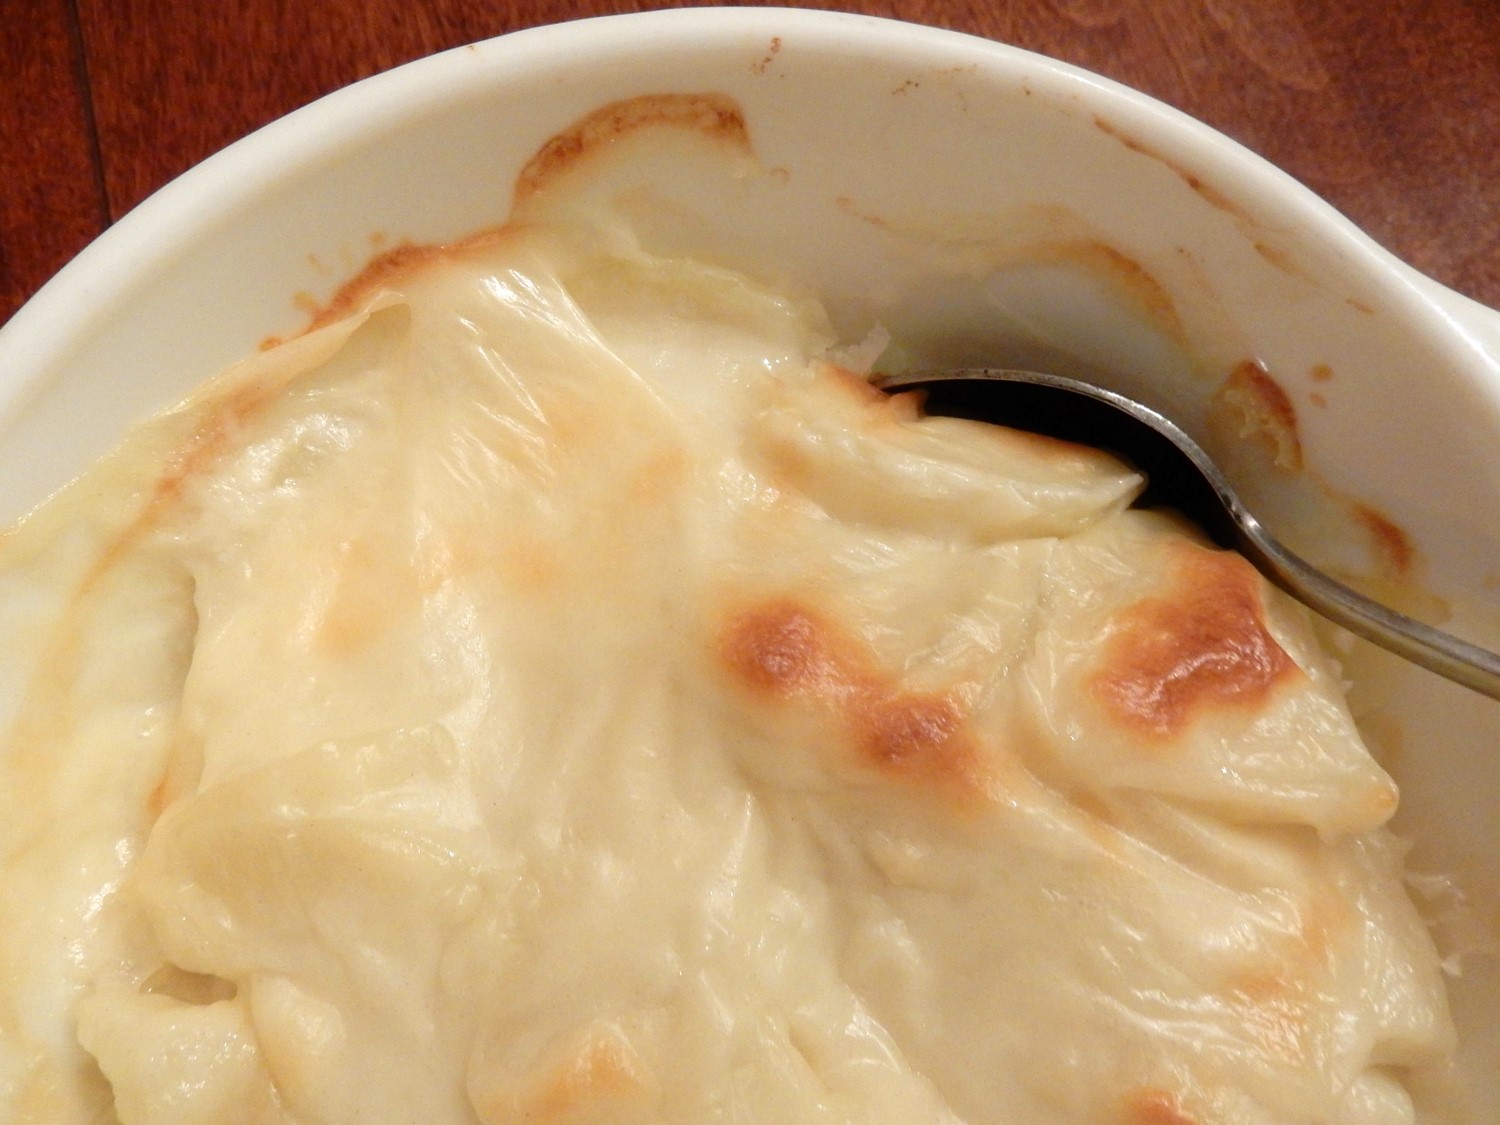
This recipe was a winner, and I may never make regular scalloped potatoes again. Scotch Potatoes wonderfully pairs the creamy potatoes with the sweet, bright, complex flavor and texture of the onions to create a lovely taste sensation.
The recipe I typically use for Scalloped Potatoes just has me put the raw potato slices into the casserole dish and then pour white sauce over it. When I bake that casserole I often struggle to get the potatoes tender before the top gets overly brown. One of my favorite things about the Scotch Potatoes recipe is that I had no issues with a burned top and under-cooked potatoes.
This recipe called for boiling the potatoes and onions for a few minutes before putting them into the baking dish. This worked perfectly—and I now wonder why I never thought of doing this before.
Scotch Potatoes (Scalloped Potatoes and Onions)
4 medium potatoes, peeled and sliced (approx. 2 cups)
4 medium onions, sliced (approx. 2 cups)
water
1 teaspoon salt
2 tablespoons butter
2 tablespoons flour
1/2 teaspoon salt
1/8 teaspoon pepper
1 cup milk
Preheat oven to 400° F. Put the sliced potatoes and onions into a saucepan, and cover with water. Add 1 teaspoon salt. Bring to a boil, then reduce heat, and simmer until the potatoes are just barely tender (about 12 minutes). Remove from heat and drain.
In the meantime, make a white sauce by melting the butter in another saucepan. Stir in the flour, 1/2 teaspoon salt, and pepper. While stirring constantly, slowly add the milk. Continue stirring until the mixture is hot and begins to thicken.
Place the cooked potatoes and onions in a baking dish. Pour the white sauce over them, and put into the oven. Bake for 25 minutes, or until hot and bubbly, and the top begins to brown. Remove from oven and serve.
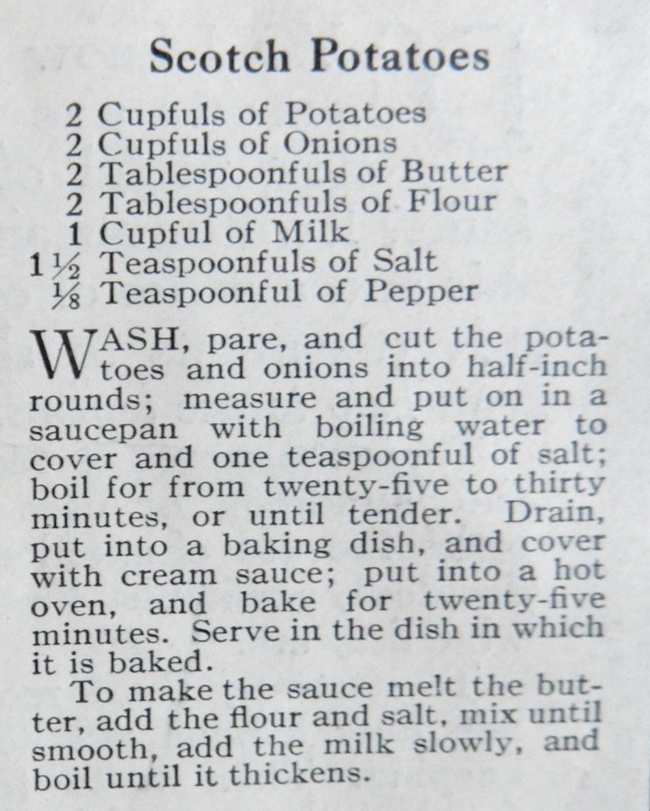
Here’s the original recipe:
I didn’t make my potato and onion slices as thick as the slices called for in the original recipe. Mine were about 1/4 inch thick, and they worked beautifully in the updated recipe.