When baking, many cooks a hundred years ago used a variety of informal ways to figure out whether an oven was very hot, hot, or less hot. However, times were changing and recipes were beginning to indicate the temperature that should be used. This was confusing to some cooks. The April, 1924 issue of Ladies Home Journal advocated for the use of oven thermometers. Here’s a few excepts:
Taking the Hazards and Heartaches Out of Baking: Oven Thermometers Save You Time and Money
Commercial bakers have been using temperature methods these many years in order to produce uniform baking results, while the majority of women who do their own baking still depend upon the hit-or-miss way of oven regulation. The housewife who has used the same range for a long period of time usually judges fairly well, but the inexperienced cook is completely at a loss when she is told to thrust her hand in the oven and count ten, or given some other antiquated method of judging heat.
No longer need women employ such indefiniteness for there are on the market at the present time small portable oven thermometers, reasonably durable in construction, which make guess work in baking a thing of the past, and put the home kitchen on a par with the scientifically correct bakeries of commercial use.
Source: Ladies Home Journal (April, 1924)
One can depend on the results every time. There is no chance for burnt or underdone food, once you have learned the control of your oven by temperature. This means a real saving in money because food is not wasted. There’s an added saving, too, for one never need worry about results.
Source: Ladies Home Journal (April, 1924)
Temperature can play a large part in accomplishing perfection in cake baking. A dependable recipe and painstaking mixing are essential, but more cakes are spoiled in the baking than in any other way. This because, by the ordinary method, there has been no way of being absolutely sure that your baking oven today was just like it was yesterday. Luck, good or bad, is a nonessential factor in cake baking if the temperature method outlined is adopted. It becomes an accurate science in which the terrors of possible failure have no place. Different types of cake batter require baking at different temperatures, but the size and depth of the pan also have their effect.
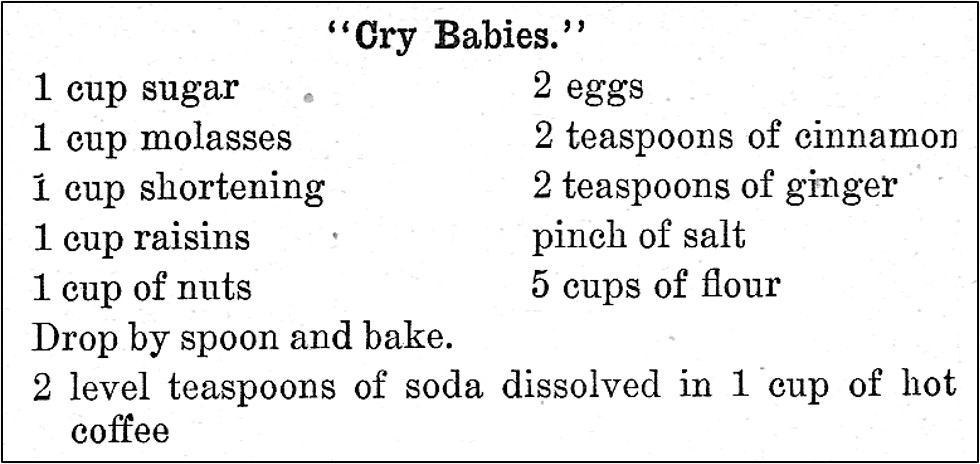
Sometimes old recipes have really fun, descriptive names. When I saw a recipe in a hundred-year-year old cookbook for “Cry Baby” cookies, I just knew that I needed to give it a try.
The cookies are an old-fashioned drop cookie with molasses and spices – and lots of raisins and nuts. They were lovely – and I can see why children would “cry” for them. These cookies would be a perfect addition to a child’s (or adult’s) packed lunch.
Here’s the original recipe:
Source: The New Home Cook Book, 1924 Edition (Published by the Illinois State Register, Springfield, IL)
This recipe makes a lot of cookies – probably about 100 cookies. Most modern cookie recipes don’t make that many cookies, so I updated the recipe to make 1/2 of the old recipe.
Preheat oven to 375° F. Dissolve the baking soda in the hot coffee.
Put sugar, molasses, shortening, egg, cinnamon, ginger, salt, and the coffee with baking soda in a large mixing bowl; beat until combined. Add flour, and stir until combined and smooth. Add raisins and walnuts; stir to distribute throughout the dough. Drop heaping teaspoons about 2 inches apart on a lightly greased baking sheet. Bake 10-12 minutes, or until lightly browned.
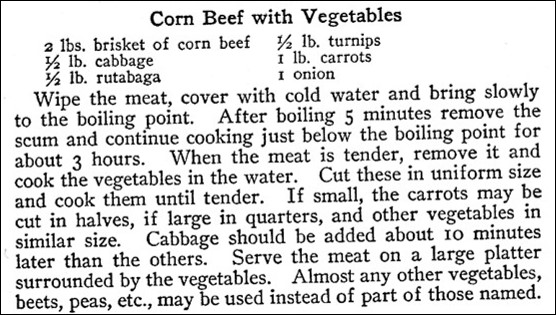
March is the perfect time for corned beef so I was excited when I found a hundred-year-old recipe for Corn Beef with Vegetables. (Is it “corned beef” or “corn beef”? I’ve always called it “corned beef” but the old recipe says “corn beef.”
The recipe called lots of root vegetables – rutabaga, turnips, and carrots – as well as cabbage and onions.
The Corn Beef with Vegetables was delightful. The briny saltiness of the corn beef combined nicely with the earthiness of the root vegetables and the subtle buttery sweetness of the cabbage.
Here’s the original recipe:
Source: Low Cost Cooking (1924) by Florence Nesbitt
This recipe makes a lot of vegetables and a relatively small amount of corn beef. (I got this recipe from a cookbook called Low Cost Cooking, so that probably explains why the recipe called for relatively little meat). I made this recipe using a 2-pound corn beef brisket as called for in the recipe. In hindsight, I wish that I’d used a larger piece of meat, so I updated the recipe to allow for the use of a larger piece of corn beef brisket if desired.
About half an hour before I wanted to serve, I put the rutabaga, turnips, and carrots into the Dutch oven without removing the meat. After about 20 minutes I removed the meat and added the cabbage and onions for the last 10 minutes. By doing it this way, I didn’t need to worry about the meat getting cold before serving.
1/2 pound rutabaga (about 1/2 of a medium-sized rutabaga), peeled and cut into 1 1/2 inch pieces
1/2 pound turnips (about 2 medium turnips), peeled and cut into 1 1/2 inch piece
1 pound carrots (about 5 medium carrots), peeled and each cut into 2-3 inch pieces
1/2 pound cabbage (about 1/2 medium cabbage), cut into wedges about 2 inches wide
1 large onion, sliced
Put the corn beef in a Dutch oven and cover with water. Bring to a boil on high heat. Reduce heat, cover and simmer for 2 1/2- 3 hours (More time is needed for a larger piece of meat.) Add rutabaga, turnip, and carrot pieces. Simmer for an additional 20 minutes. Remove meat from the Dutch oven, and add onion slices and cabbage wedges. Cook another ten minutes. Drain water.
Slice the corn beef and arrange with the cooked vegetables on serving plate.
Source: Modern Priscilla Cook Book: One Thousand Home Tested Recipes (1924)
Does anyone host formal dinners anymore? I don’t. They seem like something from the past – though apparently formal dinners were on their way out even a hundred years ago. Here’s what it said in a 1924 cookbook:
A formal dinner is an expensive and elaborate affair not to be undertaken unless one has at her command plenty of help and plenty of money. Very few really formal dinners are given nowadays except in those circles of society where the rigors of etiquette are punctiliously observed. We live in an informal age, and yet through all our informality we observe, generally, more rules of correct usage than the average family has ever done before. That is, there are more of us trying to follow the rules of good manners and consideration (upon which quality all good manner are built) than was the case when one element of society lived and moved by rule, and the rest of it went as it pleased.
The Modern Priscilla Cook Book: One Thousand Home Tested Recipes (1924)
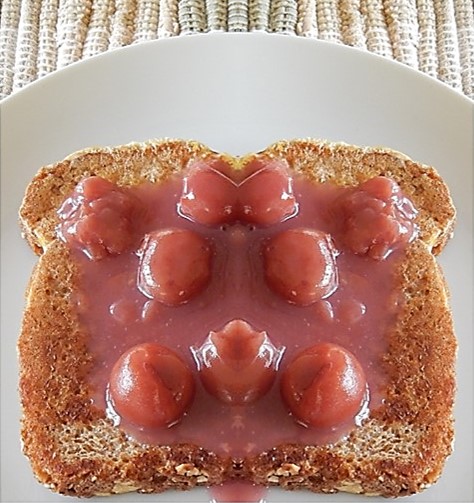
I’m always looking for interesting breakfast foods, so was intrigued by a hundred-year-old recipe for Cherry Toast. This is basically is French Toast topped with a cherry sauce. The recipe turned out well – though the sauce seemed different from modern French Toast toppings. The sauce soaks into the toast for old-fashioned goodness and texture.
Here’s the original recipe:
Source: Modern Priscilla Cook Book: One Thousand Home Tested Recipes (1924)
Something is off with the number of slices of bread in this recipe. It calls for 16 slices of bread, but 1 egg plus 1/2 cup of milk is not nearly enough liquid to dip that many slices of bread into. When I made this recipe, it was enough liquid for 4 slices of bread. The recipe as written makes an appropriate amount of sauce for 4 slices.
I decided to use tart canned cherries (like the ones I use to make a pie) rather than sweet ones. The can I bought contained cherries canned in water, so I added 1/4 cup sugar to the sauce to make it a little sweeter.
When I made the sauce, I approached the process similarly to how I make white sauce, which is a slightly different process than described in the original recipe. I melted the butter in a saucepan, then stirred in the flour. I gradually added the cherry juice while stirring constantly, then stirred in the cherries.
1 can (approximately 14.5 ounce) tart cherries including both cherries and juice
1 tablespoon butter
2 tablespoons flour
approximately 1/4 cup sugar (optional)
Beat the egg, then add the milk; beat until mixed together. Dip the slices of bread in the egg and milk mixture, then brown both sides on a hot griddle.
In the meantime, melt the butter in a saucepan. Stir in the flour, then gradually add the cherry juice while stirring constantly. Stir in the cherries. Continue heating and stirring until the mixture boils. If the cherries were canned in water (rather than a sugar syrup), add sugar to taste. Remove from heat.
To serve, spoon the cherry sauce over the browned bread slices.
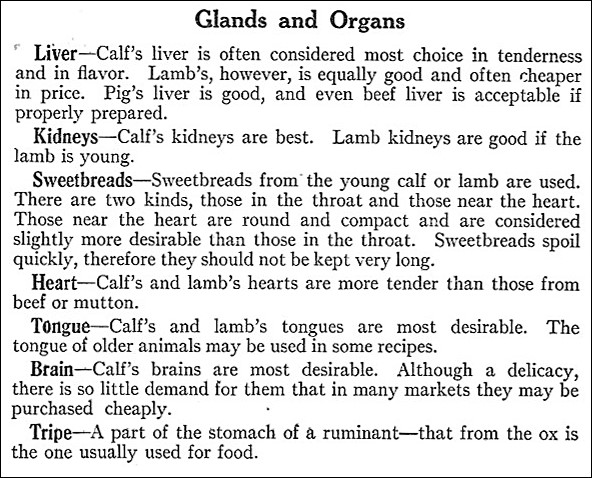
Organ meats were more popular a hundred years ago than what they are now. I don’t have a clue where to buy many of the glands and organs described in a 1924 cookbook.


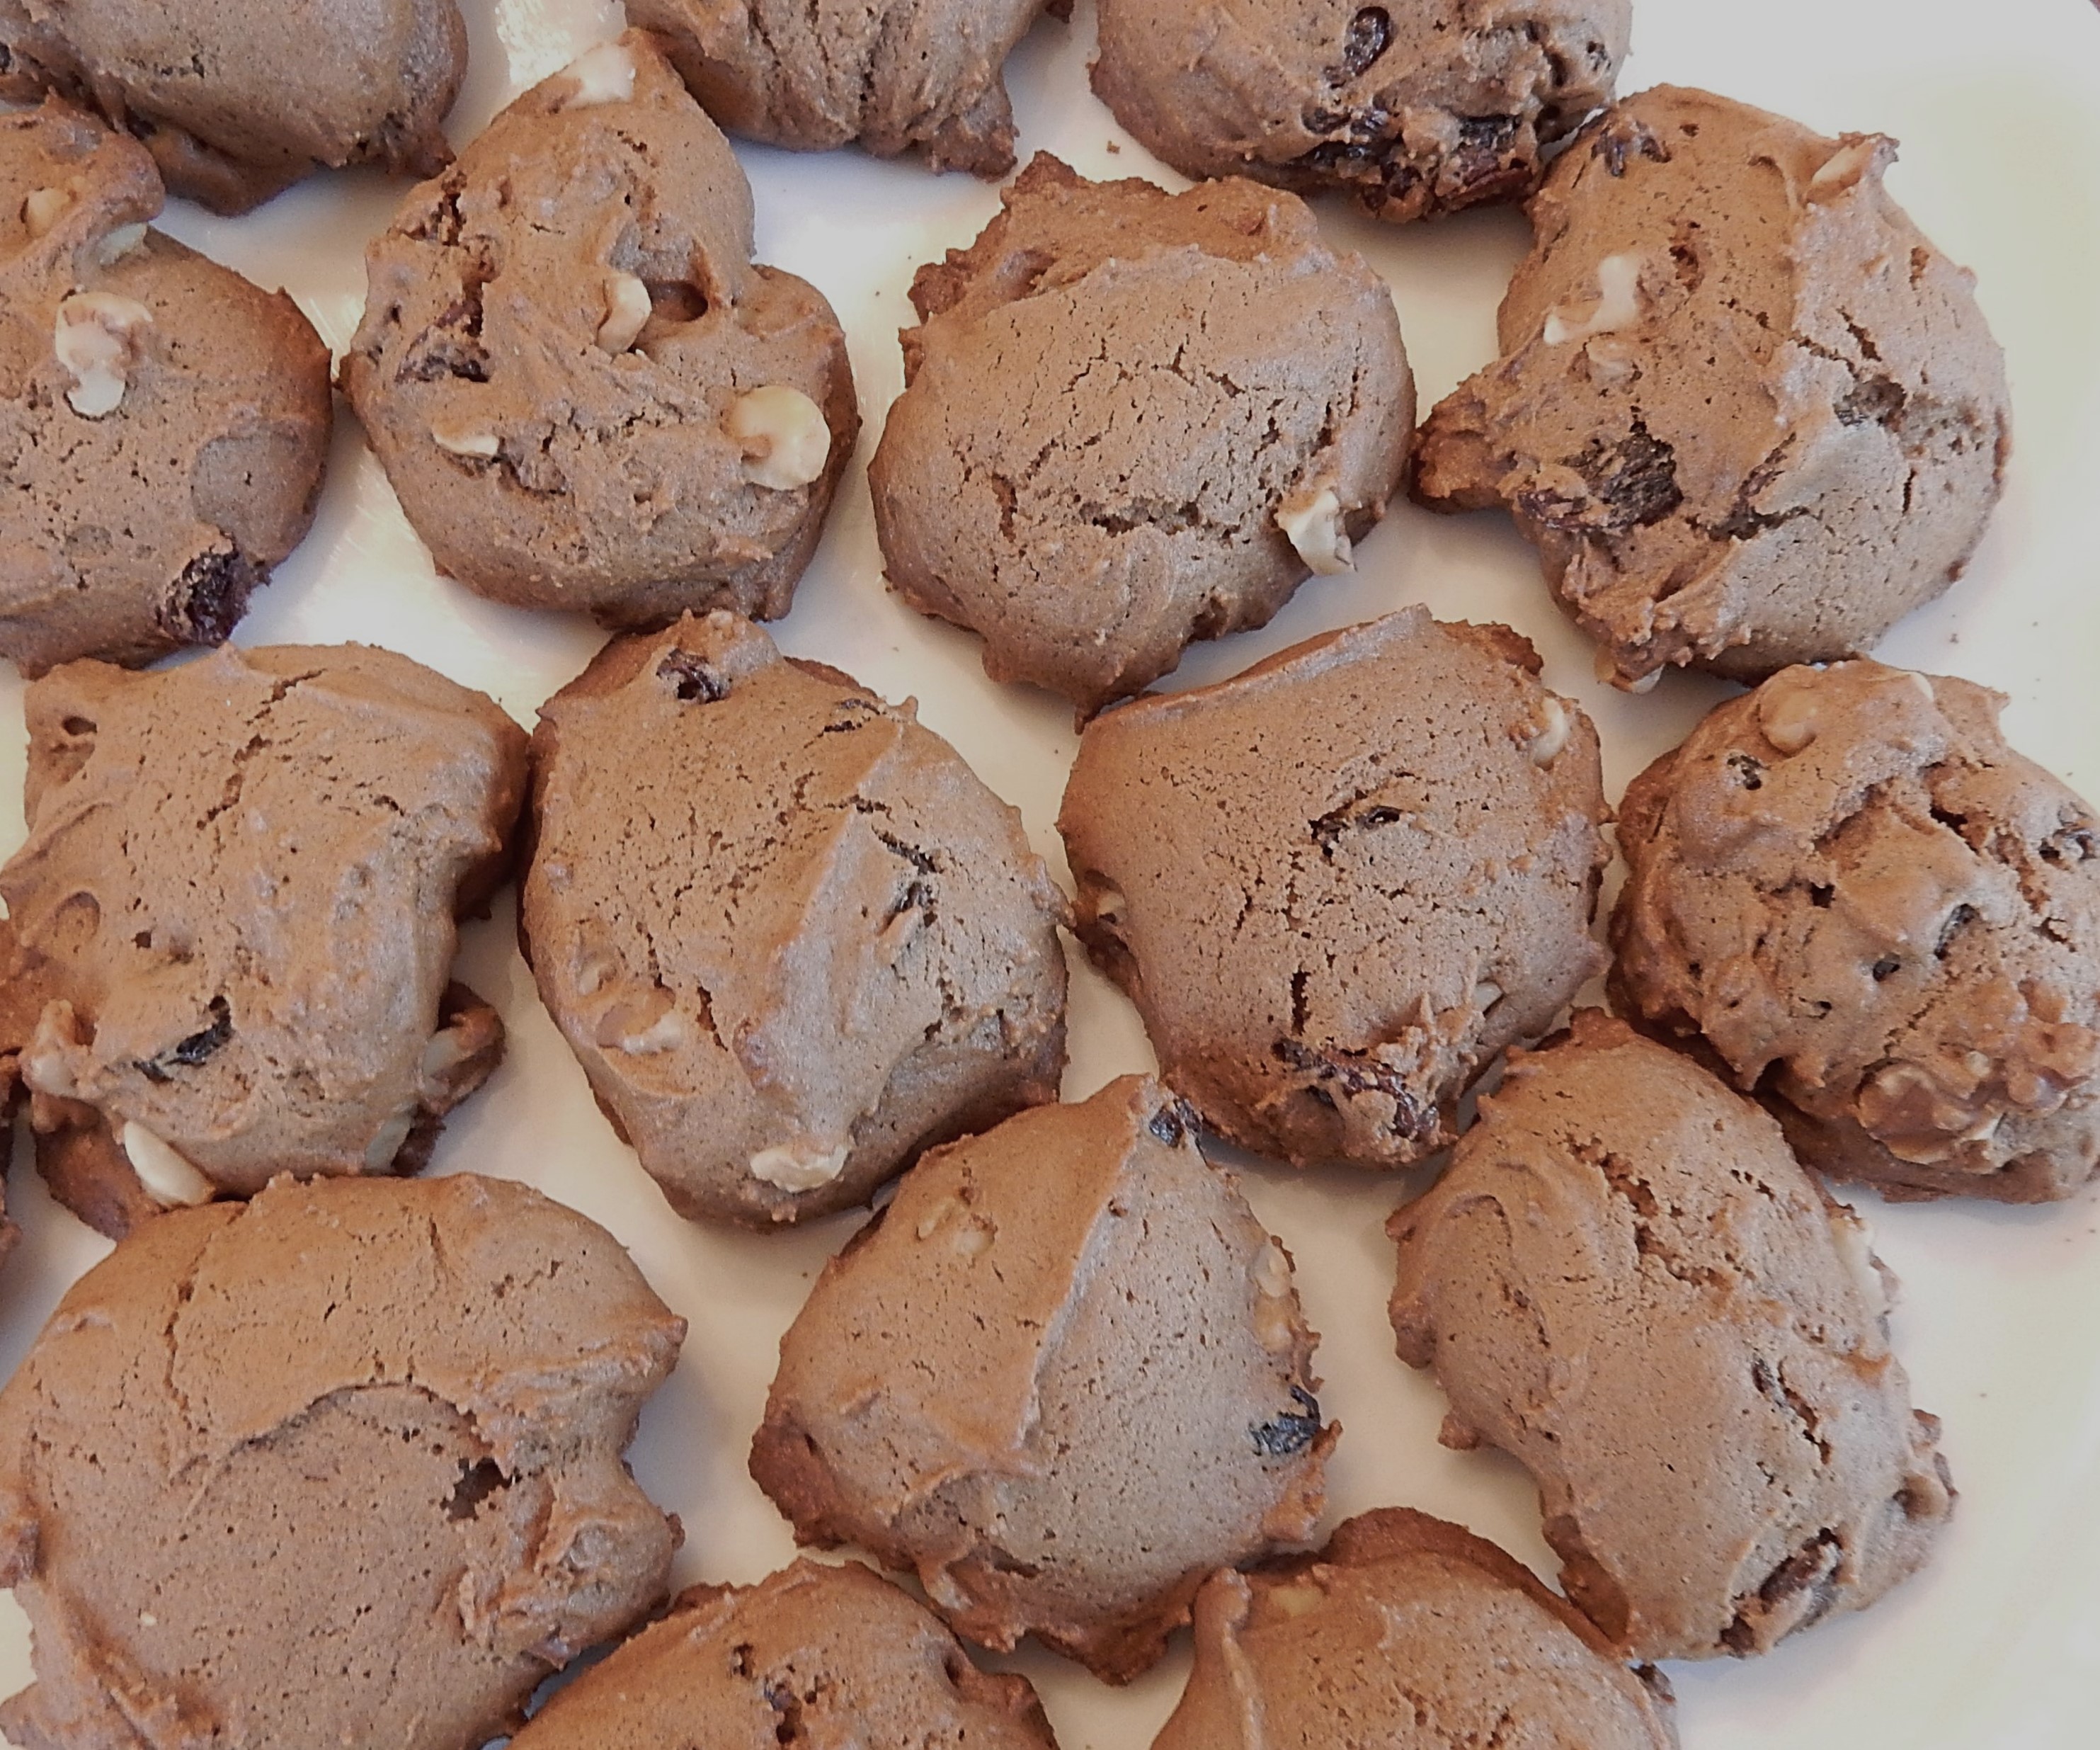 Sometimes old recipes have really fun, descriptive names. When I saw a recipe in a hundred-year-year old cookbook for “Cry Baby” cookies, I just knew that I needed to give it a try.