
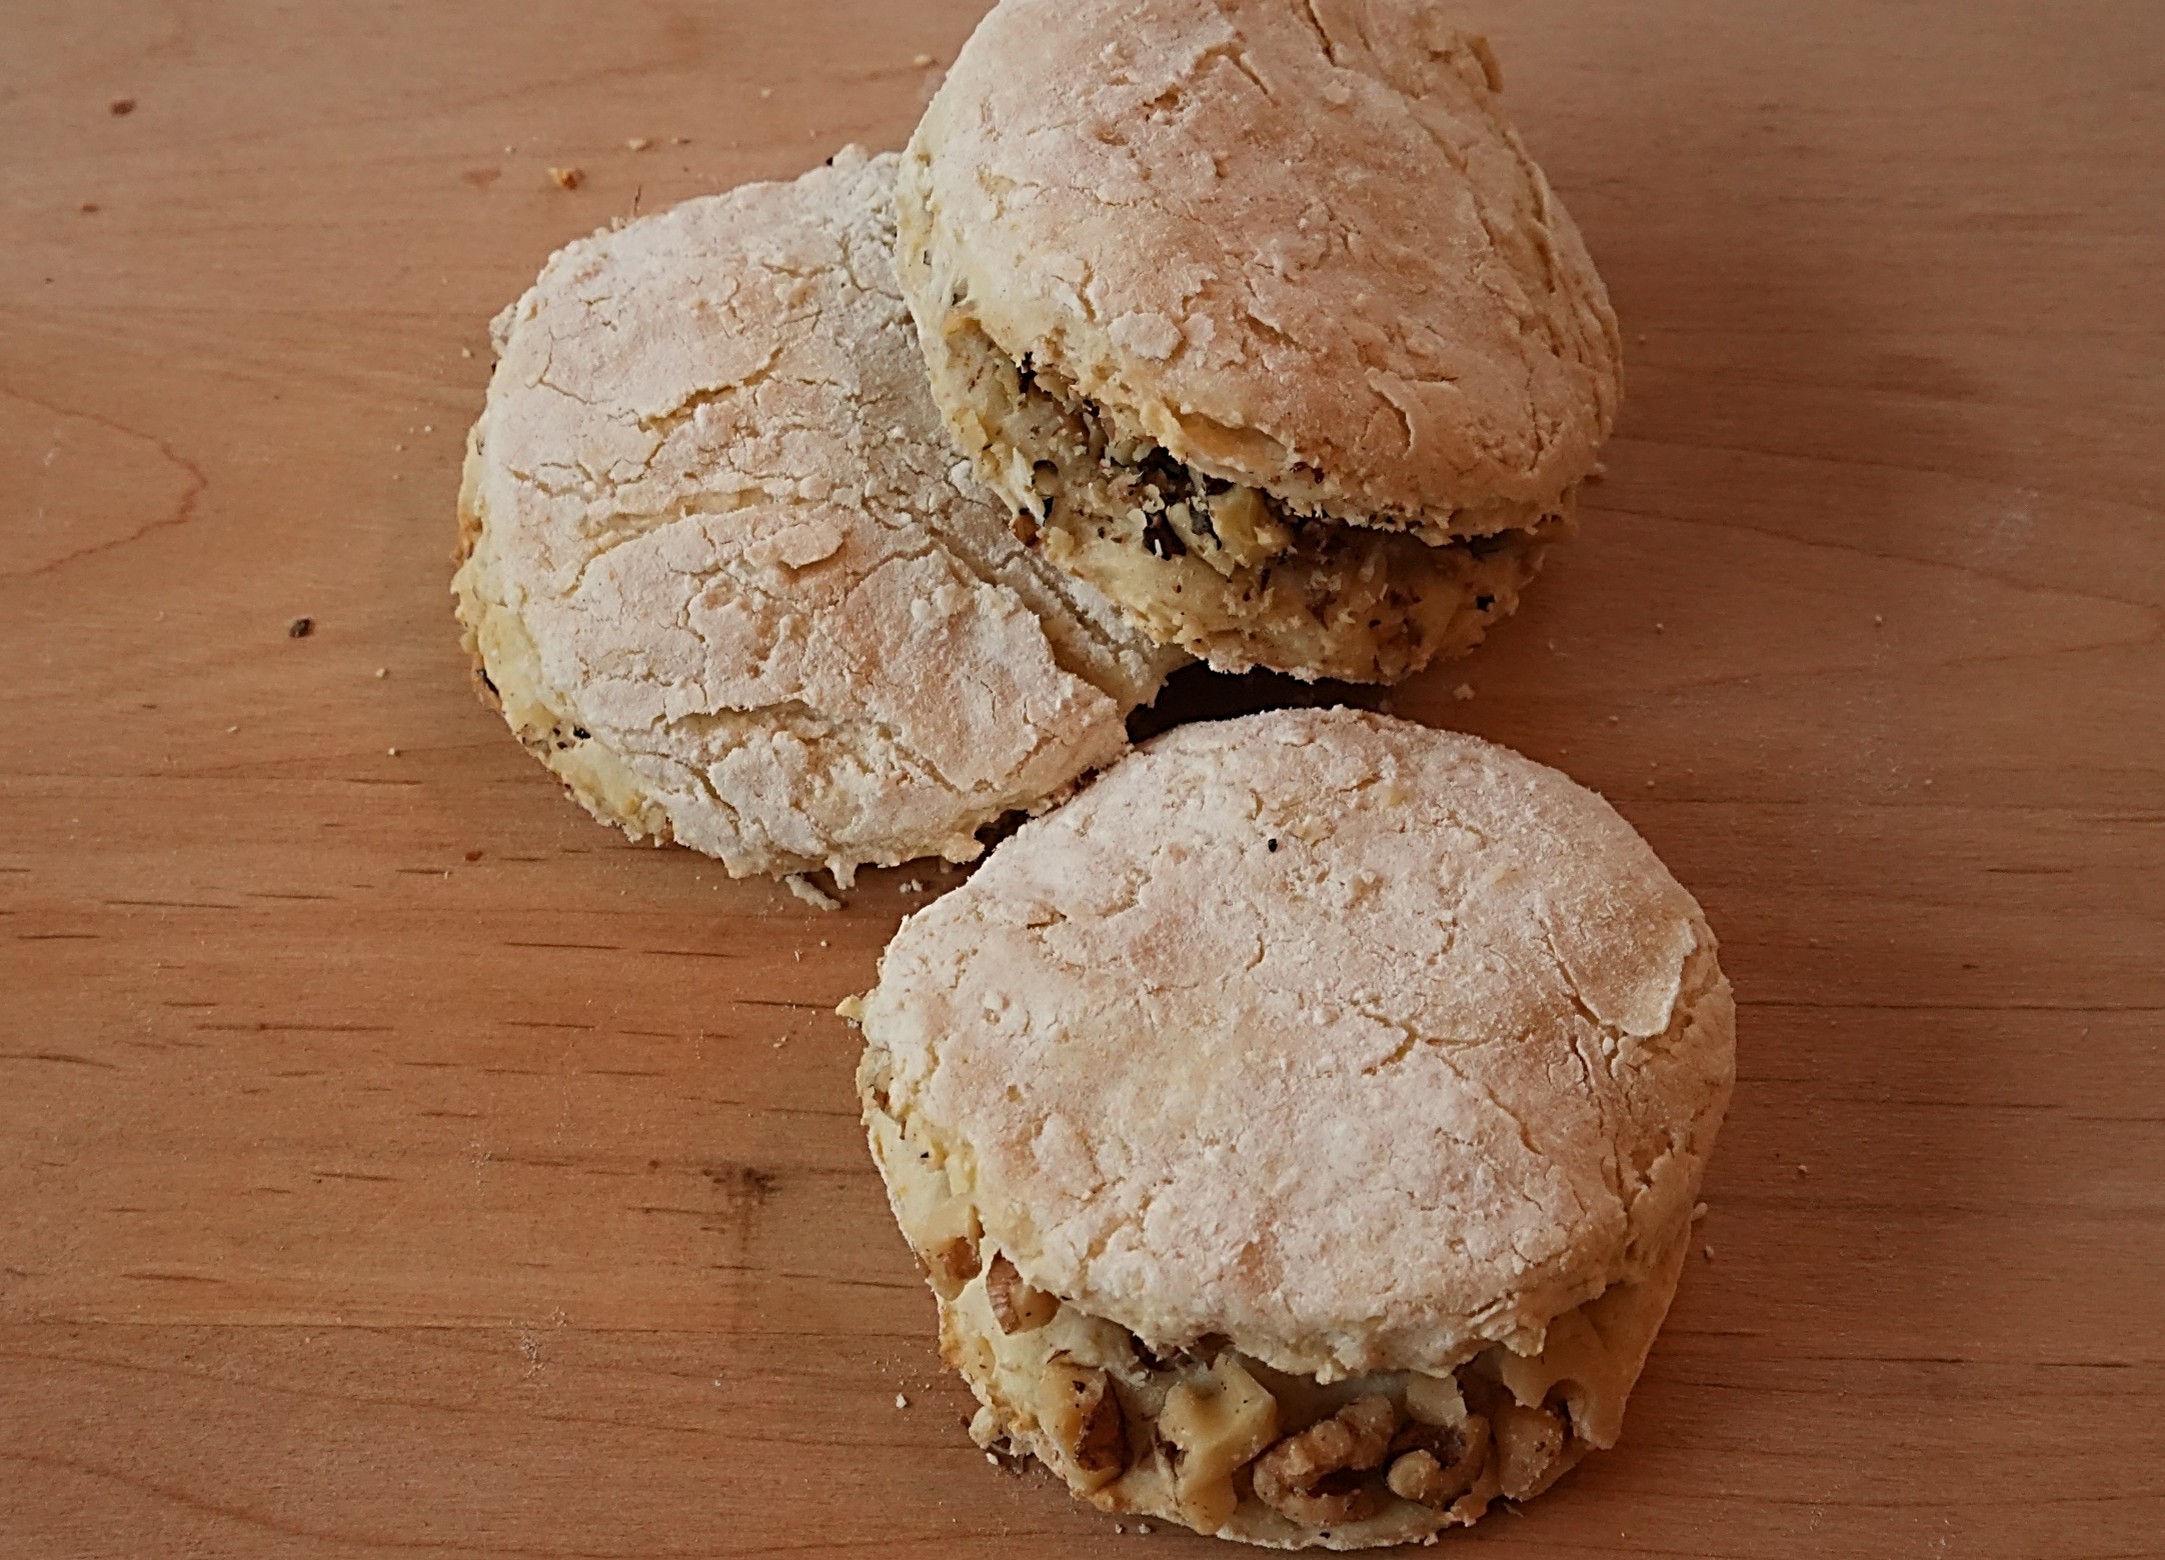
I was intrigued by a recipe in a hundred-year-old newspaper recipe supplement. The recipe title was Hot Walnut Sandwiches, but it was labeled as a biscuit recipe. The recipe called for making baking powder biscuit dough, then putting chopped walnuts between two biscuit rounds, and baking.
This recipe does not call for any sugar, so the Hot Walnut Sandwiches were not sweet and definitely tasted like a baking powder biscuit, but the walnuts were a nice twist and a fun addition. The Hot Walnut Sandwiches were tasty. I especially liked them when I smeared a little butter on them.
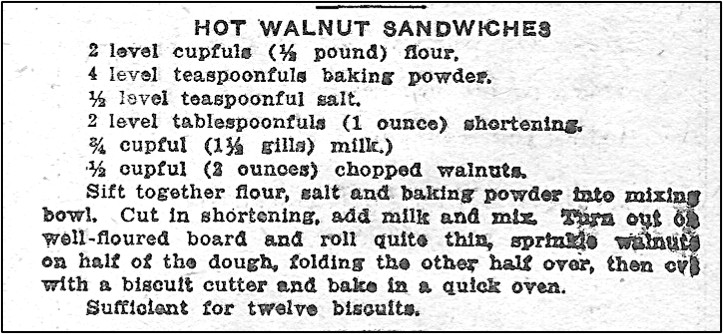
Here’s the original recipe:
The recipe calls for putting the chopped walnuts on top of half of the dough, then folding the other half over it, and cutting with a biscuit cutter. This results in a lot of scraps of dough embedded with walnuts. I found that it worked better to cut all the circles first (and re-roll the dough as needed), then put the walnuts on half of the circles and top with the remaining circles of dough.
It’s interesting that the recipe indicated that 3/4 cup of milk should be used, but that it also stated in parentheses that this is 1 1/2 gills of milk. Gills are more commonly used today as a measure for alcohol when making mixed drinks, but apparently a hundred years ago it also was still occasionally used when measuring other ingredients.
Here’s the recipe updated for modern cooks:
Hot Walnut Sandwiches (Walnuts Biscuits)
2 cups flour
4 teaspoons baking powder
1/2 teaspoon salt
2 tablespoons shortening
3/4 cup milk
1/2 cup chopped walnuts
Preheat oven to 425° F. Sift together flour, baking powder, and salt in a mixing bowl. Cut in the shortening, then stir in the milk until combined. On a lightly floured surface, roll the dough until 1/4-inch thick. Cut with a round biscuit cutter. (I used a drinking glass as the cutter.) Sprinkle chopped walnuts on half of the circles, then put the remaining circles on top of the walnuts. Lightly press together. Place on a baking sheet, and bake for 10-12 minutes, or until lightly browned. Serve warm.
 Since seafood is very healthy, I try to make it several times a week, but I tend to get into a rut and make the same few recipes over and over. So when I came across a hundred-year-old recipe for Parsley Sauce, I immediately thought about making it to serve over some perch that I had in my refrigerator.


 I recently had some friends over and wanted to serve a nice dessert (and, of course, I wanted to make a hundred-year-old recipe), so I pulled out my 1925 recipe books and found a lovely recipe for Maraschino Cherry Cake.
