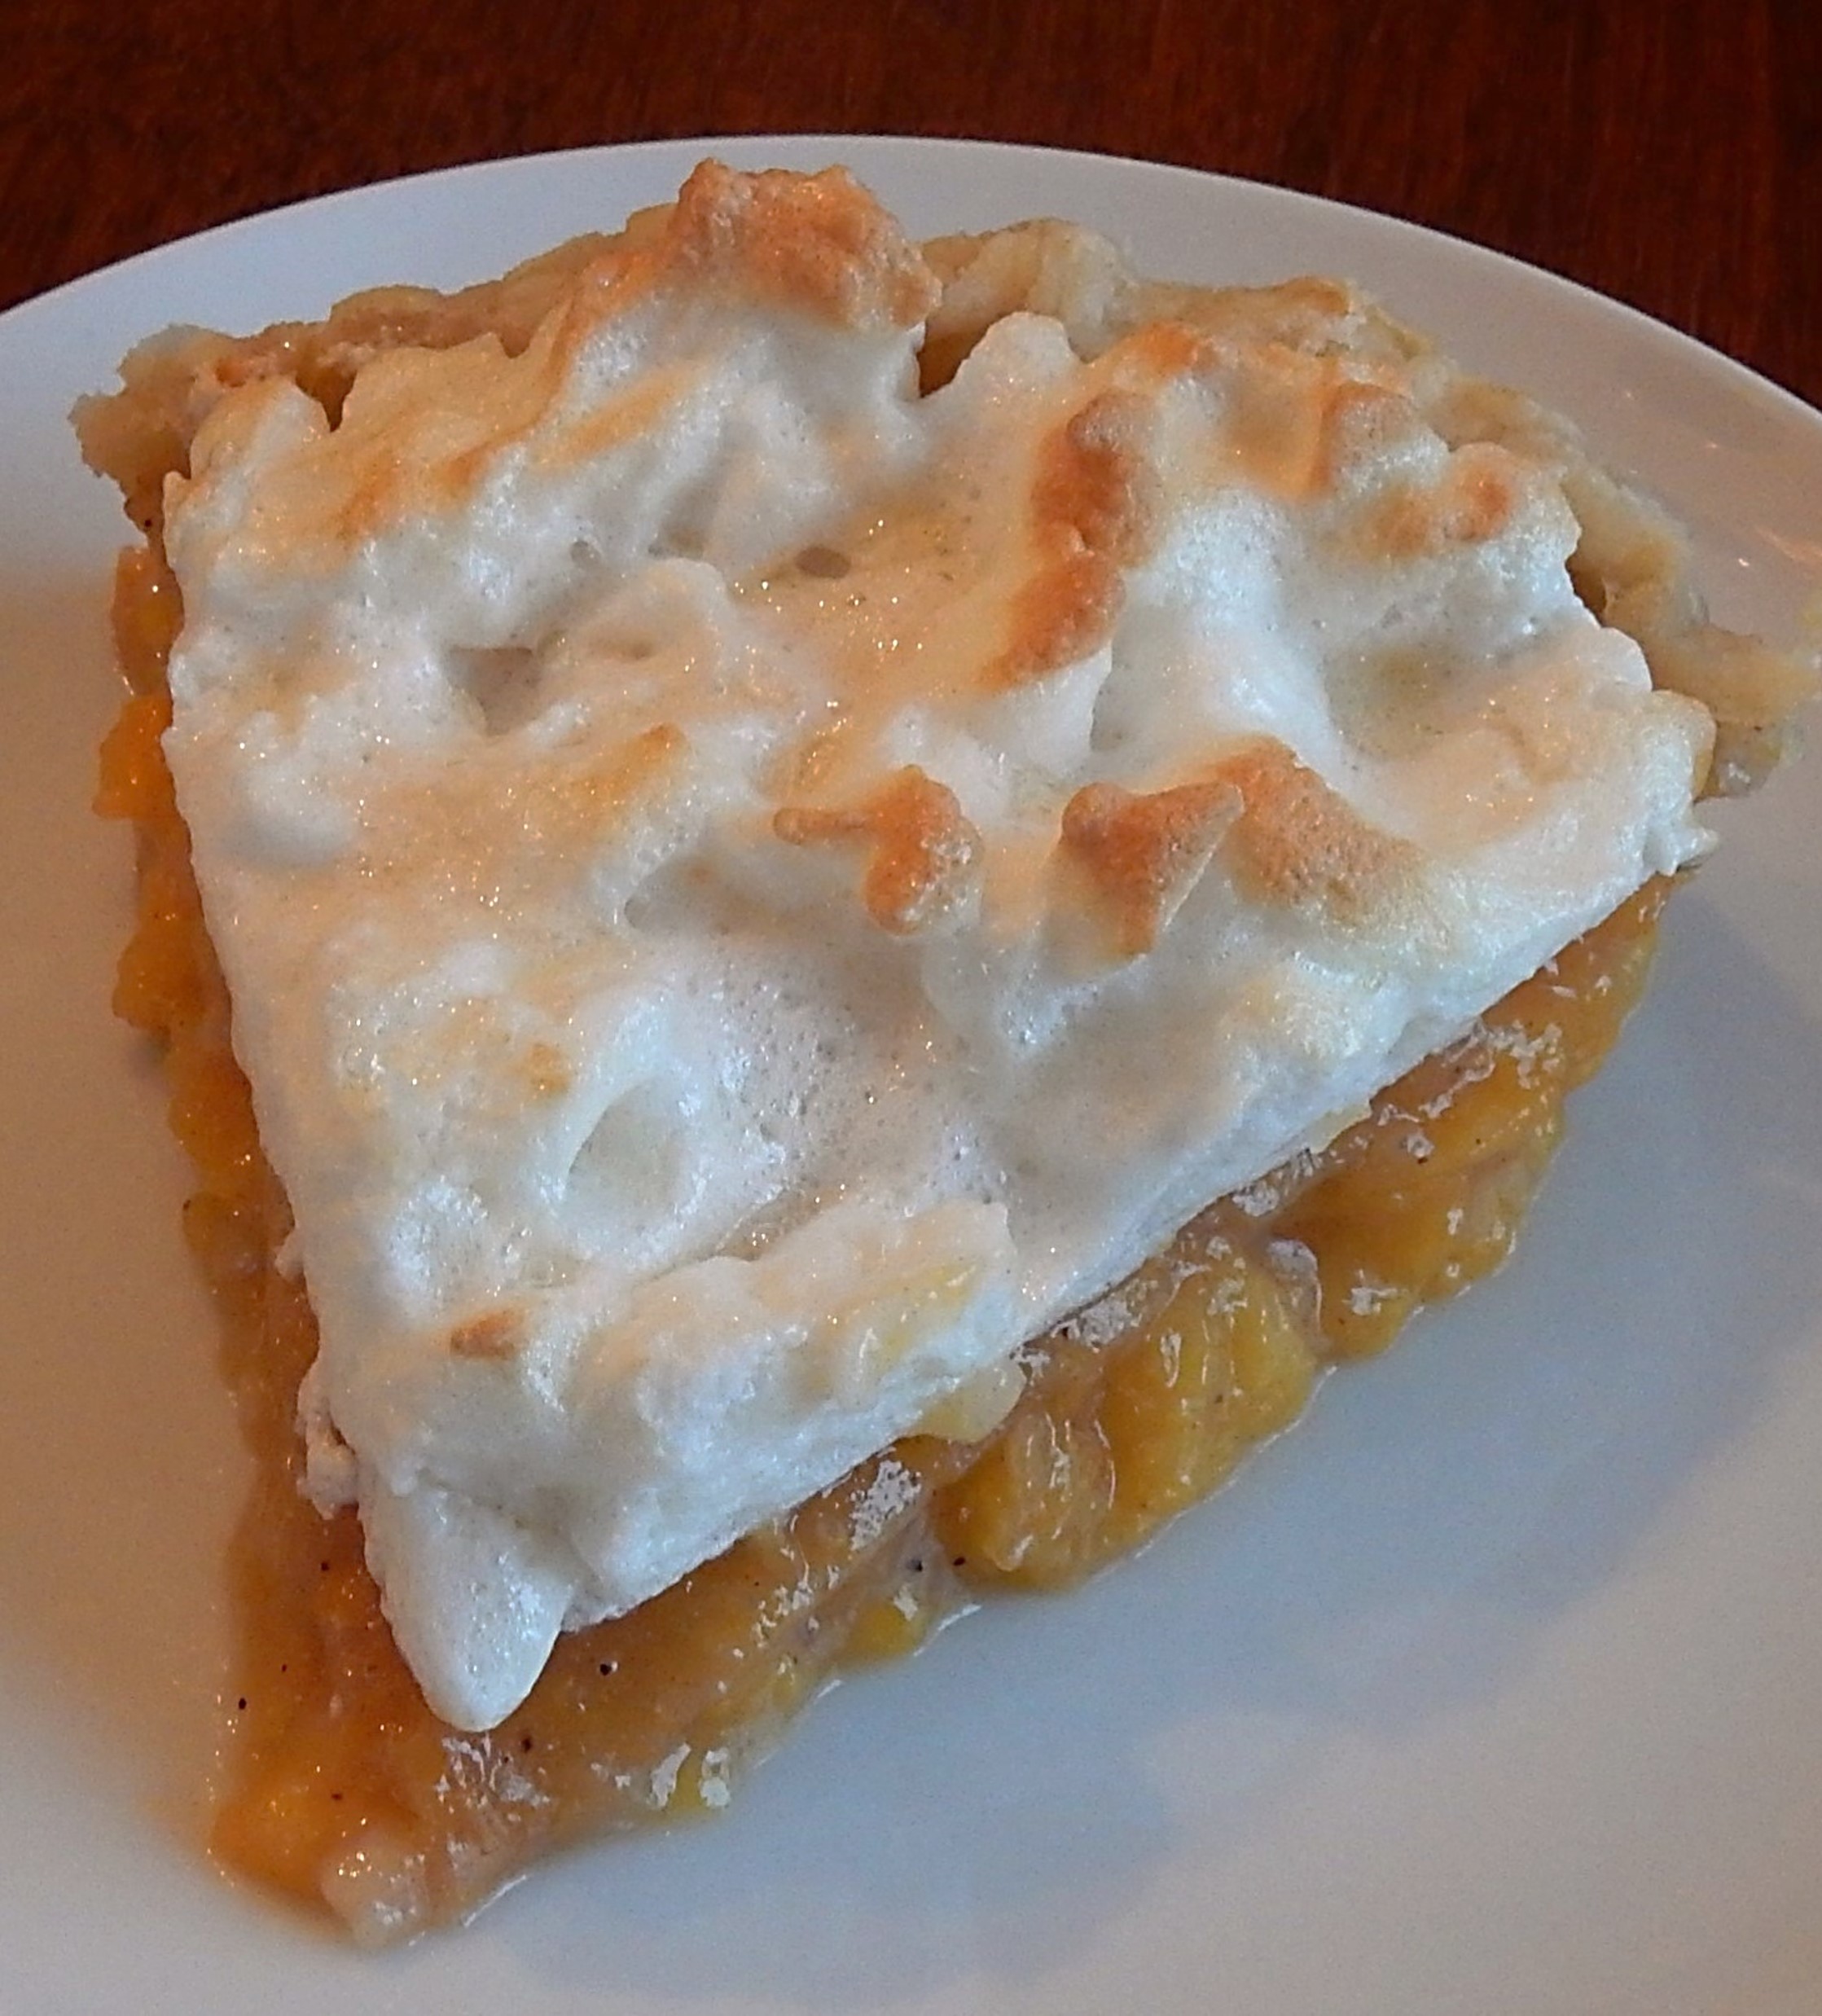
We’re getting to the peak of peach season. Succulent peaches are wonderful fresh, and are also wonderful when baked into various delectable desserts. I recently came across a recipe for Peach Meringue Pie in a hundred-year-old cookbook, and decided to give it a try.
The pie was a winner. The peach filling was sweet with a hint of tartness, and the meringue topping was refreshingly light with a nuanced vanilla flavor which nicely balanced the peaches.
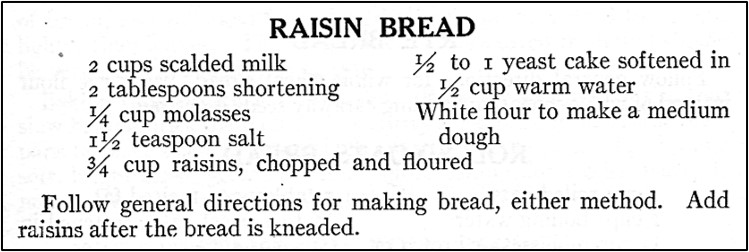
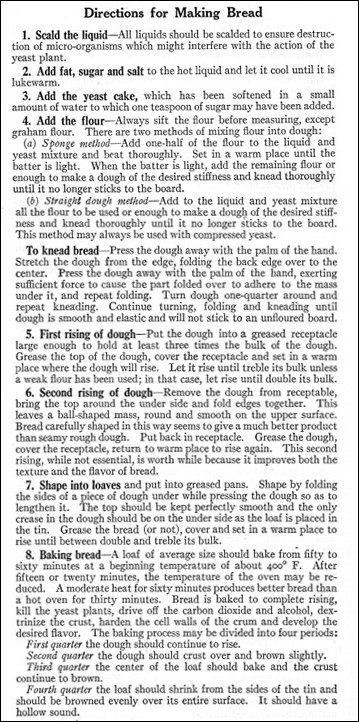
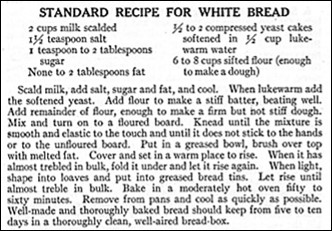
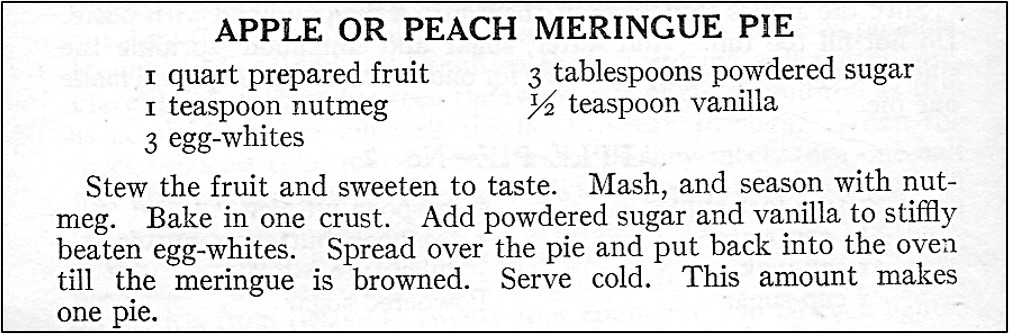
Here’s the original recipe:
I’m not sure why the recipe called for cooking and mashing the peaches prior to putting them in the pie shell, but I followed the directions. Maybe the recipe author did not want distinct slices of peach in the baked pie.
I sweetened the peaches with 1/2 cup sugar. When I made this recipe the cooked peaches were very juicy -and I knew that they would not hold their shape in a pie, so I added 1/4 cup of flour. This worked well, and the cooked peach pie filling was an appropriate consistency when the pie was baked.
It’s intriguing that the old recipe indicated that the recipe was for either apple or peach meringue pie. I would think that the spices that are used in an apple pie would be somewhat different than the spices in a peach pie. Similarly, I would think that more flour would be needed to thicken the filling of a peach pie than an apple one (though, of course, no flour or other thickener was called for in the old recipe).
Here’s the recipe updated for modern cooks:
Peach Meringue Pie
4 cups sliced and peeled peaches
1/2 cup sugar
1/4 cup flour
1 teaspoon nutmeg
1 9-inch pie shell
3 egg whites
3 tablespoons powdered sugar
1/2 teaspoon vanilla
Preheat oven to 400° F. Put the sliced peaches and the sugar in a saucepan; stir together. Using medium heat bring to a boil while stirring occasionally; simmer, until the peaches are soft, while continuing to stir occasionally (about 5 minutes). Remove from heat and mash the cooked peaches. (I used a potato masher). It is okay if the mashed peaches are chunky. Stir in the flour and nutmeg. Put the peach mixture into the pie shell and bake in oven until the filling begins to bubble, and the crust is lightly browned.
In the meantime, make the meringue. Place egg whites in a bowl, and beat the egg whites until they form stiff peaks. Gradually add powdered sugar and vanilla while continuing to beat. Then spoon on top of the pie and swirl. Reduce oven temperature to 350° F. Return pie to oven and cook for an additional 8-10 minutes or until the meringue is lightly browned.
 On hot summer days, when the heat is intense and blistering, I always remember making hay when I was a child growing up on a farm. It was hot, hard work to bale hay, and then unload it off wagons and stack in the barn. I can remember we thought that it was a good day if we made 1,000 40-pound bales in a day. To keep the hay from the scratching me, I’d wear long pants and a long-sleeved shirt that were quickly soaked with sweat. To stay hydrated, we took huge jugs of water or Kool-Aid out the fields and the barn.

 When our son recently visited, his flight arrived late at night – and I wanted to make a bedtime snack for him. I saw a recipe for Oatmeal Cookies in a hundred-year-old cookbook – and decided they might fit the bill.