 I came across a hundred-year-old recipe for Nut Molasses Bars and decided to give it a try.
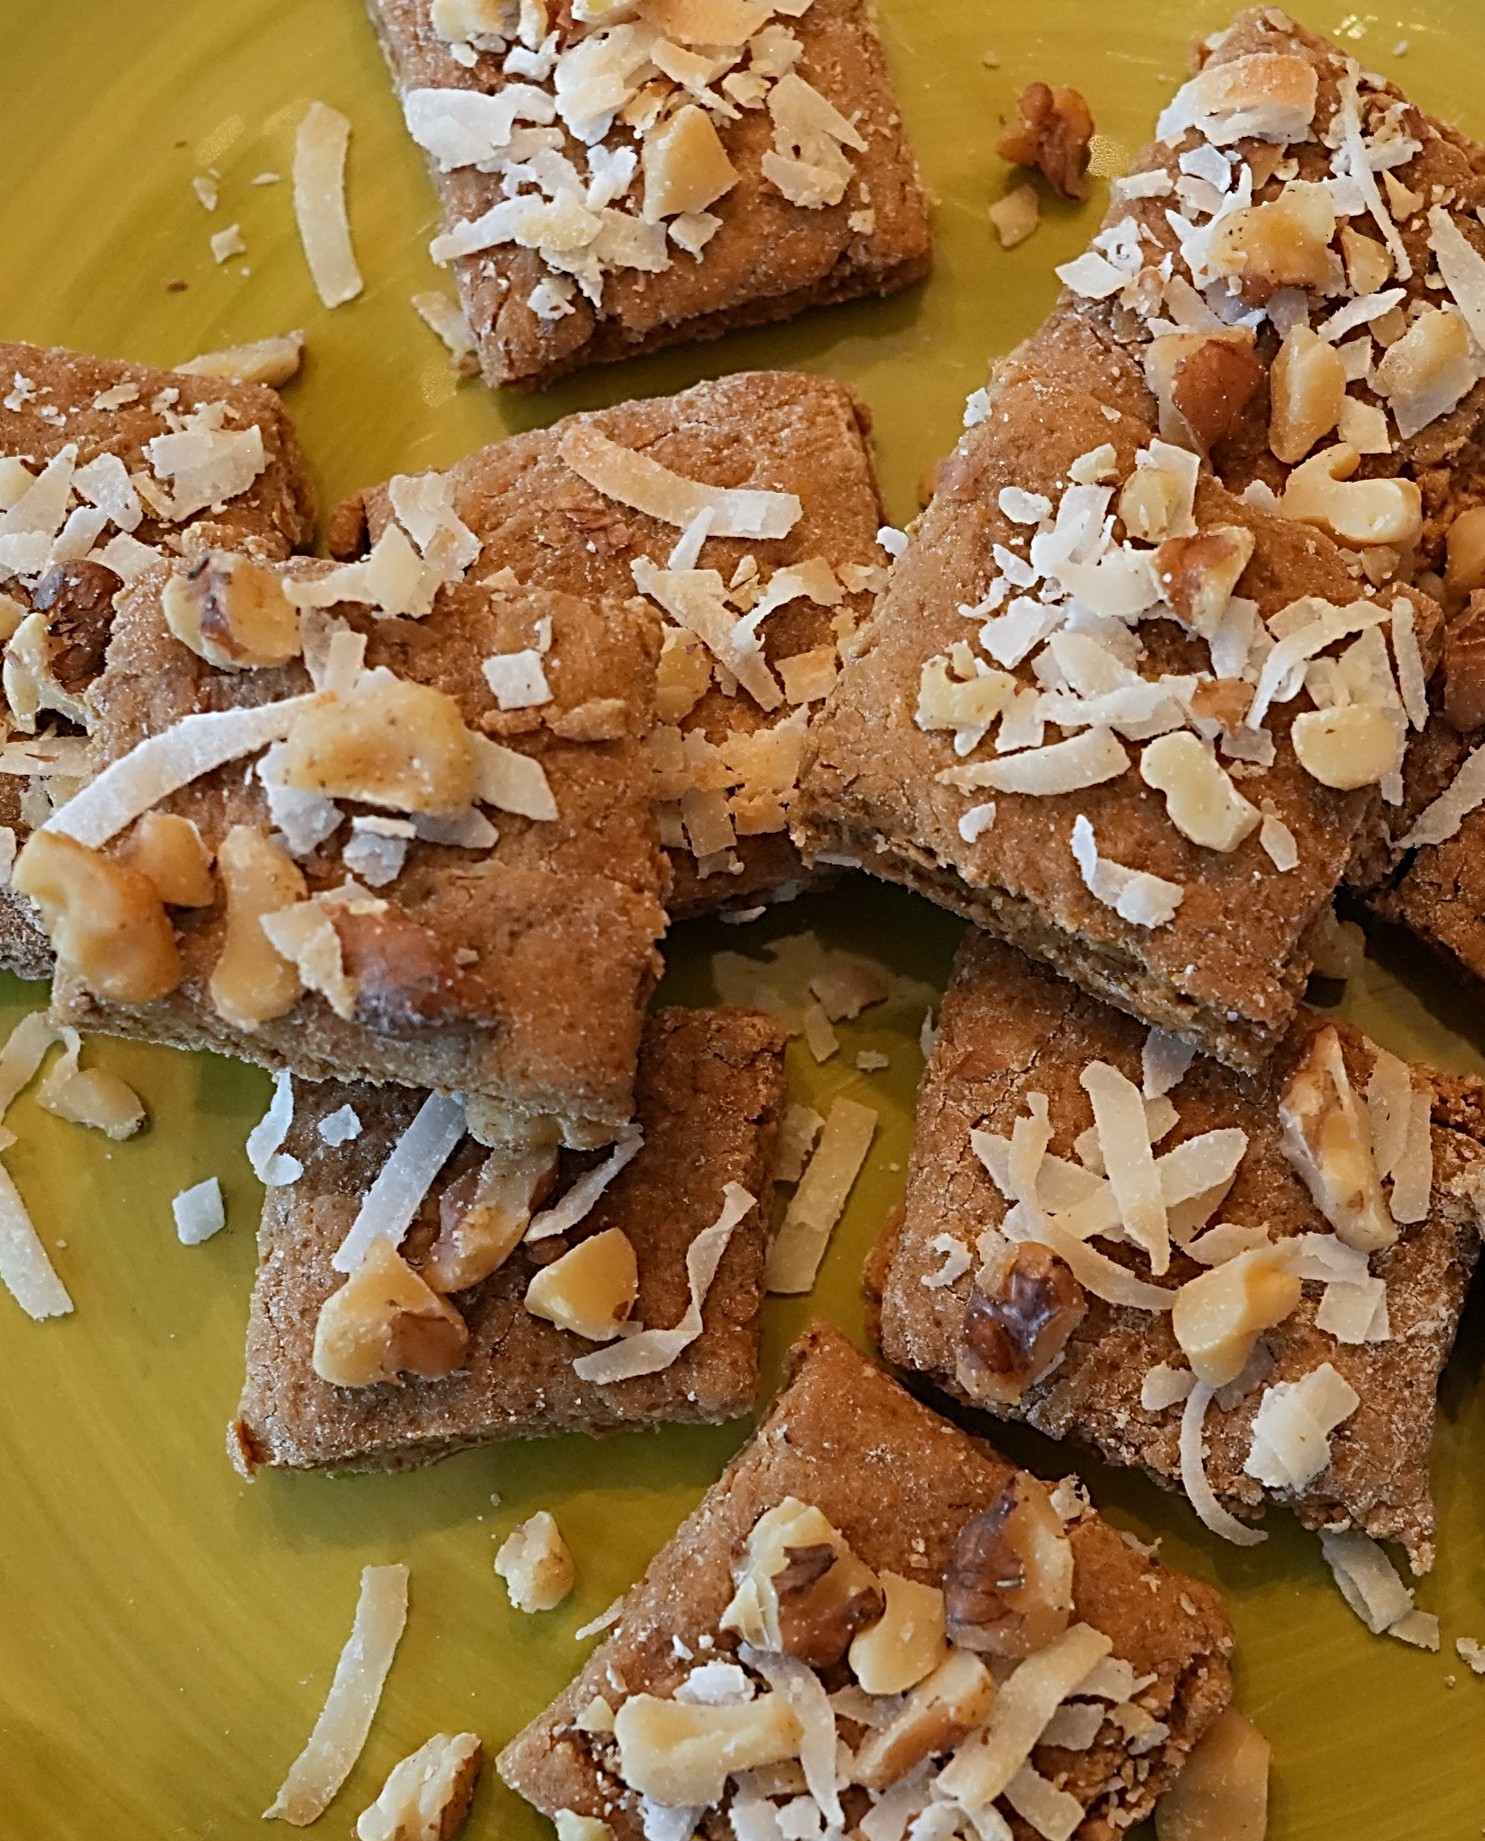
The cookies are a cross between cutout cookies and modern bar cookies. The dough is rolled out, then cut into bars, and topped with coconut and walnuts. They were tasty with just the right amount of spices and molasses.
Here is the original recipe:

English walnuts are just the usual walnuts that are sold commercially. Unless walnuts are specifically labeled as black walnuts, they are English walnuts.
If the butter is softened before making this recipe, the water does not need to be boiling.
The cookie dough was extremely dry, so I added additional water to make it rollable.
I had trouble with the coconut and walnuts not adhering to the bars. To help make the topping stay put, I revised the recipe to say that the rolled cookie dough should be brushed with beaten egg white before the coconut and walnuts are sprinkled on it.
Here’s the recipe updated for modern cooks:
Nut Molasses Bars
1/2 cup butter, softened
1/4 cup water + additional water, if needed
1/2 cup brown sugar
1/2 cup molasses
1 teaspoon baking soda
1/2 teaspoon ground ginger
1/8 teaspoon ground cloves
1 teaspoon salt
3 2/3 cups flour
1 egg white, beaten
1/2 cup coconut
1/2 cup walnuts, chopped
Preheat oven to 350◦ F. Put butter, water, brown sugar, and molasses in a mixing bowl; stir. Add baking soda, ginger, cloves, and salt; stir to combine. Add flour, and stir. If the dough is too dry, add additional water until it holds together. (I had to add about 3/4 cup of additional water). Chill for 1/2 hour. Place the dough on a lightly floured surface. Roll to 1/8 inch thickness. Cut into 3 1/2 inch X 1 inch strips. Brush with egg white, then sprinkle with coconut and walnuts. Press the coconut and the walnuts firmly into the dough. Cut each strip into 3 pieces. Put the pieces on a prepared baking sheet. Bake 12 minutes.


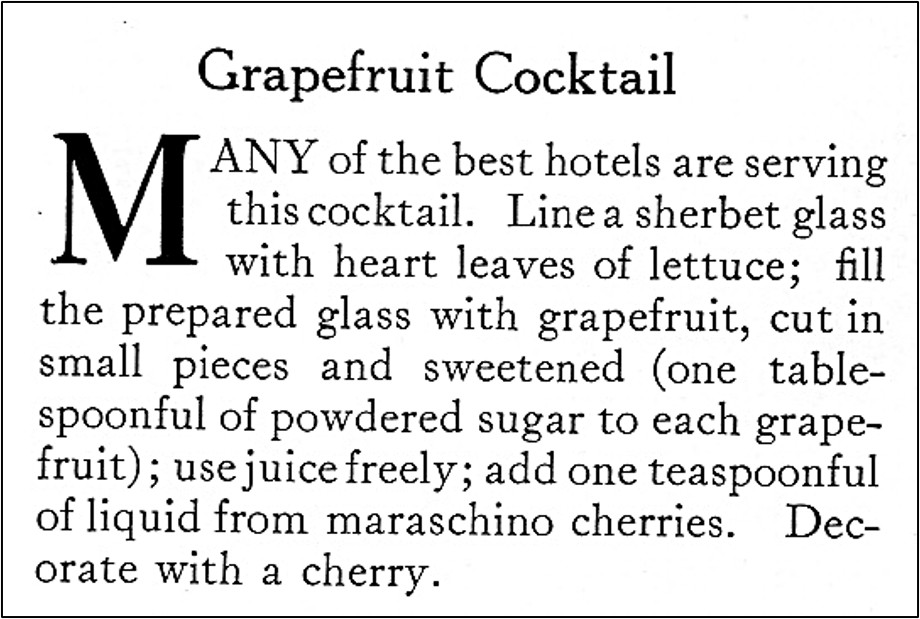
 When caring for a sick child it is important to keep them hydrated and well-nourished. Often a child will eat little while complaining that nothing tastes good. An article on serving food to sick children in the January, 1925 issue of American Cookery began: