Old-Fashioned Pineapple and Lamb Chops

Hundred-year-old cookbooks and magazines often include lamb recipes. Since lamb is so expensive, I seldom choose to make one of those recipes, but last week lamb shoulder chops were on sale at the store where I shop. The price was almost reasonable. I just couldn’t resist and bought some.

Next, I started to look for lamb chops recipes. The one I selected was for Pineapple and Lamb Chops. The recipe was embedded in a 1925 advertisement by the Hawaiian Pineapple Growers Association.  Here’s the original recipe:

Recipe for Pineapple and Lamb Chops
Source: Ladies Home Journal (December, 1925)

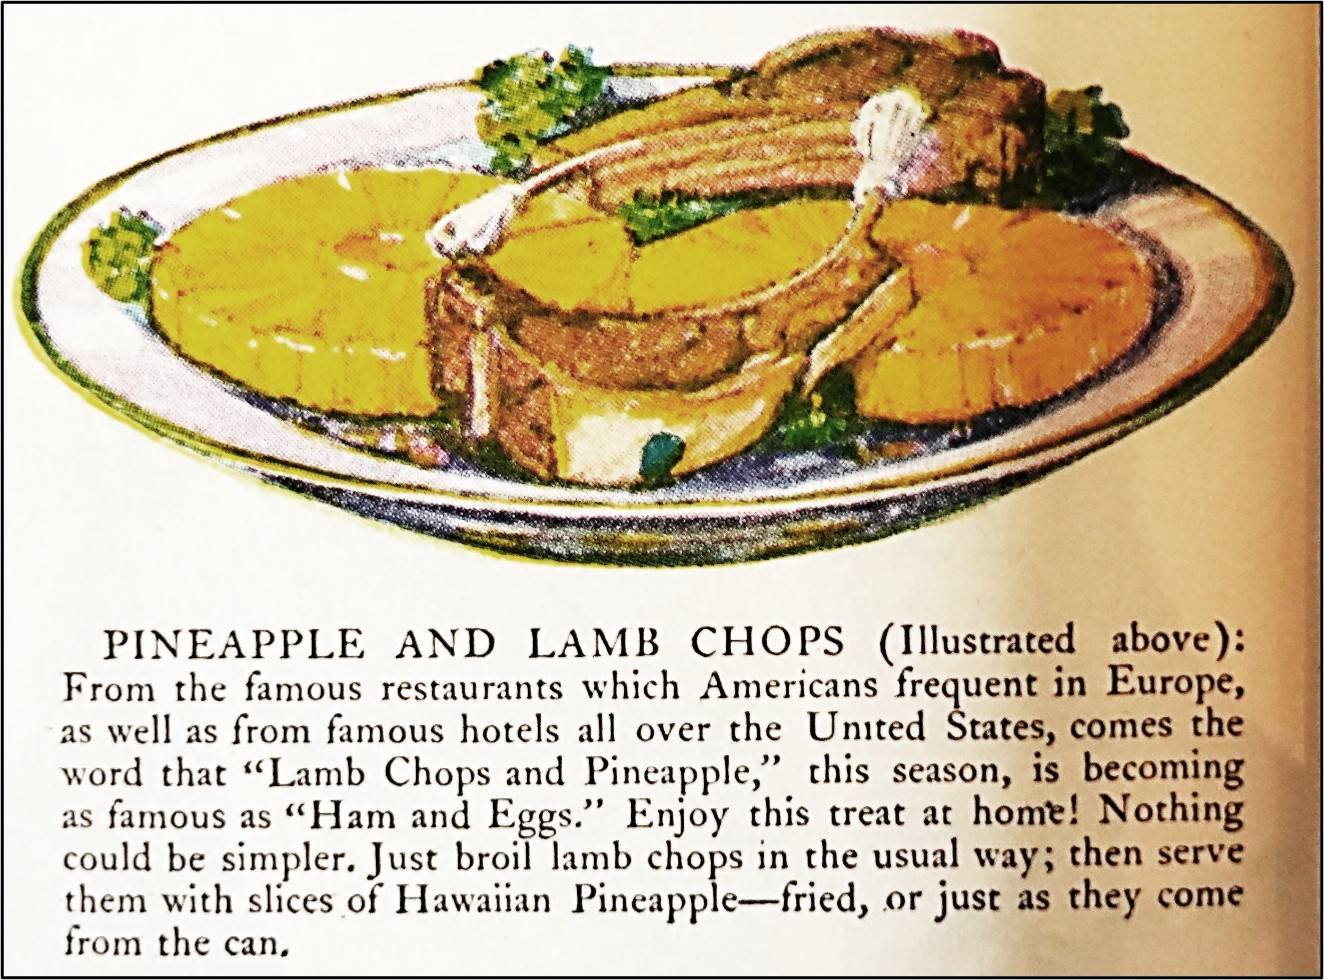
I loved how the recipe author claimed that Pineapple and Lamb Chops were served in famous restaurants and hotels throughout Europe and the United States – and I also loved the simplicity of the recipe. It called for broiling the lamb chops and serving with fried pineapple.

The Pineapple and Lamb Chops were delightful and very tasty. I’m keeping my fingers crossed that the grocery store has another sale on lamb chops very soon.

A hundred-years-ago, lamb was more popular meat in the U.S. than it is now (probably because it wasn’t as expensive back then). In the 1920’s, per capita consumption of lamb was about 5.5 pounds per person; in 2025, it is about 1 pound person. The data for the 1920’s was from a 1948 article in the Southern Economic Journal called Trends in the Per Capita Consumption of Foods in the United States Since 1920. The recent data was from The U.S. Department of Agriculture’s Sheep, Lamb, and Mutton – Sector at a Glance.

A 1925 home economics textbook for high school students included extensive information about lamb, and even contained a picture showing various types of lamb chops:

Various types of lamb chops
Source: School and Home Cooking (1925) by Carlotta C. Greer

Here’s the Pineapple and Lamb Chops recipe updated for modern cooks:

Pineapple and Lamb Chops

  • Servings: 1 (2 lamb chops)
  • Difficulty: easy
  • Print

For each serving (2 lamb chops), the following are needed:

2 lamb chops (loin, rib, shoulder) (I used shoulder lamb chops.)

salt and pepper

2 slices of canned pineapple

butter

Broil or grill lamb chops to desired doneness. Lightly sprinkle with salt and pepper.

In the meantime, melt butter in a skillet. Add pineapple; cook until lightly browned, then flip and lightly brown the other side.

To serve – Arrange the lamb chops and fried pineapple slices on serving plate. The pineapple slices look lovely on top of large lamb chops. For smaller chops, put the pineapple slices beside or under the chops.

http://www.ahundredyearsago.com

Celebrating Halloween a Hundred Years Ago

Halloween parties are the best – and they have been lots of fun for many years ago. Like now, a hundred years ago, people made jack-o-lanterns and decorated their home for Halloween. Back then, the decorations were often homemade rather than the typical purchased decorations used today.

The October, 1925 issue of Good Housekeeping magazine provided party suggestions -and included an image of a centerpiece with a Gingerbread Witch House surrounded by black cats, small jack-o-lanterns, and other spooky figures.

In the early 1900’s, the “trick” part of “trick or treat” was still in play, and people often played tricks on others – and sometimes even did pranks, including “soaping windows” by taking a bar of soap and rubbing it on windows.

More than 14 years ago, I started this blog as a place to post my grandmother’s diary entries exactly one hundred years to the day after she wrote them. She was a teen-ager living on a farm in central Pennsylvania when she wrote the entries. Her diary ended after four years, and I then converted this blog to its current food blog format. Here is what Grandma wrote in her diary about a Halloween party:

At last this old house sees a party. It was fun to see the guests arrive. They were gowned in many crazy ways. One fellow wore a skirt with hoops and looked too silly for anything. We also had a clown, a ghost, and a witch. The rest were dressed in any old way. As for the false faces, they were about as ugly as could be. There were twenty-one in all and made quite a merry company.

As it was Halloween, one of the guests caught it. Someone unhitched his buggy and carted it away, but it was found at last.

Helena Muffly, October 31, 1913

Here are a few posts I’ve done over the years about Halloween foods, decorations, and crafts:

1924 Halloween Dinner Menu

Old-Fashioned Witches’ Layer Cake

Hundred-Year-Old Shrunken Apple Head Witch Craft

Hundred-Year-Old Halloween Bogeyman Craft

Halloween Place Cards

Hundred-Year-Old Halloween Party Invitations

Hundred-Year-Old Halloween Costumes

Ice Cream Served in Orange Jack-o’-Lantern Shells

Old-Fashioned Homemade Crackerjack Candy (Popcorn)

The leaves are turning vibrant shades of red and yellow, the days are getting shorter, Halloween will be here soon, and I’m enjoying autumn comfort foods.  Popcorn is the perfect fall snack food – and popcorn coated with a molasses-flavored caramel coating brings back memories of Halloween gatherings in days gone by. I found a hundred-year-old recipe for Crackerjack Candy, which is popcorn coated with a molasses mixture, and decided to give it a try. It is somewhat similar to the Cracker Jack popcorn snack sold in stores, but does not contain any peanuts.

According to Wikipedia, commercially- packaged Cracker Jack has been around since the late 1800s. And, for almost as many years, there have been recipes for making a similar molasses-flavored popcorn. One such recipe appeared in the December, 1925 issue of Farm Journal. The recipe in the magazine spelled Cracker Jack as one word – Crackerjack, and called the coated popcorn a candy.

The homemade Crackerjack was tasty, and had a rich caramel flavor. Similar modern recipes often call for using corn syrup instead of molasses. The molasses is healthier and more nutritious than corn syrup, but it is also more challenging to use. The key to successfully making this snack is to just lightly coat the popcorn with the molasses mixture. If the coating is thick, the crunchy, chewy texture of the coating can become a bit overwhelming.

Here’s the original recipe:

Recipe for Crackerjack Candy
Source: Farm Journal (December, 1925)

The recipe says that the syrup should be boiled until “it will harden when dropped in cold water.” I interpreted this to mean that it should be cooked until it reaches the hard ball stage (260° F.)

Here’s the recipe updated for modern cooks:

Crackerjack Candy

  • Servings: 8 - 10
  • Difficulty: moderate
  • Print

12 – 15 cups popped popcorn

salt, optional

1 cup molasses

1 cup brown sugar

butter

Put the 12 cups of popped corn in a large bowl and set aside. Be sure to remove any un-popped kernels. If desired, lightly salt the popped corn. (Reserve remainder of the popped corn in case it is needed when combining the syrup with the popcorn.)

Using butter, generously grease a baking sheet or other large pan. Set aside.

Put molasses and brown sugar in a pan; stir to combine, then using medium heat bring to a boil. Reduce heat and gently boil until the syrup reaches 260° F. degrees). This will take approximately 15 to 20 minutes. Remove from heat and immediately pour over the  popped corn in the bowl and stir with the large spoon to coat the popped corn. The coating on the popped corn should just lightly coat it. If the coating is too thick, stir in additional popcorn. Work quickly because the mixture quickly begins to cool.

Spread the coated popped corn on the buttered baking sheet or other large pan. After the coated popcorn cools, break (don’t cut) into small pieces. If  it will not be used immediately, store in a tightly covered container.

http://www.ahundredyearsago.com

1925 Towle Silverware Advertisement


Picture from Towle Silverware Advertisement
Source: Ladies Home Journal (September, 1925)

A hundred-years ago, sterling silver flatware was considered a desirable luxury item, and it was frequently given as a wedding gift. Couples often listed their silver pattern on their wedding registry. They hoped several wedding guests would choose to purchase a place setting or two as a gift, and that they would end up with a full set of the flatware plus some serving pieces.

The September, 1925 issue of Ladies Home Journal had a very wordy two-page advertisement for Towle solid (sterling) silver. Here are some excerpts:

Your lovely trousseau, with its charming gowns and dainty little frocks, its film underthings, and bright stockings, has its few bright months of glory.

And, the furniture and hangings for your new home, however you may lavish care upon them, will inevitably wear out after a few years.

But, your wedding silver – your very own solid silver – you will have that always. So its choice becomes the very most important of all choices because you will want to be as proud of your pattern in twenty years as on your wedding day.

What a fascinating privilege this choice is. What a joyous occasion, when you set out to the jeweler’s.

Watch how proudly the jeweler shows it to you. He knows TOWLE Silver!

TOWLE patterns are permanent

By starting with TOWLE silver, you can make sure of perfect silver harmony, for relatives and friends will undoubtedly want to match your chosen pattern with such charming and useful pieces as sauce and salad-dressing bowls, plates for jellies, candies, sandwiches, cake, fruit, desserts, etc., candle-sticks, trays or a coffee and tea service. They will be glad to know which TOWLE pattern you have selected, and your jeweler can show them a fascinating variety.

Furthermore, in the future, as you need additions to your set, you will always find that matching it is a simple matter, for TOWLE patterns are as nearly permanent as anything in this life can be.

Ladies Home Journal (September, 1925)

Old-Fashioned Molasses Orange Cake

Molasses is an underutilized sweetener. According to Spruce Eats:

It was a very popular sweetener in the United States during the early 20th century, though it’s used less often today.

That’s a pity. Molasses can provide a delightful rich, earthy, sweetness, with hints of caramel, which enhance many foods.

When browsing through hundred-year-old cookbooks and magazines, I often see recipes that call for molasses. I recently came across a recipe for Molasses Orange Cake embedded in a Brer Rabbit Molasses ad in the November, 1925 issue of Ladies Home Journal, and decided to give it a try.

I served this cake to a group of friends. I’m originally from Pennsylvania, and one person said, “Is this one of your Pennsylvania Dutch recipes?”

It’s not, but the cake has the delightful, satisfying, hearty, richness typical of Pennsylvania Dutch desserts.

The cake was moist and flavorful with a hint of orange and nuanced spicy undertones of allspice and ginger. The recipe calls for grated orange peel, which provides bold bursts of citrus. The cake is topped with a light dusting of sugar and cinnamon. This recipe makes an 8-inch square cake. Since the cake is rich, I cut the cake into fairly small pieces and it can easily provide 8 to 10 servings.

Here is the original recipe:

Recipe for Molasses Orange Cake
Source: Ladies Home Journal (November, 1925)

I used butter rather than shortening when making this recipe. I also did not dissolve the baking soda prior to adding it batter. And, I saw no need to strain the juice from the juiced orange, since it only had a small amount of pulp, and the grated orange peel already provided some texture, so a bit more was not an issue.

Here’s the recipe updated for modern cooks:

Molasses Orange Cake

  • Servings: 8 - 10
  • Difficulty: moderate
  • Print

1 orange

1 cup molasses

1/2 cup butter melted

2 eggs

1/2 cup milk

2 cups all-purpose flour

1/2 cup whole wheat flour

1 teaspoon baking soda

1/2 teaspoon allspice

1 teaspoon ground ginger

Topping

2 tablespoons sugar

1/4 teaspoon cinnamon

Preheat oven to 350° F. Grate the peel of the orange using a light touch to minimize the amount of white pith. (I used a box grater.) Set the grated peel aside. Then, cut the orange in half and juice.

Put the orange juice, molasses, melted butter, eggs, milk, all-purpose flour, whole wheat flour, baking soda, allspice, and ginger in a mixing bowl; beat until smooth. Stir in the grated orange peel.

Put the batter in a prepared 8-inch square pan, and put in oven to bake.

While the cake is baking, combine the sugar and cinnamon in a small bowl.

Bake cake for 35 minutes or until a wooden pick inserted in center comes out clean. Remove the cake from the oven and sprinkle the sugar and cinnamon mixture over the top of the cake. Return cake to oven and bake for an additional 5 minutes.

Cake can be served warm or cold.

http://www.ahundredyearsago.com

Harlequin Mason Jar Salad – Reimagining a Classic Salad

A hundred years ago, the jazz age was in full swing with flappers dancing the night away and over-the-top parties. F. Scott Fitzgerald in The Great Gatsby listed the many foods on the buffet table at an elegant party. The list included “salads of harlequin designs.”  I did a post on Harlequin Salad in August. This red and green cabbage salad with beets, carrots, peas, and onions in a vinaigrette dressing is delicious and makes a stunning presentation. Since the salad turned out so well, it is currently featured on A Hundred Years Ago’s header.homepage image A Hundred Years Ago

A friend recently looked at A Hundred Years Ago’s homepage with its Harlequin Salad header, and said, “That picture looks nice, but I’d never make that salad. Now, if you’d made it as a mason jar salad, I might give it a try.”

After mulling over her comment, I was intrigued and decided to try making Harlequin Salad as a mason jar salad.

To be totally transparent, I’m into hundred-year-old recipes, not the latest meal prep trends. That said, I’m glad I pushed myself to rethink Harlequin Salad to a much greater extent than I typically do when updating hundred-year-old recipes. Mason Jar Harlequin Salad was easy to make, attractive, and tasty.

Mason jar salads are very popular. The salad is made in layers with the dressing put in the jar first, then the firmest ingredients, with the most fragile ingredients added last. This prevents the salad from getting soggy. They generally stay fresh for 4 – 6 days. People often make several jars of salad at the same time. Mason jar salads are typically dumped into a bowl or plate to eat.

Mason jar salads are a game changer for many.  They allow weekly meal prep, are cost effective, and provide portion control for those concerned about how much they eat.  And, they are good for the environment because the mason jar can be reused.

I made two jars of my rendition of Harlequin Mason Jar Salad, and ate one of the salads two days later, and the other four days after I made it. The salad looked lovely when I dumped it into a bowl and stirred it a little to get everything coated with the dressing.

Harlequin Mason Jar Salad

  • Servings: 2
  • Difficulty: easy
  • Print

Note: This recipe makes enough salad to fill two 16 oz. mason jars.

STEP 1. MAKE THE VINAIGRETTE DRESSING

Dressing Ingredients

1/3 teaspoon salt

1/8 teaspoon pepper

1/8 teaspoon paprika

1 teaspoon prepared mustard

4 tablespoons olive oil

1 1/2 tablespoons vinegar

Put the salt, pepper, paprika, and mustard in a small bowl; stir to combine. Add the olive oil and stir until mixed. Slowly add the vinegar, a little at a time, while stirring continuously with a fork.

Step 2. LAYER THE SALAD IN THE MASON JARS

Salad Ingredients

Dressing (see above)

1/2 cup cooked carrots, coarsely chopped (cool before layering in jar)

1/2 cup cooked beets, coarsely chopped (cool before layering in jar)

1/2 cup cooked green peas (I used frozen peas that had been thawed.)

1/2 cup onions, chopped

1 cup red cabbage, finely shredded

1 cup green cabbage, finely shredded

Layer the ingredients in the following order in two 16-ounce mason jars: dressing, carrots, beets, peas, onions, red cabbage, green cabbage.  Put half of each ingredient in each jar.

Notes: Be sure the chopped beets are well drained before layering. The red color from the beets will run a little, but it can be minimized by carefully draining them.

This salad is very flexible. Feel free to adjust the amounts of the various ingredients based on personal preference.

Step 3. EAT THE SALAD

When ready to eat, the preferred way is to dump the salad into a bowl to mix the ingredients, though the jar with the salad can be shaken and the salad eaten directly from the jar.

http://www.ahundredyearsago.com

Old-Fashioned Apple Griddle Cakes

Fall is in the air. The trees are turning color, and the nights are getting nippier – and it’s apple season. Apples are so versatile. Biting into a fresh juicy apple is a treat, and they can be used to make tasty salads, side dishes, and desserts. When browsing through a hundred-year-old magazine I came across a recipe for Apple Griddle Cakes and decided to give it a try.

My sense is that griddle cakes and pancakes are interchangeable terms. There may be regional variation regarding which is used.

The Apple Griddle Cakes were delectable. They were light and almost airy with sweet and chewy bits of apple. I started to write that the griddle cakes were light and fluffy, but then I realized that many recipes state that the recipe makes “light and fluffy” griddle cakes. This recipe is different from most because it calls for separating the eggs, beating the egg whites, and then folding them into the griddle cake batter. Most modern recipes just call for adding the entire egg with all the other ingredients.

Most apple recipes today call for cinnamon; however, the old recipe did not call for using any. This allowed the natural sweet and tangy flavor of the apples to be more prominent in the griddle cakes.

Another difference between this recipe and other griddle cake recipes is that it calls for small pieces of torn bread (bread crumbs) that have been soaked in milk. A hundred years ago, cooks didn’t want to waste food, and this recipe was a way to use stale bread (or bread crusts).

Here is the original recipe:

apple griddles cakes on plate
Source: Ladies Home Journal (November, 1925)
recipe for Apple Griddle Cakes
Source: Ladies Home Journal (November, 1925)

This recipe was included in an advertisement for Crisco. (Yes, Crisco has been around for more than a hundred years, though the ingredients have been tweaked several times over the years.). When I updated the recipe, I used melted butter instead of the Crisco.

A hundred years ago, this recipe probably was a good way to use stale bread that was very dry and firm, so the bread crumbs may have needed to soak overnight to soften. However, I decided to use some whole wheat bread that I recently purchased. I just tore up several slices of the bread and soaked it in the milk. It did not take more than a few minutes for the bread to become mushy. I did not heat the milk. After the bread softened, I just used electric beaters to turn it into a paste.

One large apple made approximately one cup of chopped apples.

Here’s the recipe updated for modern cooks:

Apple Griddle Cakes

  • Servings: 4 - 5
  • Difficulty: moderate
  • Print
apple griddle cakes on plate

2 cups bread, torn into small pieces

2 cups milk

2 eggs, separated

1 tablespoon butter, melted

1 tablespoon sugar

1/2 teaspoon salt

2 teaspoons baking powder

1 cup flour

1 cup chopped apples (1 large apple)

Put the bread crumbs into a bowl and pour the milk over them. Let the bread soak until it is soft and mushy. This will only take a few minutes in many cases; it may take up to several hours if the bread is extremely stale and dry.)

In the meantime, put the egg whites in a bowl and beat until stiff peaks form. Set aside.

Once the bread crumbs have softened, beat the bread and milk mixture with electric beaters to make a paste. Add the egg yolks, butter,  sugar, salt, and flour; beat until thoroughly mixed. Gently fold in the beaten egg whites; then, using a fork, stir in the chopped apples.

Heat a lightly greased griddle or skillet to a medium temperature, then pour or scoop the batter onto the hot surface to make individual pancakes.  Cook until the top surface is hot and bubbly, and then flip and cook other side.

http://www.ahundredyearsago.com