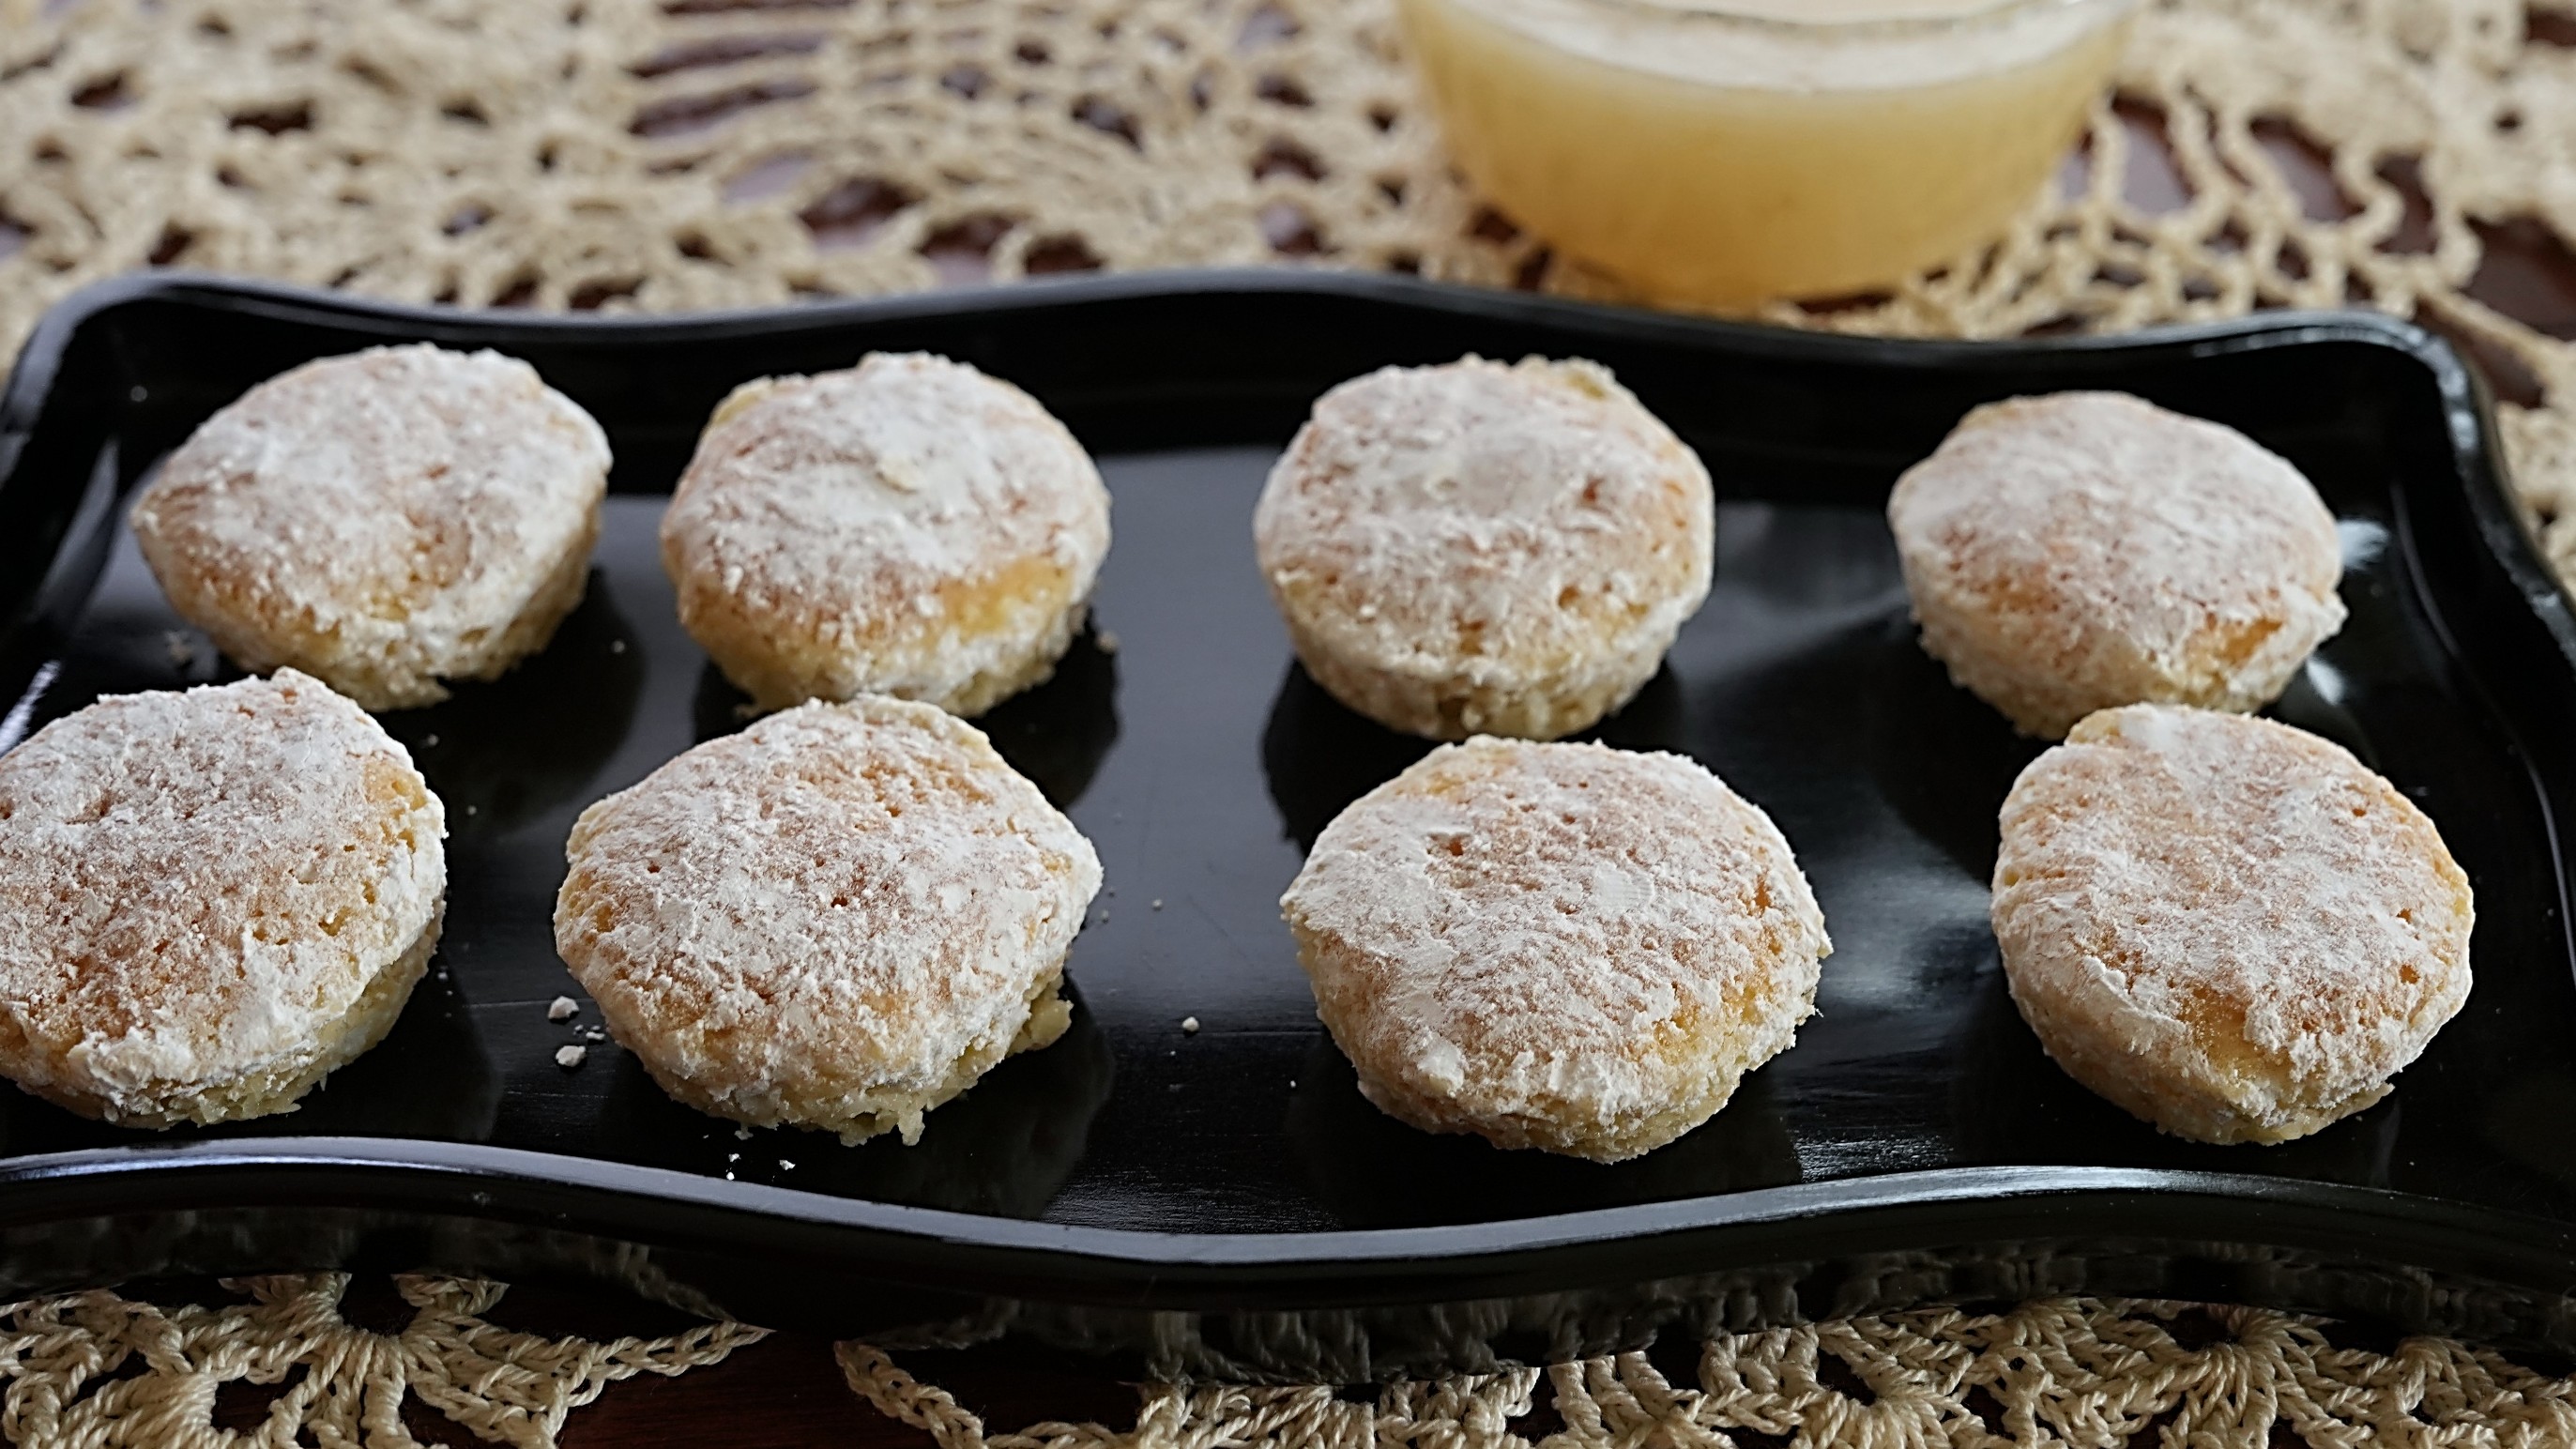
A hundred years ago alcohol was prohibited in the United States. The prohibition era went from 1920 to 1933. Cookbooks published during that time period seldom contain recipes that call for alcohol, but there are recipes for lots of nonalcoholic drinks. I recently came across a recipe for Dry State Punch in a 1925 cookbook. I was intrigued, and decided to give it a try.
I made this recipe on a 90° day and it was delightful. It’s a perfect summer drink. The Dry State Punch was zesty and refreshing. It contains grapefruit juice, orange juice, lemon juice, and pineapple juice.
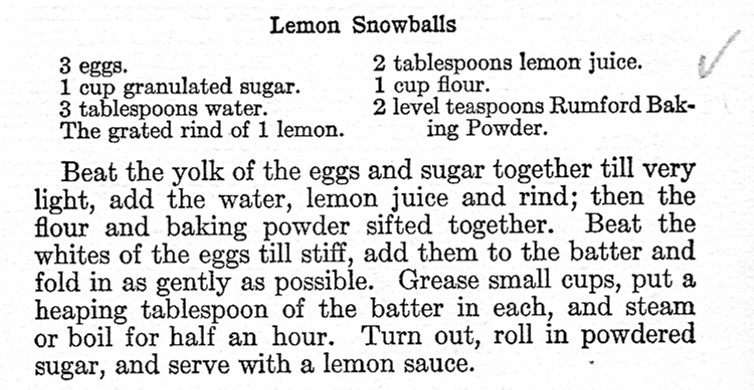
Here’s the original recipe:
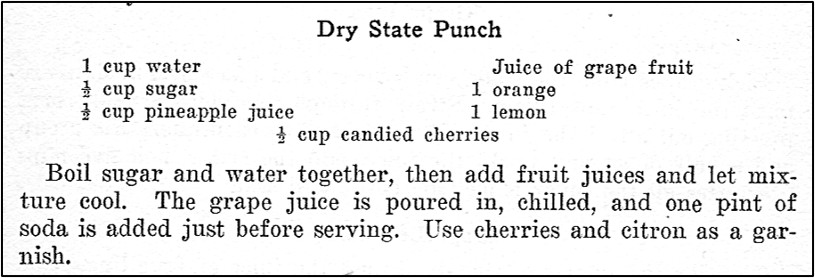
It is a little confusing how the list of ingredients calls for “juice of grape fruit,” but the directions call for adding “grape juice.” I decided to go with grapefruit juice, but am not absolutely certain that is what the recipe author intended. I added all the fruit juices to the sugar syrup while it was still hot, and did not wait until it cooled to add the grapefruit juice.
I used lemon-lime soda when I made this recipe. Either candied cherries or Maraschino cherries would work as a garnish. Citron is listed as a garnish in the directions, but I didn’t use it.
I didn’t fresh-squeeze either the grapefruit or orange juice, but rather used juice that I bought at the store. I did an online search and found out how much juice a typical grapefruit and orange contain, and then went with that amount. For the pineapple juice, I opened a can of pineapple chunks and poured the juice off and used it. (I did squeeze the lemon to get the lemon juice.)
Here’s the recipe updated for modern cooks:
Dry State Punch
1 cup water
1/2 cup sugar
1/2 cup pineapple juice
juice of 1 grapefruit (about 3/4 cup)
juice of 1 orange (about 1/3 cup)
juice of 1 lemon (about 3 tablespoons)
2 cups lemon-lime soda (Sprite, 7-up, etc.)
candied or Maraschino cherries
Put the sugar and water in a saucepan, bring to a boil using medium heat. Remove sugar syrup from the heat, and add the grapefruit juice, orange juice, and lemon juice. Chill. Just before serving, add lemon lime soda. Garnish with cherries.


 I have way too many kitchen utensils with a disorganized drawer filled with soup ladles, spatulas, a pizza cutter, a can opener, plastic and wooden mixing spoons, knives, vegetables peelers, a nutcracker with nut picks, a meat thermometer, and much more. And, that’s just the beginning. I also have a plastic container on a shelf in a bottom cupboard filled with less used kitchen utensils, while my least used utensils are stashed in a box in the basement. A hundred-year-old cookbook stressed the importance of having a few good utensils (and not having a plethora of seldom used ones):
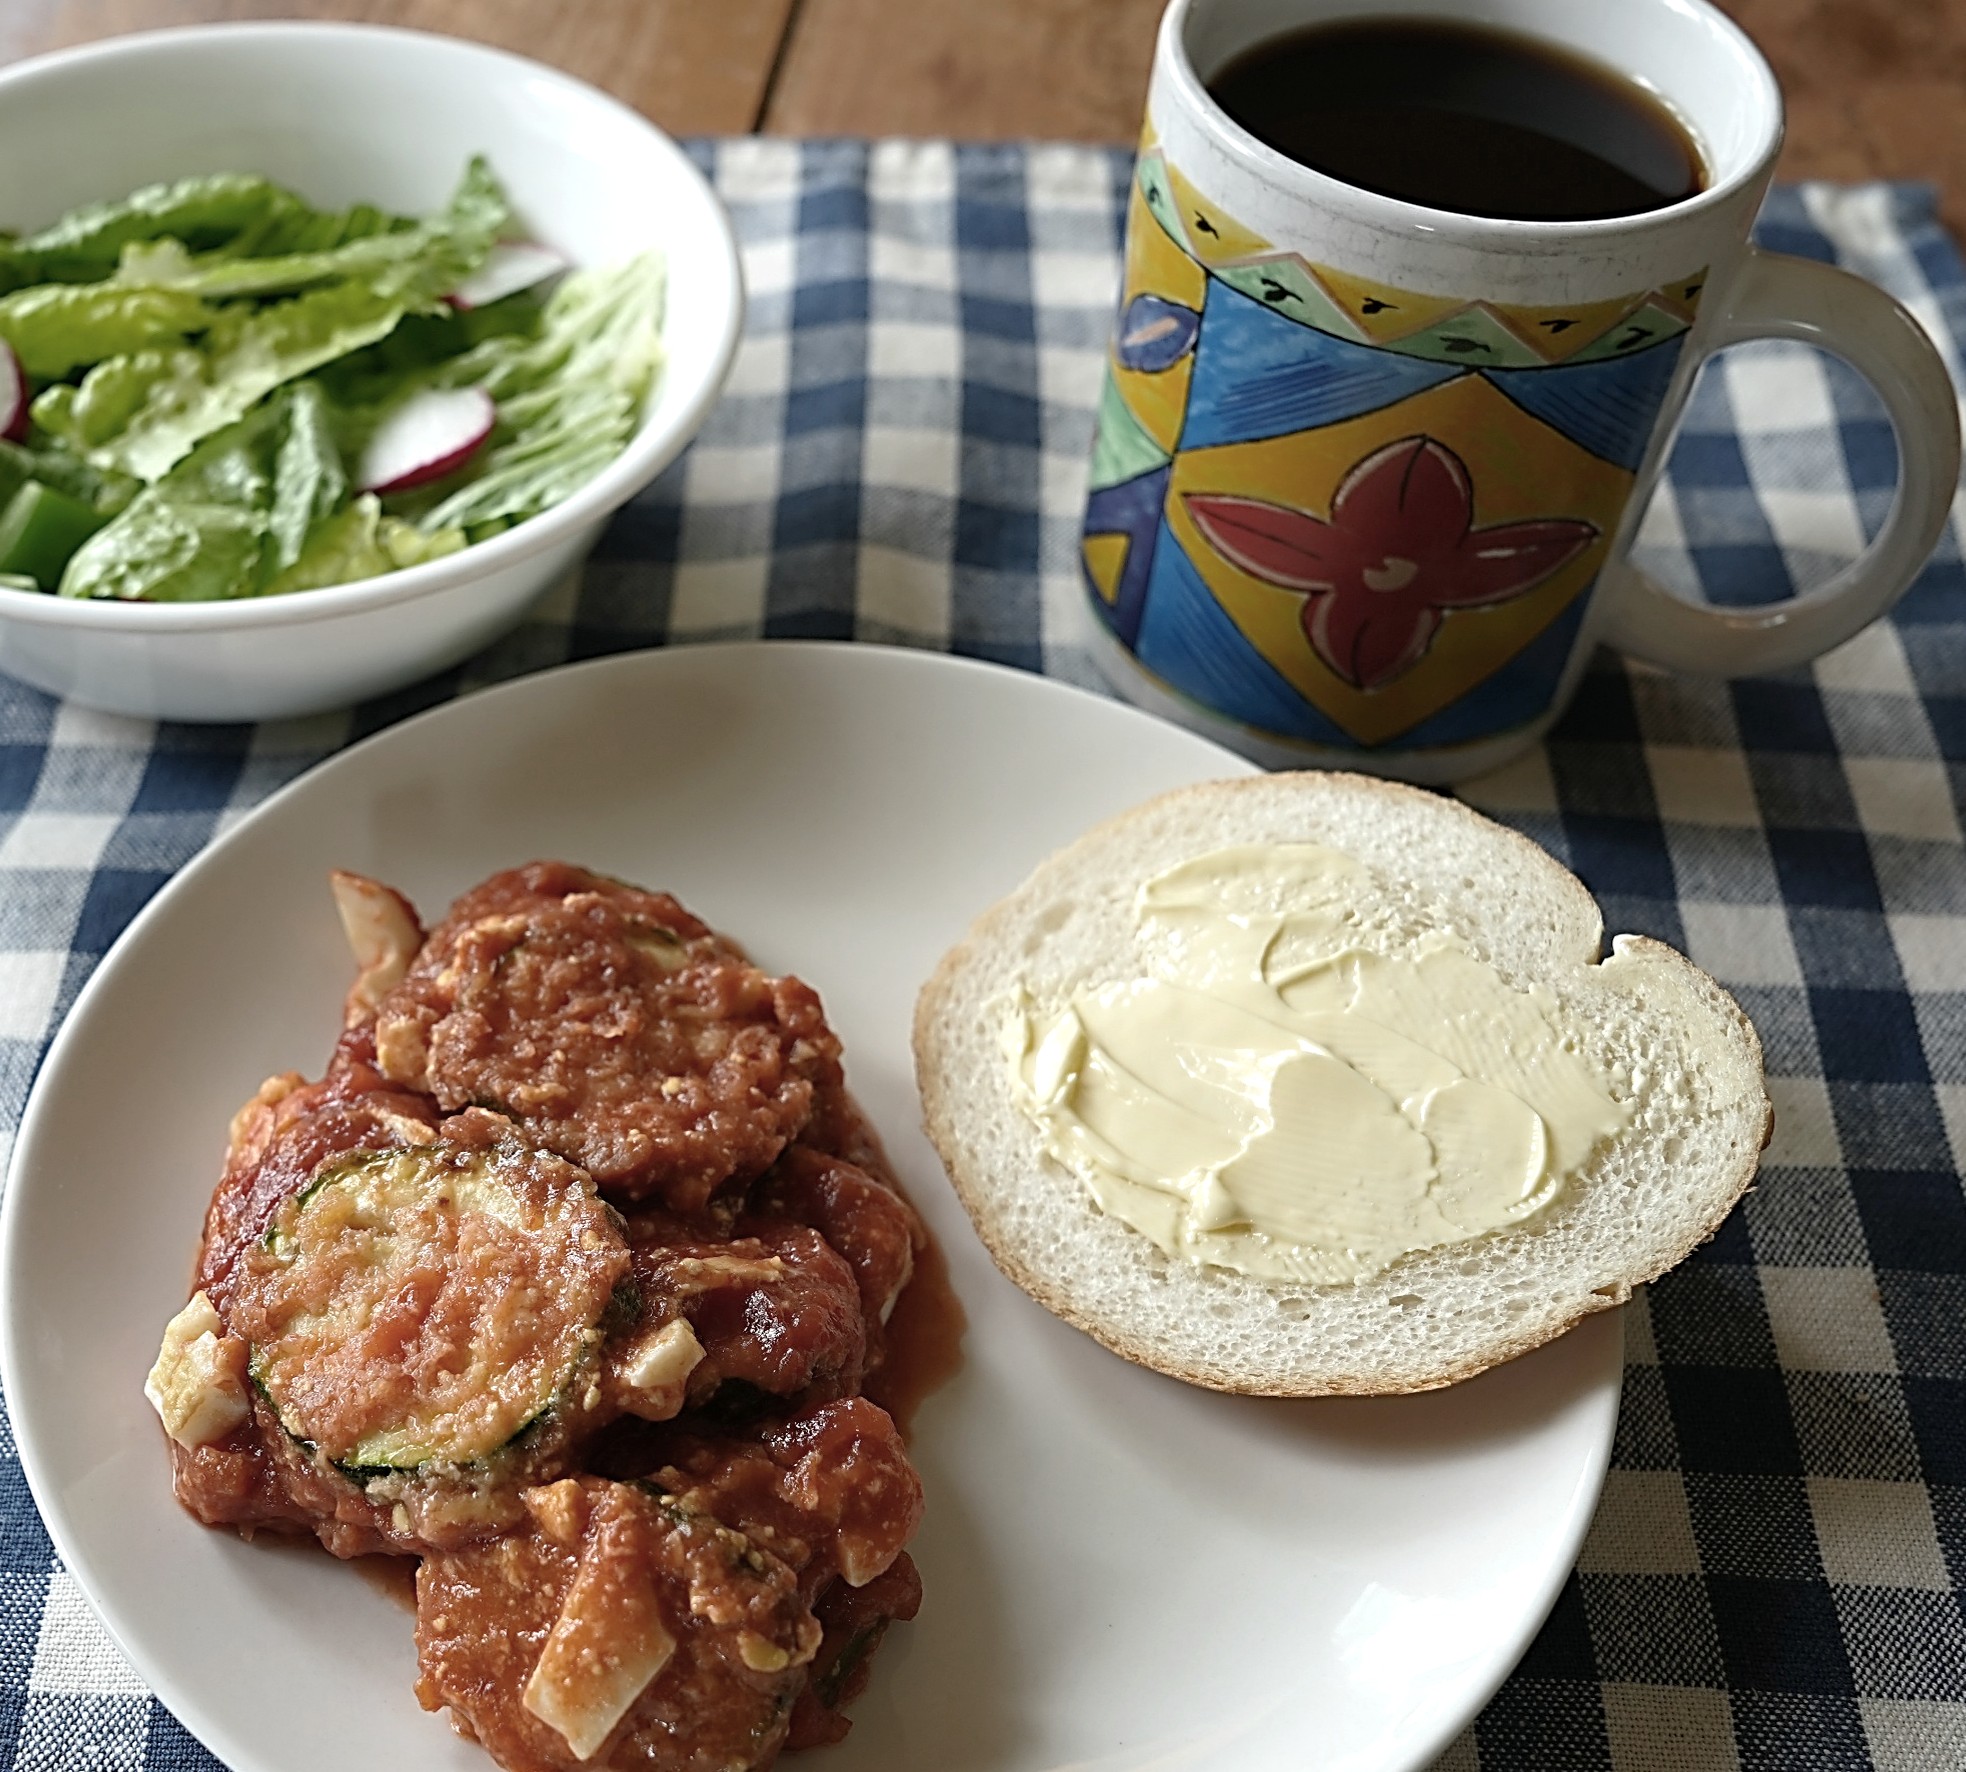

.jpg")