Fig and Cranberry Pie

slice of fig and cranberry pie

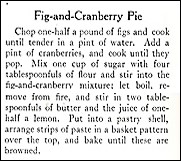
I’m always on the lookout for new pie recipes that I might make for Thanksgiving, and fresh, seasonal cranberries are one of my favorite November foods. So when I saw a hundred-year-old recipe for Fig and Cranberry Pie, I decided to give it a try.

The pie turned out beautifully with a lovely purple filling. The sweetness of the figs and the tartness of the cranberries perfectly balanced each other. If you didn’t tell your holiday guests which fruits were in the pie, I don’t think that they’d ever guess. My husband said that the pie wasn’t too sweet and it wasn’t too sour, but (ala Goldilocks) it was just right.

The recipe is a keeper.

Here’s the original recipe:

Recipe for Fig and Cranberry Pie
Source: American Cookery (November, 1921)

Here’s the recipe updated for modern cooks:

Fig and Cranberry Pie

  • Servings: 6 - 8
  • Difficulty: moderate
  • Print

1/2 pound (8 ounces) figs, chopped

2 cups water

2 cups cranberries

1 cup sugar

1/4 cup flour

2 tablespoons butter

juice from 1/2 of small lemon

milk

sugar

pastry for 2-crust 10-inch pie (It might possibly fit in a 9-inch pie shell, but it would be really full.)

Put chopped figs and water in a saucepan. Bring to a boil using high heat, then reduce heat and simmer until the figs are tender (about 15 minutes). Add the cranberries and continue cooking until the cranberries pop.

In the meantime, put the sugar and flour in a small bowl, and stir until combined.

Once the cranberries have popped, gradually add the flour and sugar mixture while stirring constantly. Continue cooking and stirring until the mixture comes to a boil. Remove from heat and stir in the butter and lemon juice.

Preheat oven to 425° F. Turn cooked fig and cranberry mixture into pastry-lined pie pan. Cut the second pie dough circle into strips and make a lattice top crust and flute edges. Brush crust with a small amount of milk; sprinkle with sugar.  Bake in oven for 10 minutes; then reduce heat to 350 degrees. Bake an additional 20 to 30 minutes or until crust is lightly  browned and juice just begins to bubble.

http://www.ahundredyearsago.com

Macedoine of Vegetables a la Poulette

Macedoine of Vegetables a la Polette in dish

A few recipes in the 1921 edition of The Boston Cooking-School Cook Book have French names. One of those recipes is Macedoine of Vegetables a la Poulette. After googling the words in the name, I think that it roughly translates into cut vegetables in a creamy sauce. In any case, this is a nice recipe for an attractive vegetable mixture containing matchstick-sized pieces of carrots and turnips, as well as peas, in a rich sauce made with chicken broth and cream.

Here’s the original recipe:

Recipe for Macedoine a la Poulette
Source: The Boston Cooking-School Cook Book (1921 Edition)

And, here’s the recipe updated for modern cooks:

Macedoine of Vegetables a la Poulette

  • Servings: 5 - 7
  • Difficulty: moderate
  • Print

1/2 cup turnips cut into matchstick-sized pieces (about 1 medium turnip)

1 1/4 cups carrots cut into matchstick-sized pieces (about 3 medium carrots)

1 1/4 cups peas

3 tablespoons butter

3 tablespoons flour

1 cup chicken broth

1/2 cup cream

2 egg yolks, slightly beaten

1 1/2 teaspoons lemon juice

salt  and pepper

Cook each of the vegetables (carrots, turnips, peas) in a separate pan; cover each vegetable with water (add salt to water if desired), bring to a boil, reduce heat and cook until tender. Drain vegetables.

In the meantime, melt butter in another pan. Stir the flour into the butter. While stirring constantly, slowly pour in chicken broth and cream, and bring to a boil over medium heat. Add the vegetables. Reheat until the sauce comes back to a boil while stirring gently. While continuing to gently stir, add lemon juice and egg yolks. If desired, add salt and pepper to taste. When the added ingredients are combined into the sauce, remove from heat and serve.

http://www.ahundredyearsago.com

Old-fashioned Rye Gems (Rye Muffins)

Rye Gems (Muffins) on Plate

Some ingredients languish in my pantry during the summer months, and then, as the weather cools, I again begin to regularly use them. Rye flour and molasses are two such ingredients. I hadn’t used either in months, but when I came across a hundred-year-old recipe for Rye Gems (Muffins) that called for both ingredients, I just had to try it.

The rustic sweetness of the molasses merges beautifully to create a hearty muffin. The Rye Gems make a nice dinner muffin. I served them with butter. They nicely complemented the roast beef and baked winter squash that I served with them.

Here’s the original recipe:

Recipe for Rye Gems (Muffins)
Source: The Boston Cooking-School Cook Book (1921 Edition)

Gem pans traditionally were made of cast iron, but I just used my usual muffin pans and it worked fine.

Here’s the recipe updated for modern cooks:

Rye Gems (Rye Muffins)

  • Servings: approximately 24 muffins
  • Difficulty: easy
  • Print

1 2/3 cups rye flour

1 1/3 cups flour

4 teaspoons baking powder

1 teaspoons salt

1/4 cup molasses

1 1/4 cup milk

2 eggs

3 tablespoons melted butter

Preheat oven to 400° F. Sift together rye flour, flour, baking powder and salt. Add molasses, milk, eggs, and melted butter; stir to combine. Grease gem pans (muffin pans), and then fill each gem 3/4th full with batter. Bake for approximately 20 – 25 minutes or until an inserted wood pick comes out clean.

http://www.ahundredyearsago.com

Old-fashioned Baked Pears

baked pears

Pears are a wonderful Fall fruit that often get overshadowed by apples, so I was pleased to find a hundred-year-old recipe for Baked Pears. The pear halves were easy to make and very tasty. The Baked Pears were coated with a buttery brown sugar sauce.

I was surprised how little sauce this recipe made – just enough to coat the pear halves. There was not enough to spoon extra over the pears when serving. I did not really miss the extra sauce, but extra sauce would have made a nice presentation.

Here’s the original recipe:

Recipe for Baked Pears
Source: The New Cookery (1921) by Lenna Frances Cooper

I skipped the whipped cream when I made this recipe.

Here’s the recipe updated for modern cooks:

Baked Pears

  • Servings: 8
  • Difficulty: easy
  • Print

8 pears (Use pears that are ripe, but still firm.)

1/2 cup brown sugar

2 tablespoons butter

whipped cream (optional)

Preheat oven to 350° F. Cut the pears in half lengthwise, and then core the pears. Arrange the pear halves in a large baking dish (such as a lasagna dish or a rectangular cake pan). Sprinkle each pear (2 halves) with one tablespoon sugar, and dot each half with 2 or 3 small pieces of butter. Place in oven and bake until tender (about  30-35 minutes). Increase heat (425° F.) to lightly brown the pears. (The pears can be browned using the broiler, if a dish is used that can go under the broiler.)

Remove from oven. Best when served warm. If desired, serve with whipped cream.

Smaller versions of this recipe could easily be made. For each pear, just use a tablespoon of brown sugar, and a little butter.

http://www.ahundredyearsago.com


Old-fashioned Jelly Omelet

Jelly Omelet on plate

I’m always looking for looking for nice breakfast foods, so decided to try a hundred-year-old recipe for Jelly Omelet. For the omelet, the eggs are separated and the whiten beaten, which results in a light and fluffy omelet. I’ve seen many recipes in old cookbooks that call for beating the egg whites when making an omelet, and I’ve previously made several of them – and they always turn out wonderfully.  By comparison modern omelets seem heavy. Modern recipes seldom call for beating egg whites. I can’t figure out why the older method of making omelets seems to have largely been lost over time.

To make a Jelly Omelet, the cooked eggs are spread with jelly prior to folding to make the omelet. I used currant jelly – though other jams, jellies, or marmalades could be used. The sweet tartness of the currant jelly was a nice complement to the eggs.

This recipe is a keeper, and I anticipate that I’ll make it again. I have lots of jellies that I made last summer, and this is a tasty way to use some of the jelly.

Here is the original recipe:

Recipe for Jelly Omelet
Source: The Boston Cooking-School Cook Book (1921 Edition)

I did not garnish with a “thin white sauce.”

Here’s the recipe updated for modern cooks:

Jelly Omelet

  • Servings: 2
  • Difficulty: moderate
  • Print

4 eggs, separated

1/4 teaspoon salt

1 tablespoon sugar

4 tablespoons hot water

1 tablespoon butter, melted

jam, jelly, or marmalade

additional sugar to sprinkle on top of omelet (optional)

Preheat oven to 375° F. Place egg whites in a bowl, and beat the egg whites until they form stiff peaks. Set aside.

In another bowl, whisk the egg yolks, then stir in the salt, sugar, hot water, and melted butter. Fold in the beaten egg whites.

Heat a large oven-proof skillet (or use an omelet pan) on the top of the stove using medium-low heat. (If needed to prevent sticking, liberally grease the skillet before heating.) Pour the egg mixture into skillet, and gently cook for 1 minute. Turn the pan 90° to help ensure that the omelet cooks evenly, and gently cook for another minute. Then move the skillet to the oven, and bake for about 8 – 10 minutes or until the egg mixture is set. Remove from oven, and loosen the edges of the omelet from the skillet with a knife or spatula, then turn onto a plate. Thickly spread jam, jelly, or marmalade onto one half of the omelet, and then fold in half. If desired, sprinkle sugar on top of the omelet. Serve immediately.

http://www.ahundredyearsago.com

Old-fashioned Spider Cornbread

Piece of Spider Cornbread on plate with additional cornbread in background in skillet
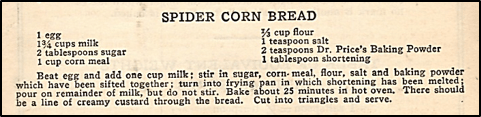
I was intrigued by a recipe for Spider Cornbread in a hundred-year-old cookbook. What an unusual name! After doing a little research, I discovered that Spider Cornbread is a regional food that is eaten in New English and some other sections of the U.S.

Spider Cornbread has a creamy middle layer that is made by pouring milk on top of the batter after the has been poured into the skillet that will be used to cook the cornbread.

The verdict: The Spider Cornbread was tasty, though the creamy layer wasn’t very thick.  I baked the Spider Cornbread in a 12-inch cast iron skillet. If I made it again, I’d use a slightly smaller skillet – maybe a 10-inch skillet. This would result in a thicker cornbread and  a thicker creamy layer.

Here is the original recipe:

Recipe for Spider Corn Bread
Source: The New Dr. Price Cook Book (1921) published by the Price Baking Powder Factory

Is “cornbread”, one word or two? I think that it’s one word, but see that the old recipe makes it two words – corn bread. Maybe the two word version is an older way of writing cornbread.

When I made this recipe, I reduced the salt by a small amount, and used 3/4 teaspoon rather than the 1 teaspoon called for in the original recipe.

Here’s the recipe updated for modern cooks:

Spider Cornbread

  • Servings: 6 - 8
  • Difficulty: moderate
  • Print

1 tablespoon shortening

1 egg

1 cup milk + 3/4 cup milk

2 tablespoons sugar

1 cup cornmeal

1/3 cup flour

3/4 teaspoon salt

2 teaspoons baking powder

Preheat oven to 400° F. Grease a 10 – 12 inch cast iron skillet; with the shortening; then put skillet into oven while it is preheating.

In the meantime, put egg in mixing bowl and beat; add 1 cup milk and beat. Add sugar cornmeal, flour, salt, and  baking powder; beat to combine. Remove skillet from oven and pour batter into it. Pour the remaining 3/4 cup of milk on top of the batter, but do not stir. Return skillet to oven, and bake for approximately 25 minutes. When a wooden pick inserted in the center comes out clean, the cornbread is done. Removed from oven and cut into triangles.

http://www.ahundredyearsago.com

Old-fashioned Apple and Celery Salad

Celery and Apple Salad in dish

I always enjoy Waldorf Salad, so was intrigued by recipe for Apple and Celery Salad in a hundred-year-old cookbook. It seemed very similar to Waldorf Salad – but with fewer ingredients (just apples and celery). I wondered, would I miss the nuts and raisins in the typical Waldorf Salad?

The verdict- Apple and Celery Salad was nice, but I prefer Waldorf Salad with the added crunchiness and sweetness of the nuts and raisins.

Here’s the original recipe:

Recipe for Celery and Apple Salad
Source: The New Cookery (1921) by Lenna Frances Cooper

I went with the mayonnaise option when I made this recipe, and I did not garnish with lettuce. (Exactly how do you garnish with lettuce?) I also did not peel the apples. To be totally honest, I somehow failed to notice that the apples were supposed to be peeled until I started writing this post. When I made this recipe, I was in a hurry and just glanced at the recipe, and thought that this would be an easy recipe because it was Waldorf Salad minus half the ingredients. I should have read it more carefully. The salad would be different (and less colorful) if the apples had been peeled.

And I also failed to notice that I was supposed to marinate the apple pieces in lemon juice – but we ate the salad soon after I made it, so the apples didn’t discolor. (I think that coating them with mayonnaise also slows discoloration).

I used just enough mayonnaise to coat the celery and apple pieces (about 1/2 – 2/3 cup).  I previously made the Golden Salad Dressing recipe that is listed in this recipe when I made another recipe from this cookbook: Pineapple and Strawberry Salad with Golden Dressing. Golden Salad Dressing recipe can be found in that post.

I’m now realizing that I barely made the original recipe for Apple and Celery Salad – and am fascinated that I somehow failed to do so many things quite right with such a simple recipe. I guess it’s a lesson learned about carefully reading directions even for the easiest recipes. That said, the recipe turned out well, so the updated recipe for modern cooks is based on how I made it..

Here’s the recipe updated for modern cooks:

Apple and Celery Salad

  • Servings: 5 - 7
  • Difficulty: easy
  • Print

2 cups chopped apples (about 1/2 inch pieces) –The apples can be either peeled or not peeled.

2 cups chopped celery (about 1/2 inch pieces)

1/2 – 2/3 cup mayonnaise

Combine apple and celery pieces; stir in enough mayonnaise to lightly coat the pieces.

http://www.ahundredyearsago.com