

I’m a black walnut aficionado The bold, rich taste of black walnuts is lovely in candies and baked goods. And, as a bonus black walnuts are quite nutritious. They are a good source of vitamin E and iron, and have lots of protein. They also contain “good” polyunsaturated and monounsaturated fats that can help reduce “bad” cholesterol.
Black walnuts are seldom sold in stores, so each autumn I scope out black walnut trees on nearby public property, and then forage the walnuts. I then hull the walnuts (and walk around for at least a week afterwards with walnut-stained hands), and then spread the hulled nuts out on newspapers to dry for several months.
A couple days ago my husband and I began to crack the walnuts, and then to pick the nut meats out, which is a challenge in itself. I swear that black walnuts are the most difficult nuts (except for maybe hickory nuts) to crack.
Now that I had the shelled nuts, I was ready to begin baking with them. I selected a hundred-year-old nut bread recipe. Any type of nuts could be used in the recipe–but black walnuts would have commonly been used in the early 1900s.
The Black Walnut Bread was easy to make, and it was a taste treat with the embedded, robust, savory pieces of black walnut. This recipe is a keeper.
Here is the original hundred-year-old recipe:

Here’s the recipe updated for modern cooks:
Black Walnut Bread (Nut Bread)
4 cups flour
1/2 cup sugar
4 teaspoons baking powder
1 teaspoon salt
1 egg, slightly beaten
1 1/2 cups milk
1 cup black walnuts, chopped (or other type of nut)
Preheat oven to 350° F. Grease two loaf pans. Put the flour, sugar, baking powder, and salt into a mixing bowl, and stir to combine. Add egg and milk, and stir just enough to blend the ingredients. Add the black walnuts, and gently stir to spread the nuts throughout the batter. Pour into the greased pans. Bake about 40 minutes or until a toothpick inserted in the bread comes out clean.
I couldn’t figure out why the old recipe said that after the batter was poured into the loaf pans that they should “stand aside to raise twenty minutes” before baking. Since this recipe called for baking powder (and not yeast), it didn’t seem like it needed to rise prior to baking so I ignored that step.


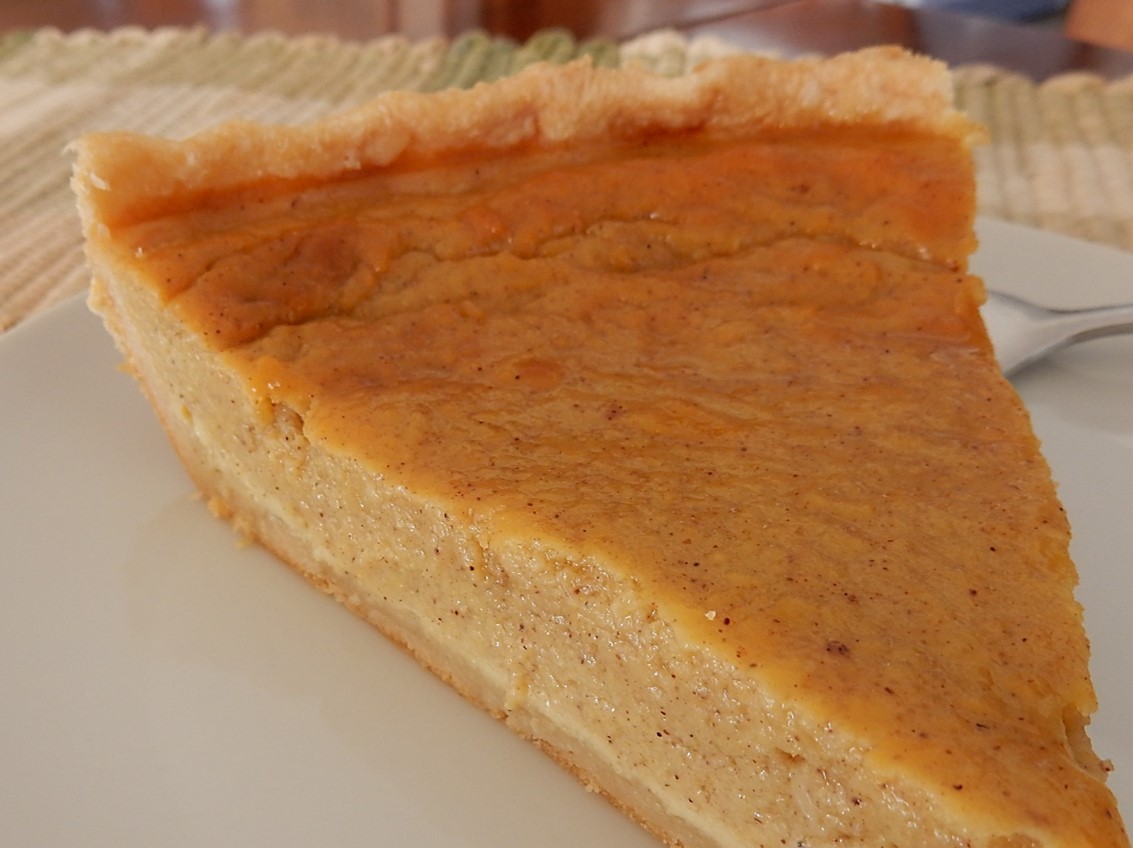


I used fresh pumpkin, but 1/2 of a can of pumpkin (14-16 oz. can) could be used. This recipe makes a small 8-inch pie. If I used canned pumpkin I’d probably double it, and instead make a large 10-inch pie.
To prepare the fresh pumpkin for the pie, I peeled part of a pumpkin and cut it into one-inch cubes. About 1 3/4 cups of cubed pumpkin will make a cup of cooked pumpkin. I put the cubed pumpkin into a saucepan and covered it with water. I turned the heat to high and brought to a boil; I then reduced the heat to medium and cooked until tender (about 20 minutes). I drained the pumpkin and used my mixer to blend it until smooth. I then proceeded with the pie recipe.
Fresh pumpkin can also be roasted. Cut the pumpkin in half and remove seeds and membranes, then put it in the oven at 400° F. Bake for about an hour or until the pumpkin is tender. Remove from oven. When the pumpkin has cooled, remove the pulp from the pumpkin shell. Use mixer, blender, or food processor to blend the chunks of pulp until smooth. Proceed with the pie recipe.