Old-fashioned Fried Parsnips

fried parsnips in bowl

When I recently saw a hundred-year-old recipe for Fried Parsnips, I decided to give it a try. As winter begins to wind down, I’m enjoying some of the less common vegetables.

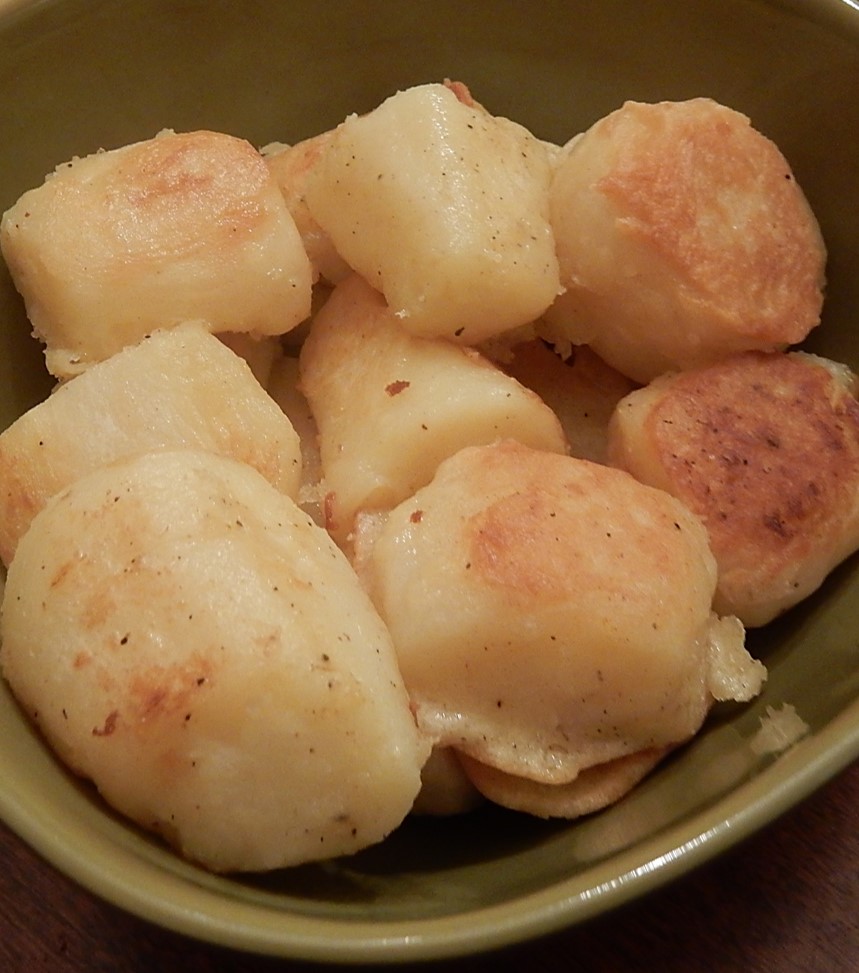
The parsnips are cut into large chunks. After they are cooked, each piece is dipped into a batter and then fried. The Fried Parsnips had a delightful earthy, sweetness which was accentuated by the crispy coating.

Here is the original recipe:

Recipe for Fried Parsnips
Balanced Daily Diet (1920) by Janet McKenzie Hill

I could not figure why the cooked parsnips were supposed to stand in the butter for half an hour, or why the batter was to sit for half an hour – so I didn’t include extended wait times when I updated the recipe.

I also substituted butter for some of the Crisco, and any shortening or lard works for frying.

Here is the recipe updated for modern cooks:

Fried Parsnips

  • Servings: 3-4
  • Difficulty: moderate
  • Print

2 pounds parsnips (6 – 8 medium parsnips)

1 egg

1/2 cup milk

3/4 cup flour

1/4 teaspoon salt

salt and pepper

2 tablespoons butter

shortening or lard

Peel parsnips and cut into 2 1/2 inch chunks. Place in a saucepan and cover with water. Bring to a boil using high heat, then reduce heat and simmer until tender (approximately 20 – 25 minutes). Drain.

While the parsnips are cooking, make the batter. In a mixing bowl place the egg, milk, flour and 1/4 teaspoons salt. Beat until smooth; set aside.

Melt butter in skillet, then add cooked parsnips. Sprinkle with salt and pepper, then gently roll in the melted butter. Remove parsnip pieces from the skillet, then add enough shortening or lard to the skillet so that there is 1/2 inch of shortening once it is melted.

Dip each piece of parsnip in the batter to coat, remove from batter, let any excess batter drip off, then put the batter-coated parsnips pieces into the hot fat. Cook until lightly browned on the bottom, then gently roll several times to brown other sides. When browned, remove parsnip pieces from the skillet with a fork. Drain on paper towels, then serve.

http://www.ahundredyearsago.com

Canned Fruit Custard


Cherries in custard sauce in stemmed glassesSometimes it is a challenge to make a recipe in an old cookbook. The cookbook may make assumptions about the knowledge level of the cooks who will use the cookbook that totally miss the mark when it comes to modern cooks; or one recipe may refer to another recipe which might then refer to still another.

For example,  I recently found a hundred-year-old recipe for Canned Fruit Custard that at first appeared very simple – Make a thin (soft) custard and pour it over drained canned fruit. But there was just one problem; the cookbook did not contain a recipe for thin custard. Apparently cooks were just supposed to know how to make thin custard.

Recipe for Canned Fruit Custard
Source: The Cook Book for Left-Overs (1920) Compiled by The More Nurses in Training Movement (Illinois)

Unfortunately I  am not as knowledgeable as cooks a hundred year ago, and didn’t know how to make a thin (soft) custard, so I searched through other old cookbooks for a recipe. I finally found a soft custard recipe in a 1920 home economics textbook.

soft custard recipe
Source: School and Home Cooking (1920) by Carlotta Greer

All was good, but I then was surprised to discover that I needed to find still another recipe. The Soft Custard recipe said to “mix the materials in the same way as for steamed or baked custard.”

Steamed or Baked Pudding Recipe
Source: School and Home Cooking (1920) by Carlotta Greer

Whew, this was getting complicated. After I found all three recipes, I took a stab at synthesizing all the directions, I finally made Canned Fruit Custard using canned sweet dark cherries. The dessert was lovely, with the cherries coated with a creamy, slightly sweet custard sauce, but the whole process has left me feeling drained.

So that others don’t need to go through the process of synthesizing the recipes, here is the Canned Fruit Custard recipe updated for modern cooks.

Canned Fruit Custard

  • Servings: 4 - 5
  • Difficulty: moderate
  • Print

2 pints canned fruit (15-16 ounce cans) – I used canned dark sweet cherries.

Custard

2 eggs, separated

2 cups milk

1/4 cup sugar

1/8 teaspoon salt

1/2 teaspoon vanilla

To make the custard, first scald the milk. To do this, put the milk in a heavy sauce pan (use a double boiler if available); then heat using medium heat. Stir frequently until the milk just barely begins to bubble, then remove from the heat.

In a bowl beat egg whites until stiff peaks form. Set aside.

In a separate bowl, beat egg yolks slightly, then add sugar and salt. Beat to combine. Then place a small amount (approximately 1 – 2 tablespoons) of hot milk into bowl with the egg mixture, stir quickly. Add this mixture to the hot milk and stir. (This helps prevent the egg from coagulating when the egg is introduced to the hot liquid.)  Return to stove and cook, using medium heat while stirring constantly until the mixture begins to thicken or coat a spoon. Quickly stir in the beaten egg whites. Remove from heat. Strain and then stir in the vanilla. Chill at least 3 hours.

To Serve

Drain canned fruit. Put the fruit in dessert dishes, and spoon the soft custard over the fruit.

Old-Fashioned Dainty Cheese (Cheese Ball) Recipe

Cheese ball surrounded by crackers on a plateBased on a quick scan, many cooking blogs currently have Super Bowl posts – The Best Super Bowl Food Ideas, Easy Super Bowl Recipes, Super Bowl Crowd Pleasing Snacks, and so on.

So I asked myself, “A hundred years ago what would people have eaten during the Super Bowl?” And, I immediately realized that it was a stupid question – the first Super Bowl wasn’t held until 1967.

So I revised my question, “Are there hundred-year-old recipes that might make a crowd pleasing snack for Super Bowl LIV?”

Success. . . I think I found a winner. A 1920 cookbook, Good Housekeeping’s Book of Recipes and Household Discoveries, has a wonderful recipe for Dainty Cheese – which is actually a cheese ball. I have no idea why it was called Dainty Cheese; but, regardless, the cheese ball is delicious, and would be a perfect Super Bowl snack.

The Dainty Cheese cheese ball is made with cream cheese embedded with finely chopped stuffed olives and hard-boiled egg, and a bit of onion. Since the old recipe does not call for cheddar cheese, it’s less “cheesy” than many modern recipes. (hmm . . . Maybe that’s why it is called Dainty Cheese.”) It also isn’t coated with nuts, bacon, or pepperoni like many modern balls.

But, once I set aside my modern expectations, the Dainty Cheese cheese ball was delightful. It is slightly salty with a mild onion and olive taste that works perfectly when spread on crackers.

Here is the original recipe:

Recipe for Dainty Cheese
Source: Good Housekeeping’s Book of Recipes and Household Discoveries (1920)

I couldn’t find onion juice at the store (Is it still made?), so I substituted 1 teaspoon grated onion for the 1/3 teaspoon onion juice. When I made the cheese ball, instead of following the old directions and packing the mixture into a mold (which I worried that I’d have difficulty unmolding), I shaped the cheese ball  on a piece of plastic wrap. then wrapped it in the plastic wrap and chilled until firm.

Here is the modern recipe updated for modern cooks:

Dainty Cheese (Cheese Ball)

  • Servings: 1 medium-sized cheese ball
  • Difficulty: moderate
  • Print

1 8-ounce package cream cheese, softened to room temperature

1 tablespoon butter, melted

1/3 teaspoon salt

dash cayenne (red) pepper

15 stuffed olives, finely chopped

1 hard-bowled egg, finely chopped

1 teaspoon onion, grated

Put cream cheese in a mixing bowl, beat until smooth. Add butter, salt, and cayenne pepper; beat until combined. Add olives, egg, and onion; stir until combined.  Shape into a cheese ball on a piece of plastic wrap, then wrap in the plastic wrap. Chill (at least two hours), then unwrap, put on plate, and serve with crackers.

http://www.ahundredyearsago.com

Old-Fashioned Eggs with Spinach and Cheese

Eggs, cheese and spinach in ramekin with toast on plate

Preparing eggs in the basic ways can get boring, so I was pleased to find a hundred-year-old recipe for Eggs with Spinach and Cheese. Each egg is served in an individual ramekin which makes an easy to serve, lovely presentation that can turn any breakfast into a special meal. The eggs are embedded between layers of creamed spinach and cheese.

Here is the original recipe:

Recipe for eggs with spinach and cheese
Source: Balanced Daily Diet by Janet McKenzie Hill (1920)

I’m not sure what a “very moderate” oven meant in 1920, but I interpreted it to mean 350° F. Maybe it actually was higher. The 5-8 minutes baking time called for in the original recipe was not nearly long enough to set the eggs. It took about 15 minutes for them to set.

And, here is the recipe updated for modern cooks:

Eggs with Spinach and Cheese

  • Servings: 3
  • Difficulty: moderate
  • Print

5 ounces (5 cups) of fresh baby spinach (approximately 1/2 cup cooked spinach)

1 tablespoon butter

1 1/2 tablespoons flour

1/8 teaspoon salt

1/3 cup milk

1/2 cup shredded cheese (I used cheddar.)

3 eggs

salt and pepper

Preheat oven to 350° F. Wash spinach and put in a sauce pan. There should be some water clinging to the spinach. Using medium heat, cook until the spinach has wilted down (about 2 minutes) while stirring occasionally. Remove from heat and set aside.

In the meantime, in another pan, using medium heat, melt butter; then stir in the flour and 1/8 teaspoon salt. Gradually, add milk while stirring constantly. Continue stirring until the white sauce thickens. Remove from heat, and add the cooked spinach. Stir to combine.

Put 1/6 of the spinach and white sauce mixture in each of 3 small ramekins; then sprinkle with 1/6 of the shredded cheese. Then break an egg into each of the ramekins. Sprinkle with salt and pepper.  Put 1/6 of the spinach and cream sauce mixture on top of each egg; then sprinkle with 1/6 of the shredded cheese on top of it.

Put in oven and cook for 15 – 18 minutes, or until the eggs are set.

http://www.ahundredyearsago.com

Old-fashioned Mushroom Croquettes

Mushroom Croquettes on plate

Now that we’re in 2020, I’ve set aside the 1919 cookbooks and magazines that I got recipes from last year, and have been gathering 1920 cookbooks and magazines. (EBay is wonderful source of old cookbooks.) As I shift to 1920, I am really enjoying browsing through a whole “new” set of old recipes.

One recipe that piqued my interest was a recipe for Mushroom Croquettes. The coquettes are made by combining mashed potatoes, and chopped mushrooms. They are then browned in a skillet.

The Mushroom Croquettes were crispy on the outside, and filled with a delectable creamy mashed potato and mushroom mixture on the inside.

Here is the original recipe:

Recipe for Mushroom Croquettes
Source: The Cook Book of Left-Overs (1920) compiled by The More Nurses in Training Movement from Recipes Contributed by Illinois Ladies

And, here is the recipe updated for modern cooks:

Mushroom Croquettes

  • Servings: 3 - 4
  • Difficulty: moderate
  • Print

1 cup mashed potatoes

1 pint mushrooms

2 tablespoons butter

1/8 teaspoon salt

2 eggs, beaten

vegetable oil (shortening or lard would also work)

Mashed potatoes should be at room temperature when making this recipe. Either allow hot mashed potatoes to cool, or remove cold mashed potatoes from refrigerator and allow to warm to room temperature.

In the meantime, chop the mushrooms into small pieces. There should be approximately two cups of chopped mushrooms. Melt butter in a skillet, then add the chopped mushrooms. Sauté  for 20 minutes while stirring occasionally. Then remove from heat.

Place the mashed potatoes into a mixing bowl, stir in the salt and eggs; then add sautéed mushrooms and stir until the mushrooms are evenly distributed throughout the mixture.

Heat about 1/2 inch of vegetable oil in a large skillet. Then drop heaping spoonfuls of the mushroom and potato mixture into the hot oil. Cook until lightly browned on the bottom, then gently turn to brown the other side. When browned, remove croquettes from the skillet with a fork or slotted spoon. Drain the croquettes on paper towels, then serve.

http://www.ahundredyearsago.com

Old-fashioned Sausage with Apple Rings

Sausage link and apple rings on plateSausage and apples are a classic combination, so I was thrilled when I came across a hundred-year-old recipe for Sausage and Apple Slices. It is a simple recipe that brings out the best of both foods.

Old-fashioned classic peppery sausage links such as country sausage, farmer’s sausage, or breakfast sausage work well in this recipe. And, the apples are cooked in a simple sugar syrup which enhances their natural tart-sweetness.

I can’t decide whether this dish was originally intended to be a breakfast or dinner dish. I served it at dinner, but it would work well for either meal.

Here is the original recipe:

sausage links and apple rings on plate
Source: American Cookery (January, 1920)
Recipe for Sausage with Apple Rings
Source: American Cookery (January, 1920)

And, here is the recipe updated for modern cooks:

Sausage with Apple Rings

  • Servings: 3 - 4
  • Difficulty: moderate
  • Print

1 pound sausage links (This is excellent with old-fashioned peppery sausage such as country sausage, farmer’s sausage, or breakfast sausage.)

1 cup sugar

1 cup water

4-5 tart apples which hold their shape when cooked (I used Braeburn apples; Rome or Granny Smith would also work well.)

Prick each sausage link several times with a fork. Put in a large saucepan, and cover with water; bring to boil using high heat, then reduce heat and simmer for 15 minutes. Remove from heat and drain. While cooking sausage, preheat oven to 400° F. Put sausage links in an oven-proof skillet (I used a cast iron skillet), place in oven and brown (about 10 – 20 minutes). The sausage should be turned several times so that they brown evenly.

In the meantime, peel and core apples, then cut into slices about 1/3 inch thick. Put the sugar and water in a large saucepan. Heat the mixture using medium heat. Once the sugar has dissolved, add the apple slices. When the liquid comes to a boil, reduce heat and simmer until the apple slices are soft. Using a large spoon, gently rearrange the slices once or twice, so that they all soften at about the same time. Remove from the heat, and gently remove the slices from the syrup.

To serve, arrange links on plates, and place apple slices to the side.

http://www.ahundredyearsago.com

Old-fashioned Mock Maple Kisses

Mock maple kisses on plate

I always try to make a wide variety of holiday cookies, including a gluten-free option. Meringue cookies are a personal favorite, so I was pleased to find a hundred-year-old recipe for Mock Maple Kisses. They are a light and airy meringue cookie. When I bite into them, they take me back to a summer evening, and remind of marshmallows delicately toasted over a campfire.

Here is the original recipe:

Recipe for Mock Maple Kisses
Source: Good Housekeeping (December, 1919)

I found this recipe to be a little challenging. Since very little liquid is called for, the boiled brown sugar mixture quickly moves past the “thread’ stage to the “soft ball” stage. I added a little additional water to get the temperature and stage right. But, the meringues ended up not having the classic “kiss” shape.

Here is the recipe updated for modern cooks:

Mock Maple Kisses

  • Servings: approximately 40 kisses
  • Difficulty: difficult
  • Print

2 cups brown sugar

2 tablespoons water

1 teaspoon vanilla

1 egg white

Put sugar, water, and vanilla in a sauce pan; stir, and then using medium-low heat, bring to a boil. Reduce heat, and cook until the mixture reaches the “thread” stage (223° – 234° F.). Since there is very little liquid, the mixture will reach this stage very quickly after it comes to a boil. A little additional water may need to be added if the mixture inadvertently moves beyond the “thread” stage.) Remove from heat.

In the meantime, preheat oven to 250° F. Put the egg white into a mixing bowl and beat with an electric beater until stiff peaks form. Slowly add the sugar sauce, one tablespoon at a time, while continuing to beat. Drop by rounded teaspoons two inches apart on greased baking sheet lined with parchment paper. Bake for 35-45 minutes or until the kisses can easily be removed from the parchment paper.