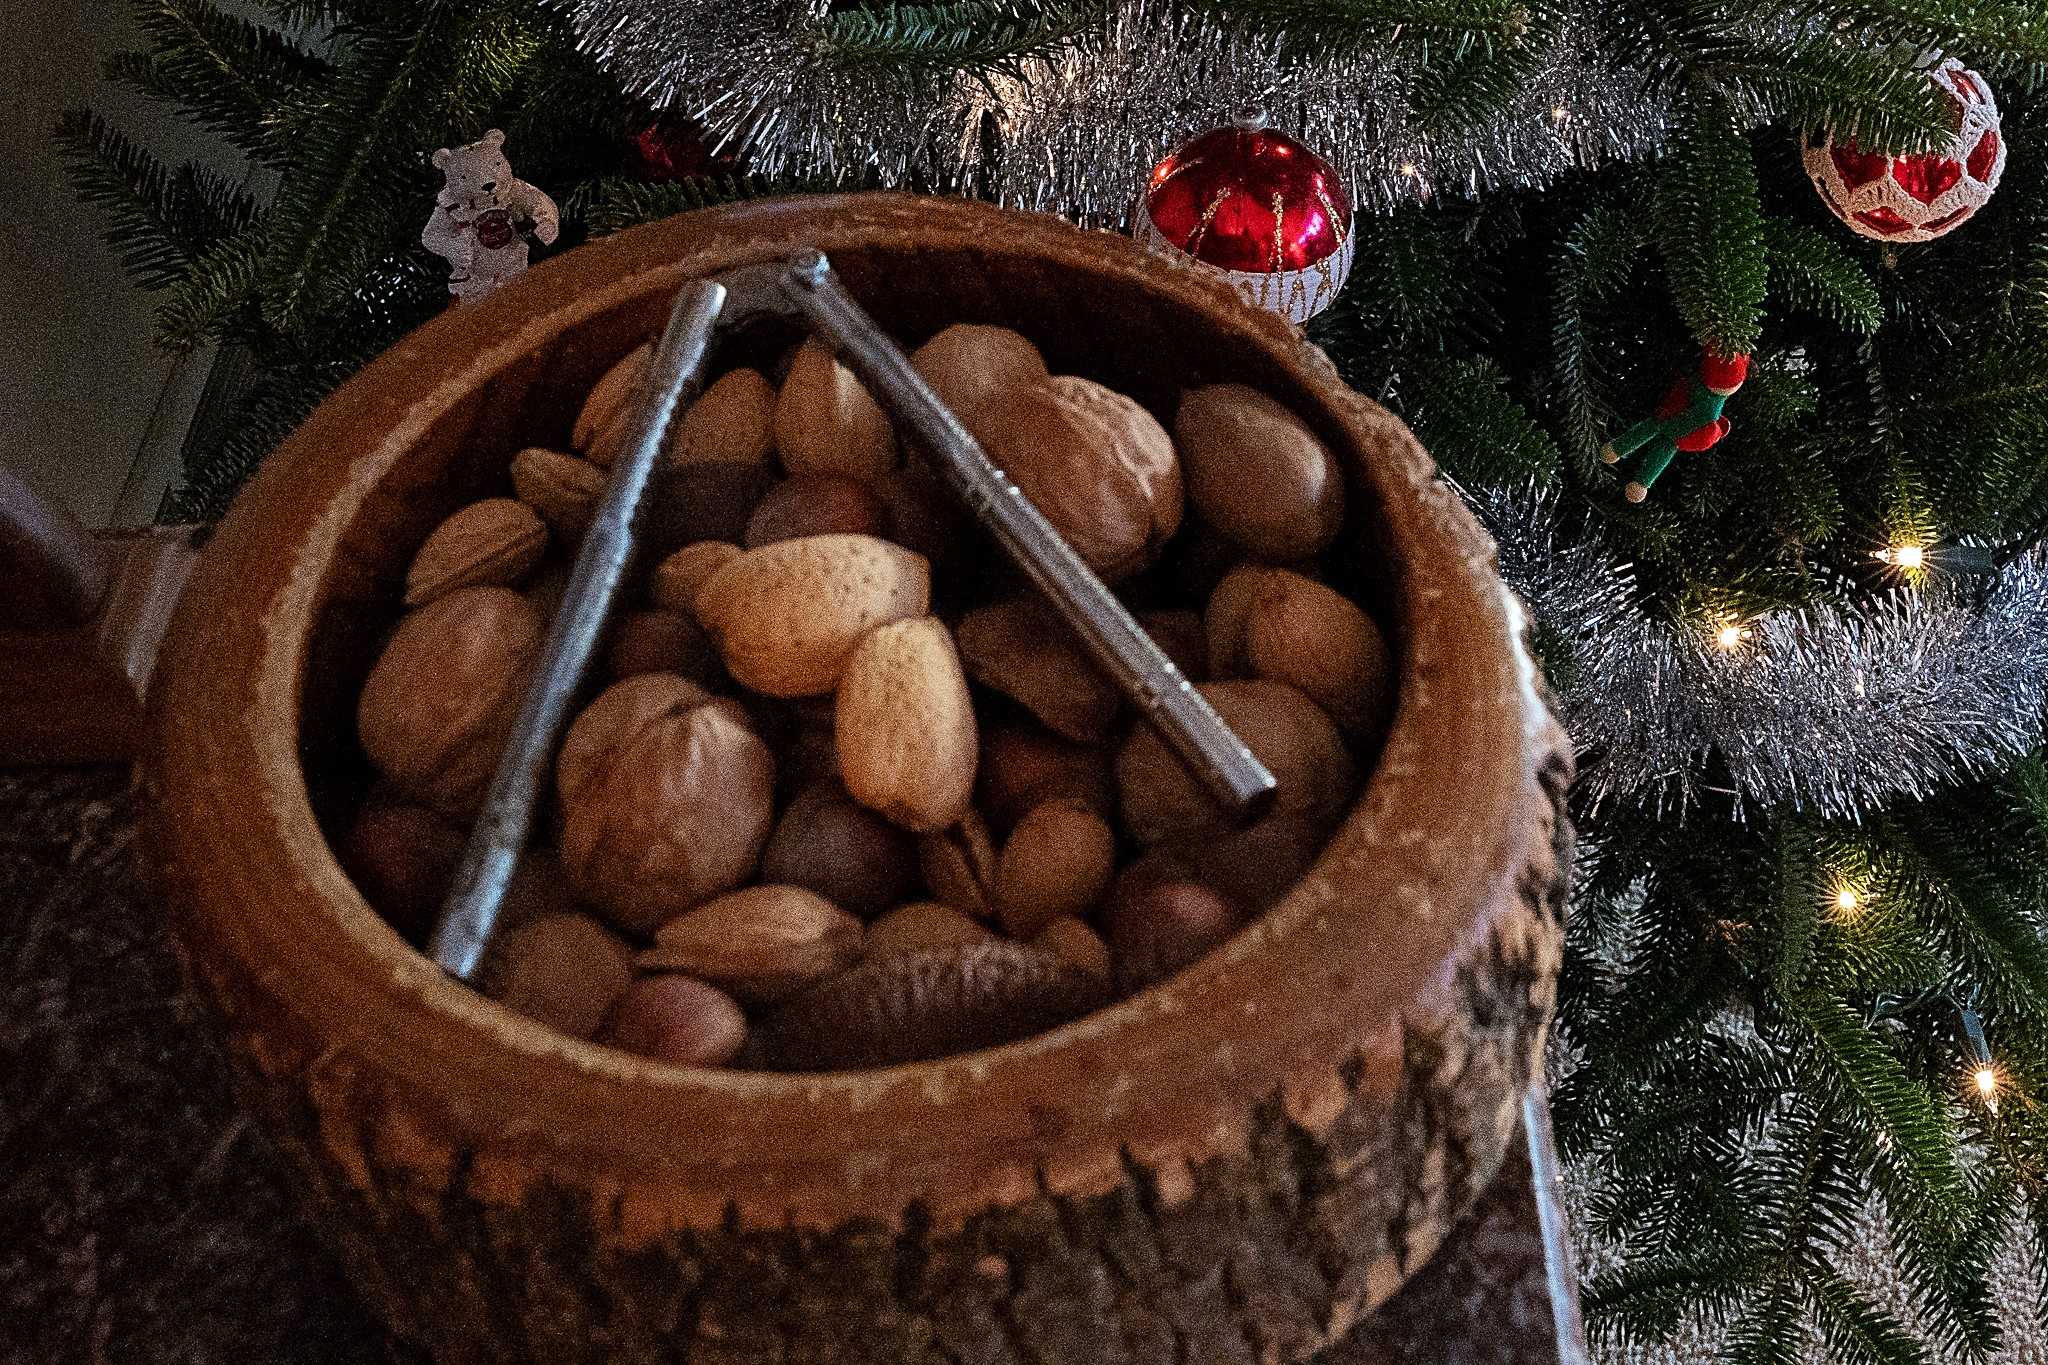
 Many dishes on the holiday dinner menu are the same year after year, and there can be complaints if a dish vanishes or is “different” from how Grandma used to make it. So, I was surprised when a friend said, “Grandma’s recipes have been ghosted.”
My first reaction was “No way. ”
I know from comments I get on this blog that many people are looking for old-recipes that they have vague memories of ancestors making years ago. I regularly get comments like, “Thanks! I’ve been looking for this recipe for years. It is almost exactly like the recipe my grandmother made when I was a child.”
But, the more I thought about whether old family recipes are being ignored, the more I think that my friend was right. Grandma’s recipes are frequently ghosted.
My own efforts to create a cookbook to preserve family recipes ended up resulting in the beginnings of A Hundred Years Ago. In 2009, I compiled a family cookbook. I included some family photos in the book. One of them was a photo of a surprised-looking me walking through a doorway at my bridal shower. Sitting on the couch in the photo’s foreground was my 82-year-old paternal grandmother.
A much younger me arriving at my bridal shower with my grandmother sitting near the doorway.
When I gave the cookbook to my children, my daughter asked, ” Who’s that old lady?”
I told her that it was her great-grandmother. But her question jogged my memory about a copy of an old diary of my grandmother’s that I had. I dug it out of a cupboard and discovered that Grandma kept the diary from 1911 – 1914. She was a teen-ager at the time.
I realized that it would be exactly one hundred years since Grandma wrote the first diary entries very soon. I decided to post Grandma’s diary entries a hundred years to the day after she wrote them on a blog I called A Hundred Years Ago. I originally did it for family, but soon others were also enjoying the diary entries. However, after four years the diary ended. I briefly quit blogging, then re-invented A Hundred Years Ago as a cooking blog.
Over the many years that I’ve done this blog, I’ve learned a lot from my readers about the value of preserving family recipes as well as the challenges. Here is a summary of what I’ve learned.
Understanding the Challenges
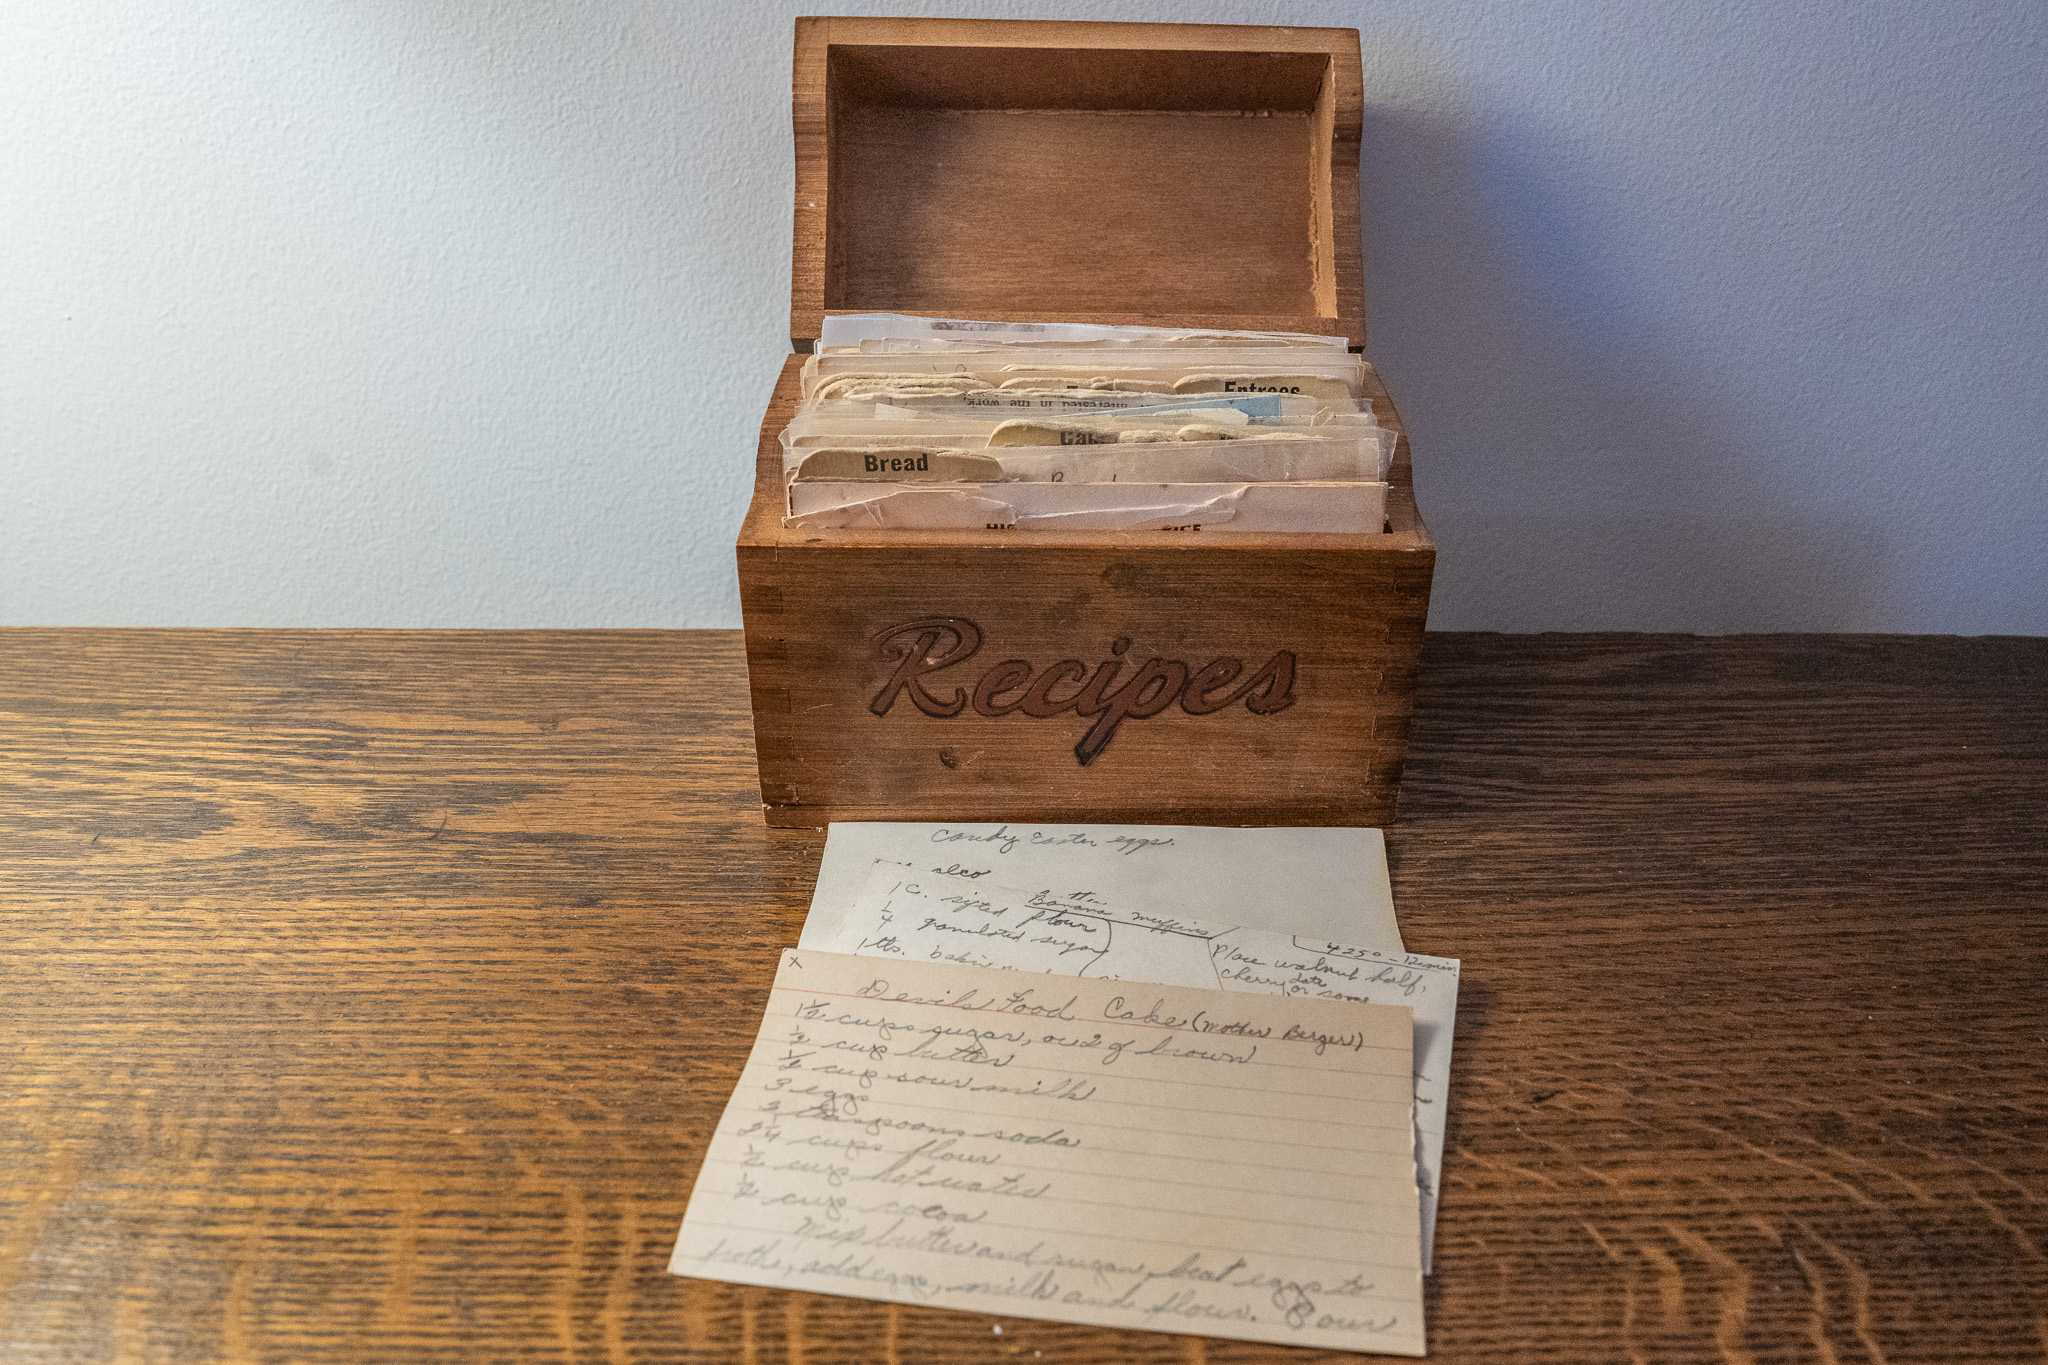
Cursive Writing is Difficult to Read. Old recipe cards often were written in cursive and are extremely difficult to read. Younger cooks never learned to read or write cursive text, and older people often don’t interact much with cursive anymore and now find it hard to read.
I recently spoke with a graphic designer who said that she advises clients to avoid the use of script-style fonts when laying out promotional materials or an advertisement. She said, “People just can’t read it.” This suggests that if people struggle to even read typed script fonts that old handwritten recipe cards are almost impossible for them to decipher.
Old Recipes Lack Directions. Another challenge for modern cooks is that old recipes often have few, or confusing, directions. Many cooks just throw up their hands and give up on a recipe when it says things like “add enough flour so that the dough can easily be rolled” or “bake in a quick oven.”
Dirty, Worn Recipe Cards and Cookbooks Are a Nonstarter. Cooks today often find the old recipe cards and books that their Grandma once used to be unappealing. Old cookbook pages are yellowed, often there are loose pages, and the book spine may be torn. Many of the pages may have food stains, which can be considered badges of honor that indicate which pages contained Grandma’s favorite recipes; but, more often, just seem like dirty (and perhaps germy) pages.
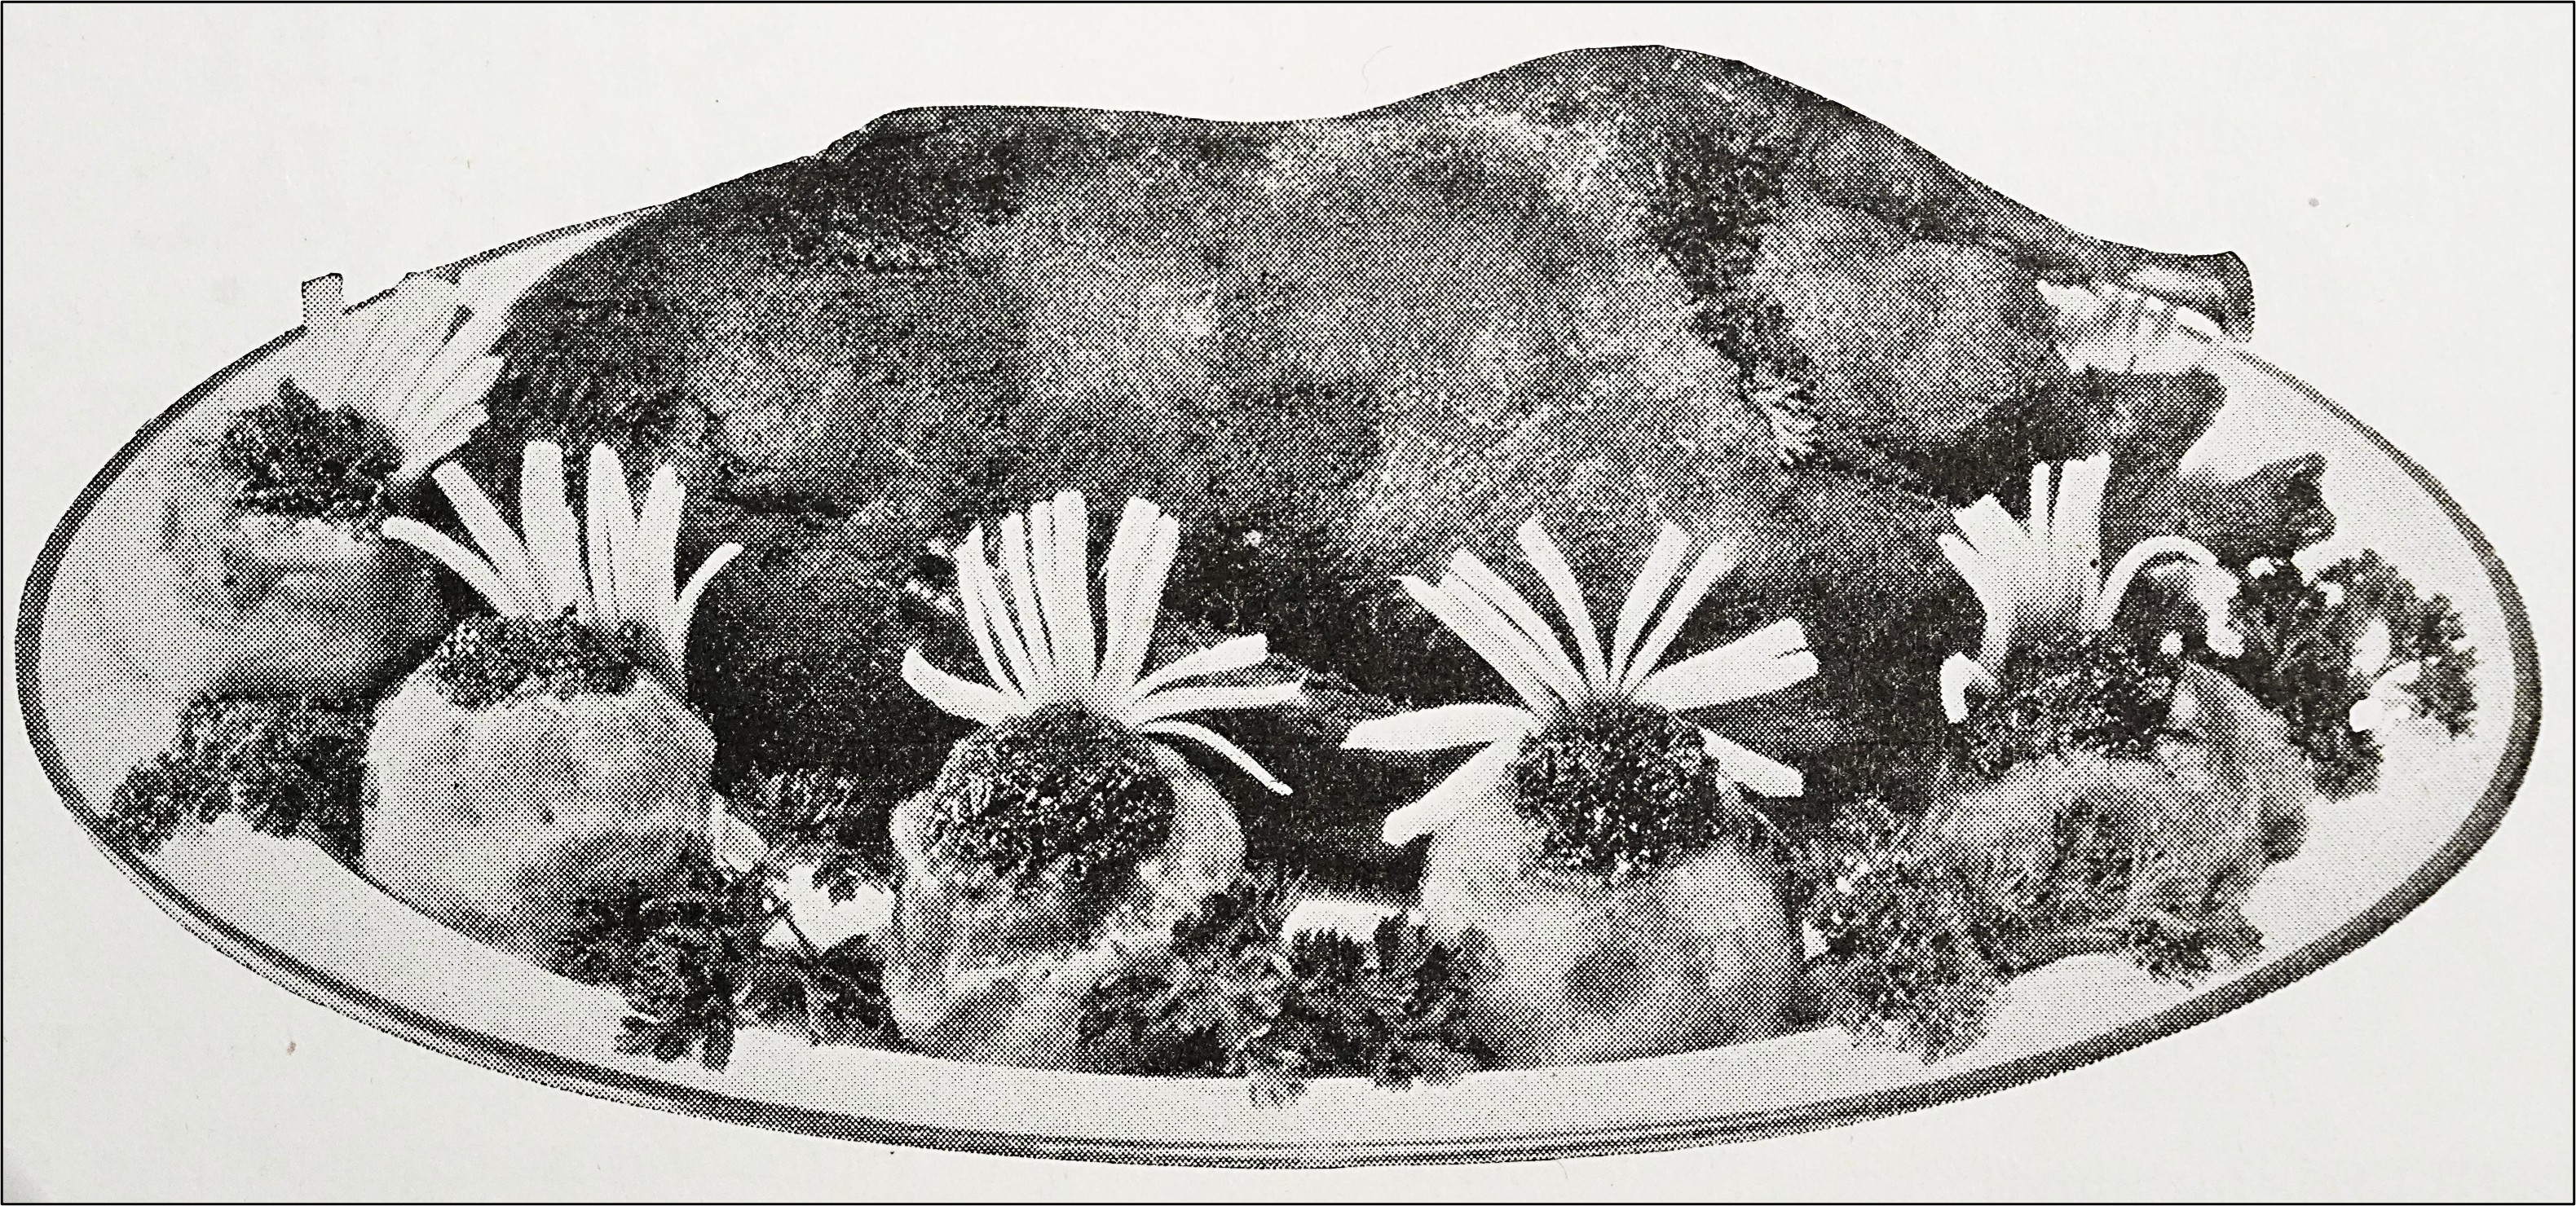
It’s Hard to Know What a Dish Will Look Like When There is No Photo. Cooks today regularly use online recipe sources (as well as modern cookbooks) that show vibrant recipe photos that help them decide which foods to make, while old recipe boxes and cookbook pages are crammed with recipes, but contain few or no pictures. This can make it difficult for a cook to envision what the dish would look like.
Sharing Family Memories
Dishes that once were common foods may now be considered old-fashioned, not appealing, or not very healthy; however, they become part of family lore and traditions. I want to think that old family recipes pull families together at holiday gatherings by becoming the basis for stories and memories. But, I also know that they can create challenges.
When a family sticks rigidly to the traditional menu for a holiday gathering, family members who do not eat animal products, have food allergies, or have environmental concerns about certain foods can feel frustrated or hurt that their needs are not met.
Yet, who can’t smile when a family matriarch remembers a great aunt who has been gone for forty years, and tells the story (for the 39th year) about the time Great Aunt Emma’s molded, canned fruit gelatin collapsed into a mushy mess when she was unmolding it right before dinner.
Discussing Grandma’s Recipes
Family members can have different opinions regarding how much (or if) their grandmother’s recipes can be adapted or modified without changing them so much that they are no longer her recipe. There probably would be general agreement that it is okay to cook a stew in a crock pot rather than in a pan on the stove as described in an old recipe.
However, if an old recipe for apple pie called for using shortening when making the pie shell and Northern Spy apples for the filling, some family members may think that it is okay to substitute butter for the shortening for the crust and to use another apple variety in the filling, while others might say that the pie no longer tastes like Grandma’s. Still others might chime in that it would be nice if Grandma’s old recipe was updated so it was gluten-free and vegan so that everyone could enjoy it.
Some might worry that “Grandma won’t approve of us changing her apple pie recipe,” while others might note that Grandma herself may have “modernized” the recipe when she updated her grandmother’s recipe so that it used shortening instead of lard. This could lead to a discussion about whether the recipe should be converted back to using lard for the pie pastry now that research suggests some possible health issues related to the use of shortening.
Preserving Grandma’s Recipes
Everyone seems stressed this year, and worried that discussions at the holiday dinner table may go sideways with one disagreement or another. Maybe it would be a good time, when everyone is there, to discuss how to preserve their Grandma’s recipes and make them more accessible.
What it means to save Grandma’s recipes will differ from family to family. In some cases, it might mean developing a plan for typing them up and creating a family hard-bound or electronic cookbook. In other families, it might mean making videos that show how to prepare favorite recipes; while, still others might have discussions about how to update the recipes to make them more user friendly, or how much a recipe can be updated without destroying it.
Let’s not ghost old family recipes, but rather use them as connectors that bring families together. Those old recipes can be a powerful tool that engages family members across generations.

 Helena Muffly
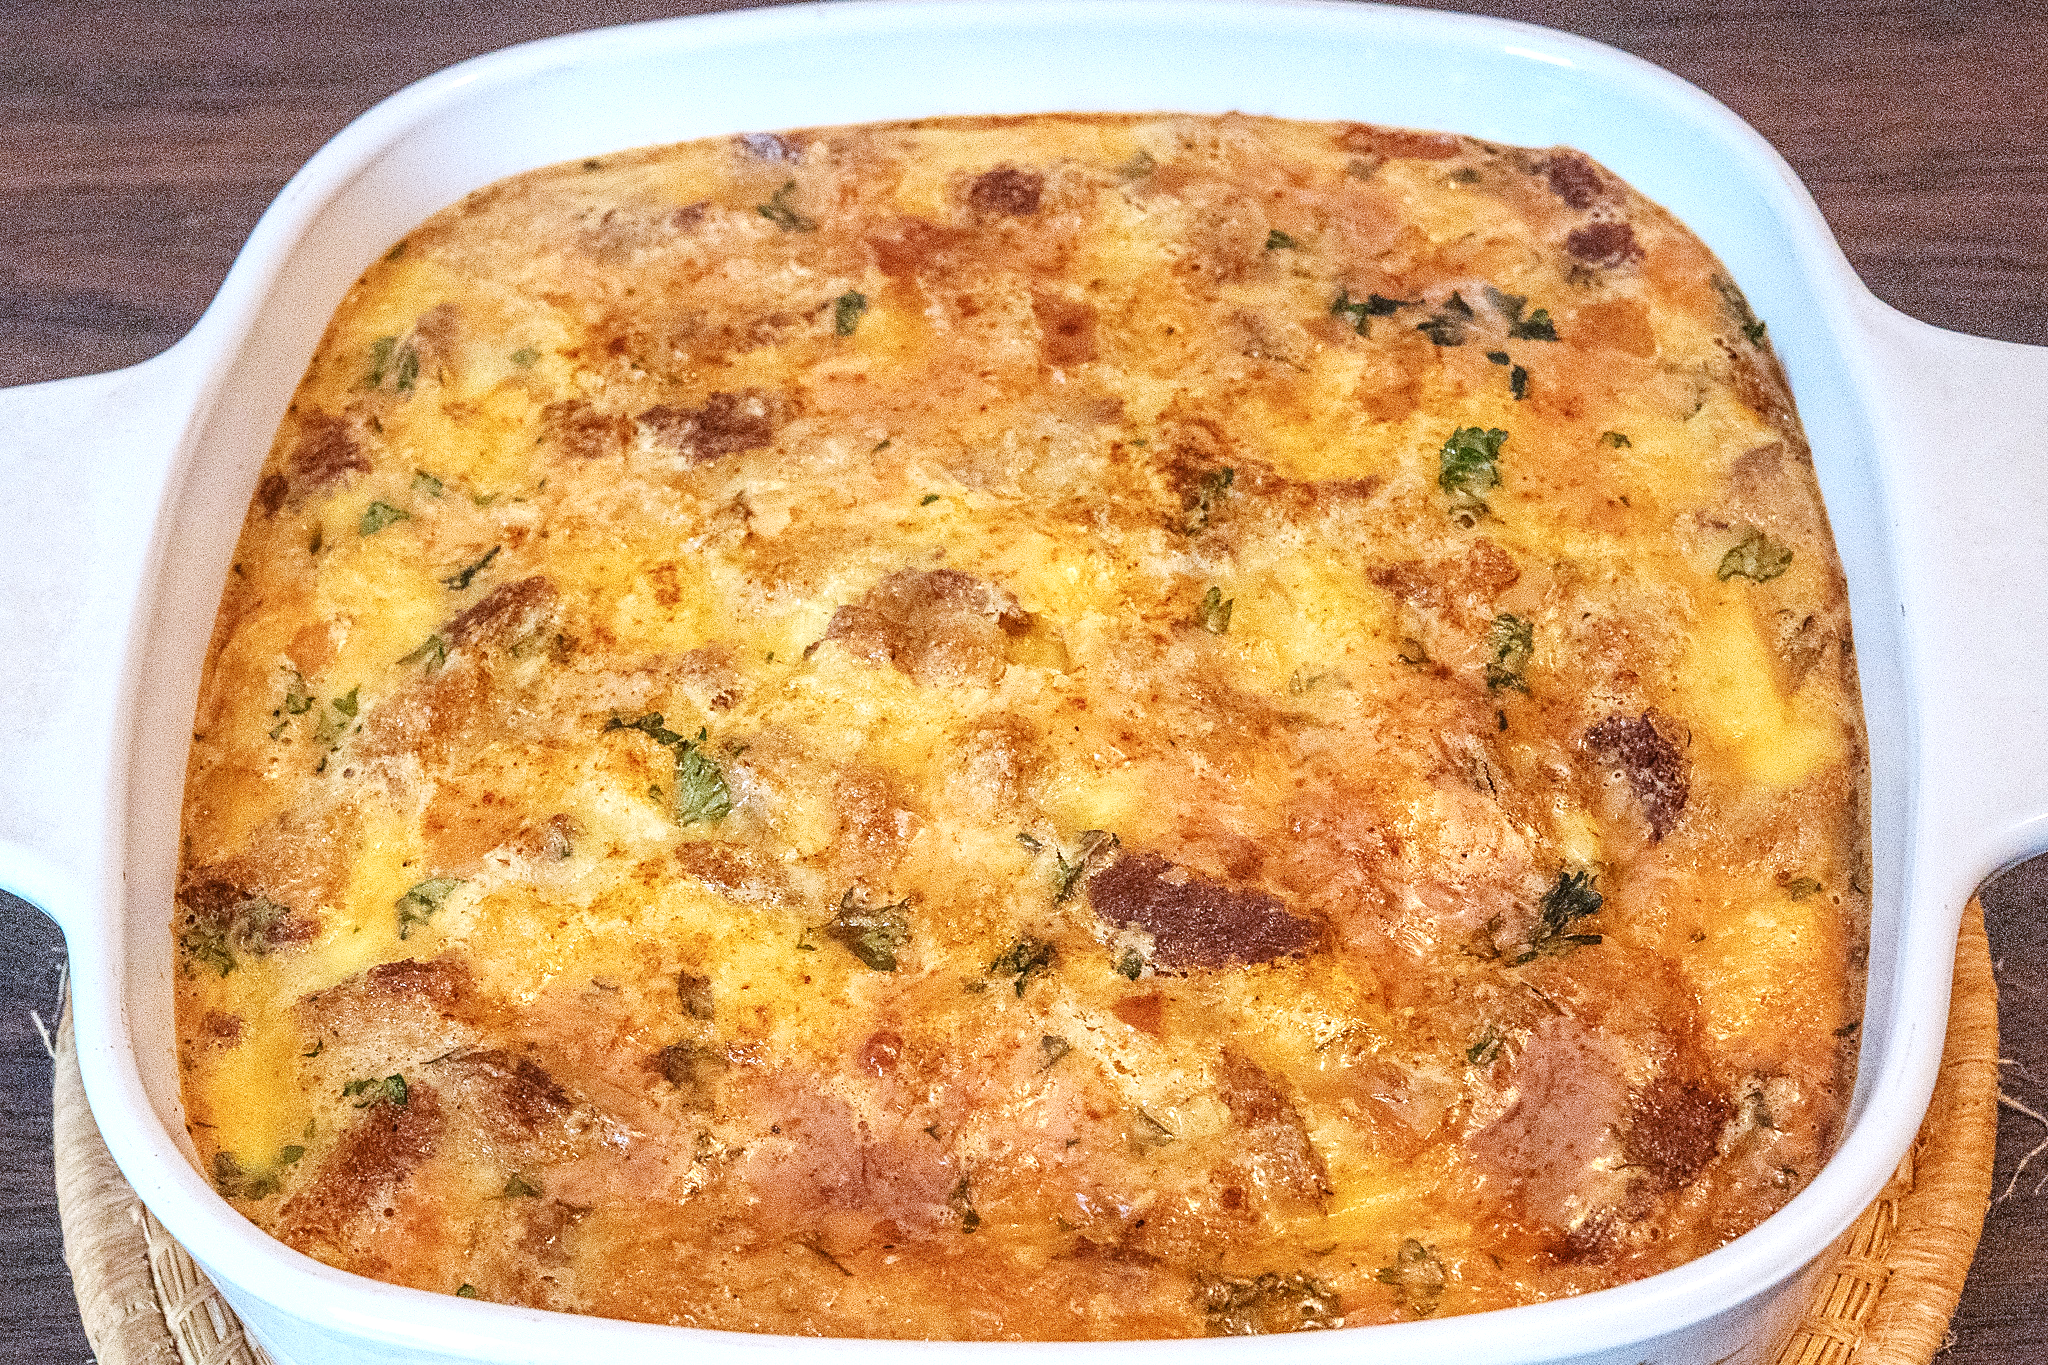 As the holidays are beginning to wind down, I’m in the mood for comfort food. So, when I came across a hundred-year-old recipe for Cheese Delight, I was intrigued and decided to give it a try.
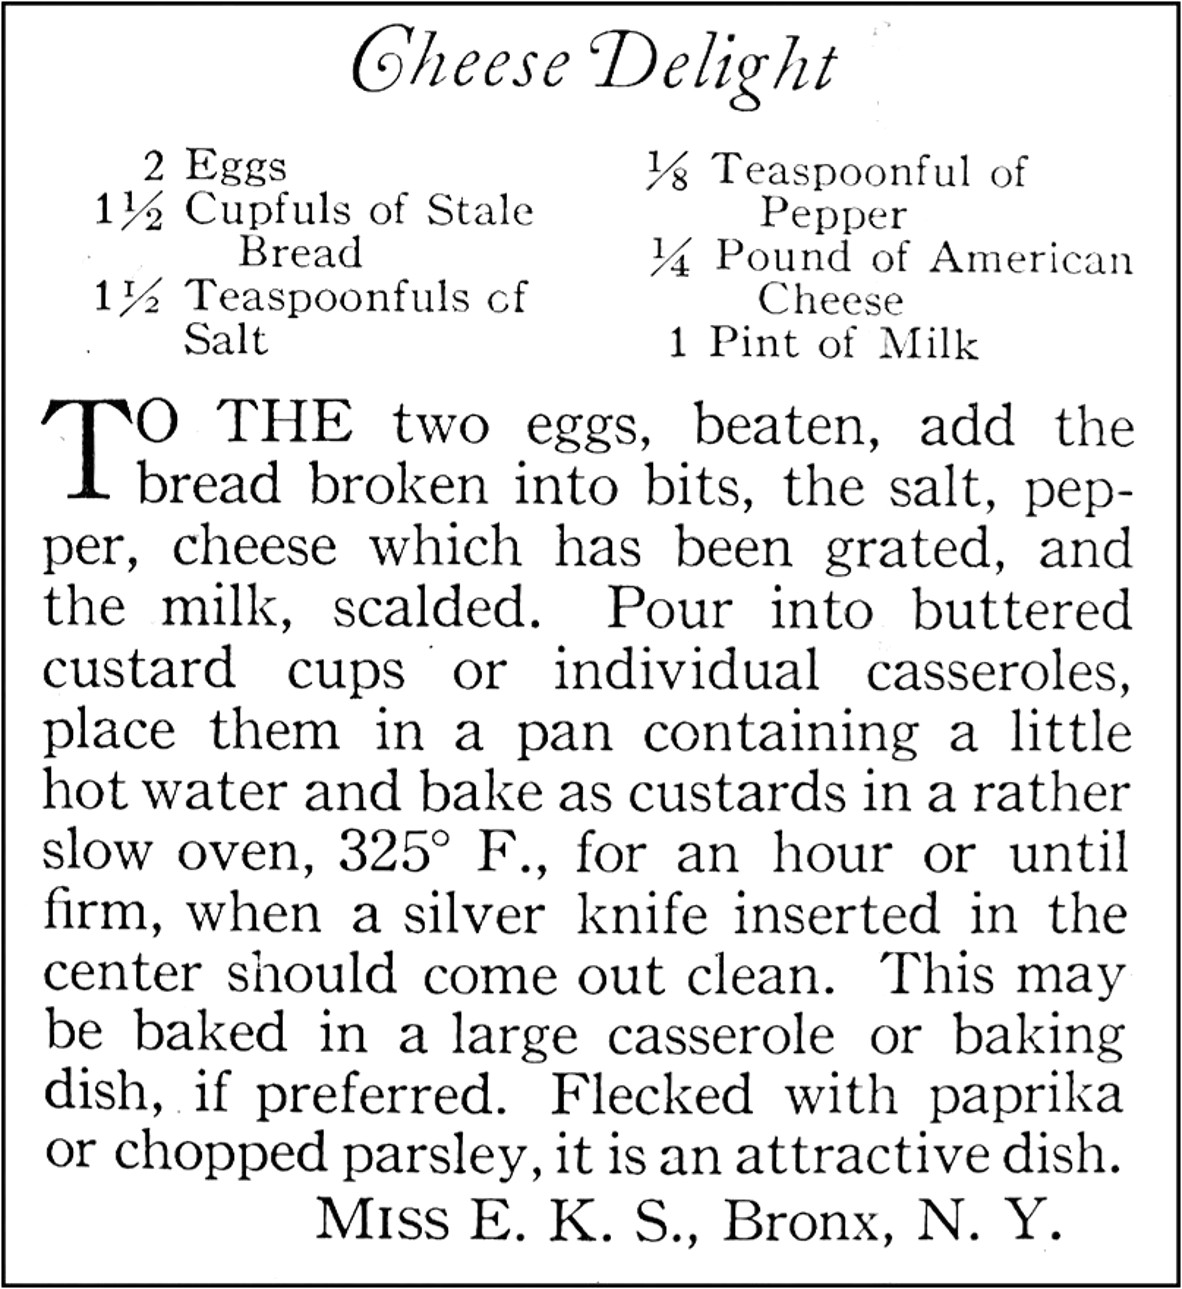
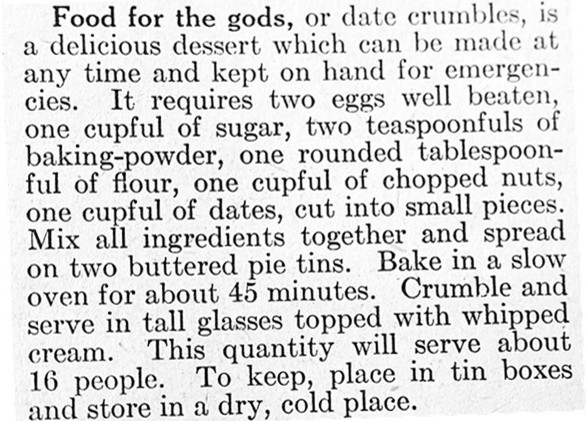
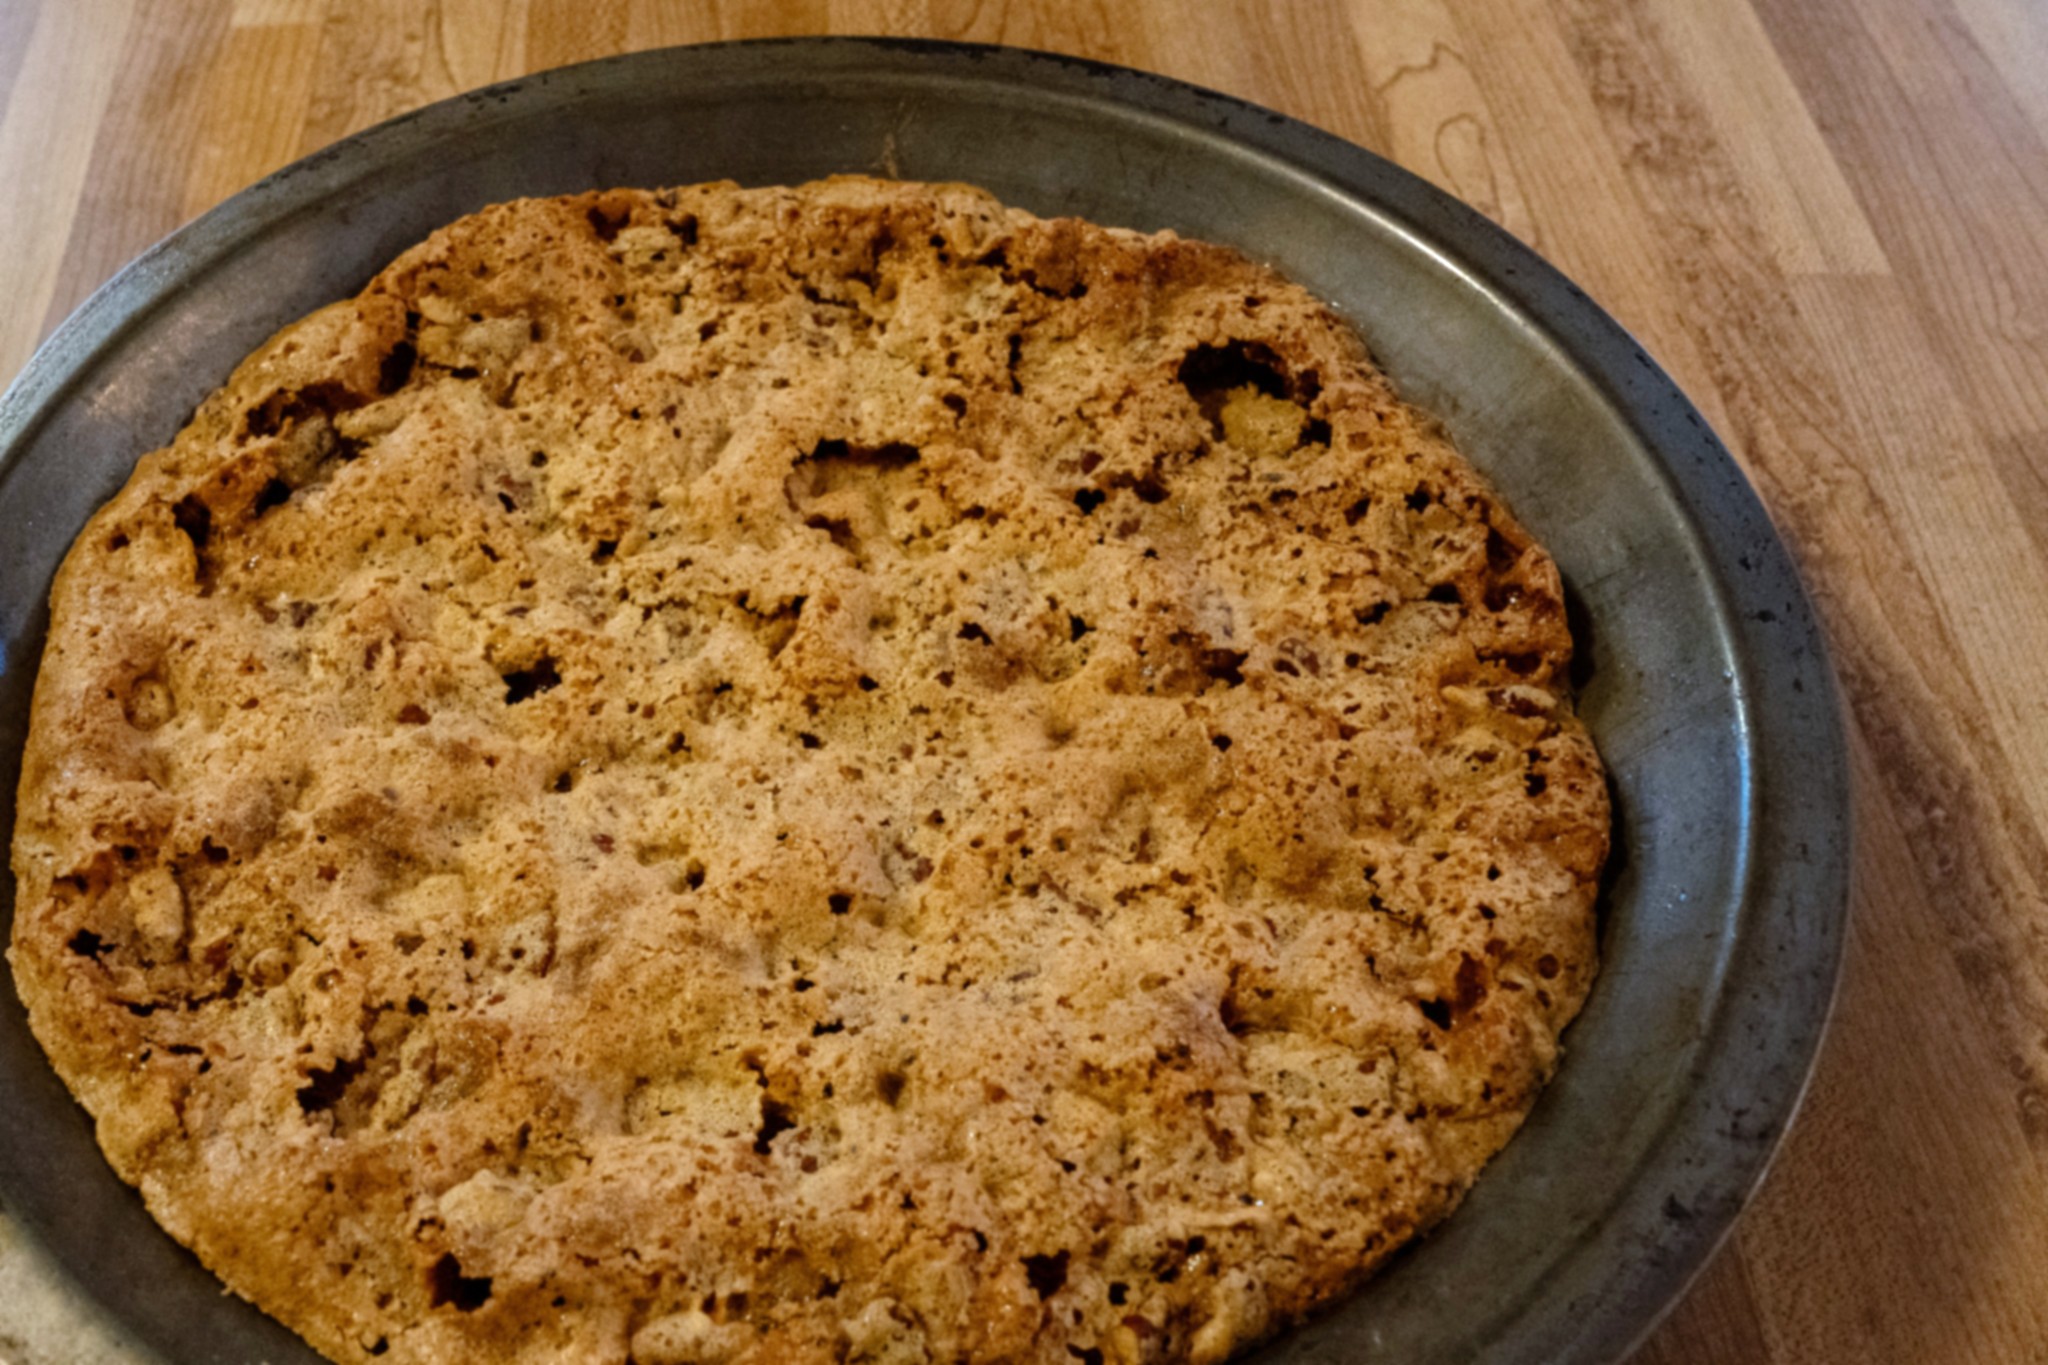
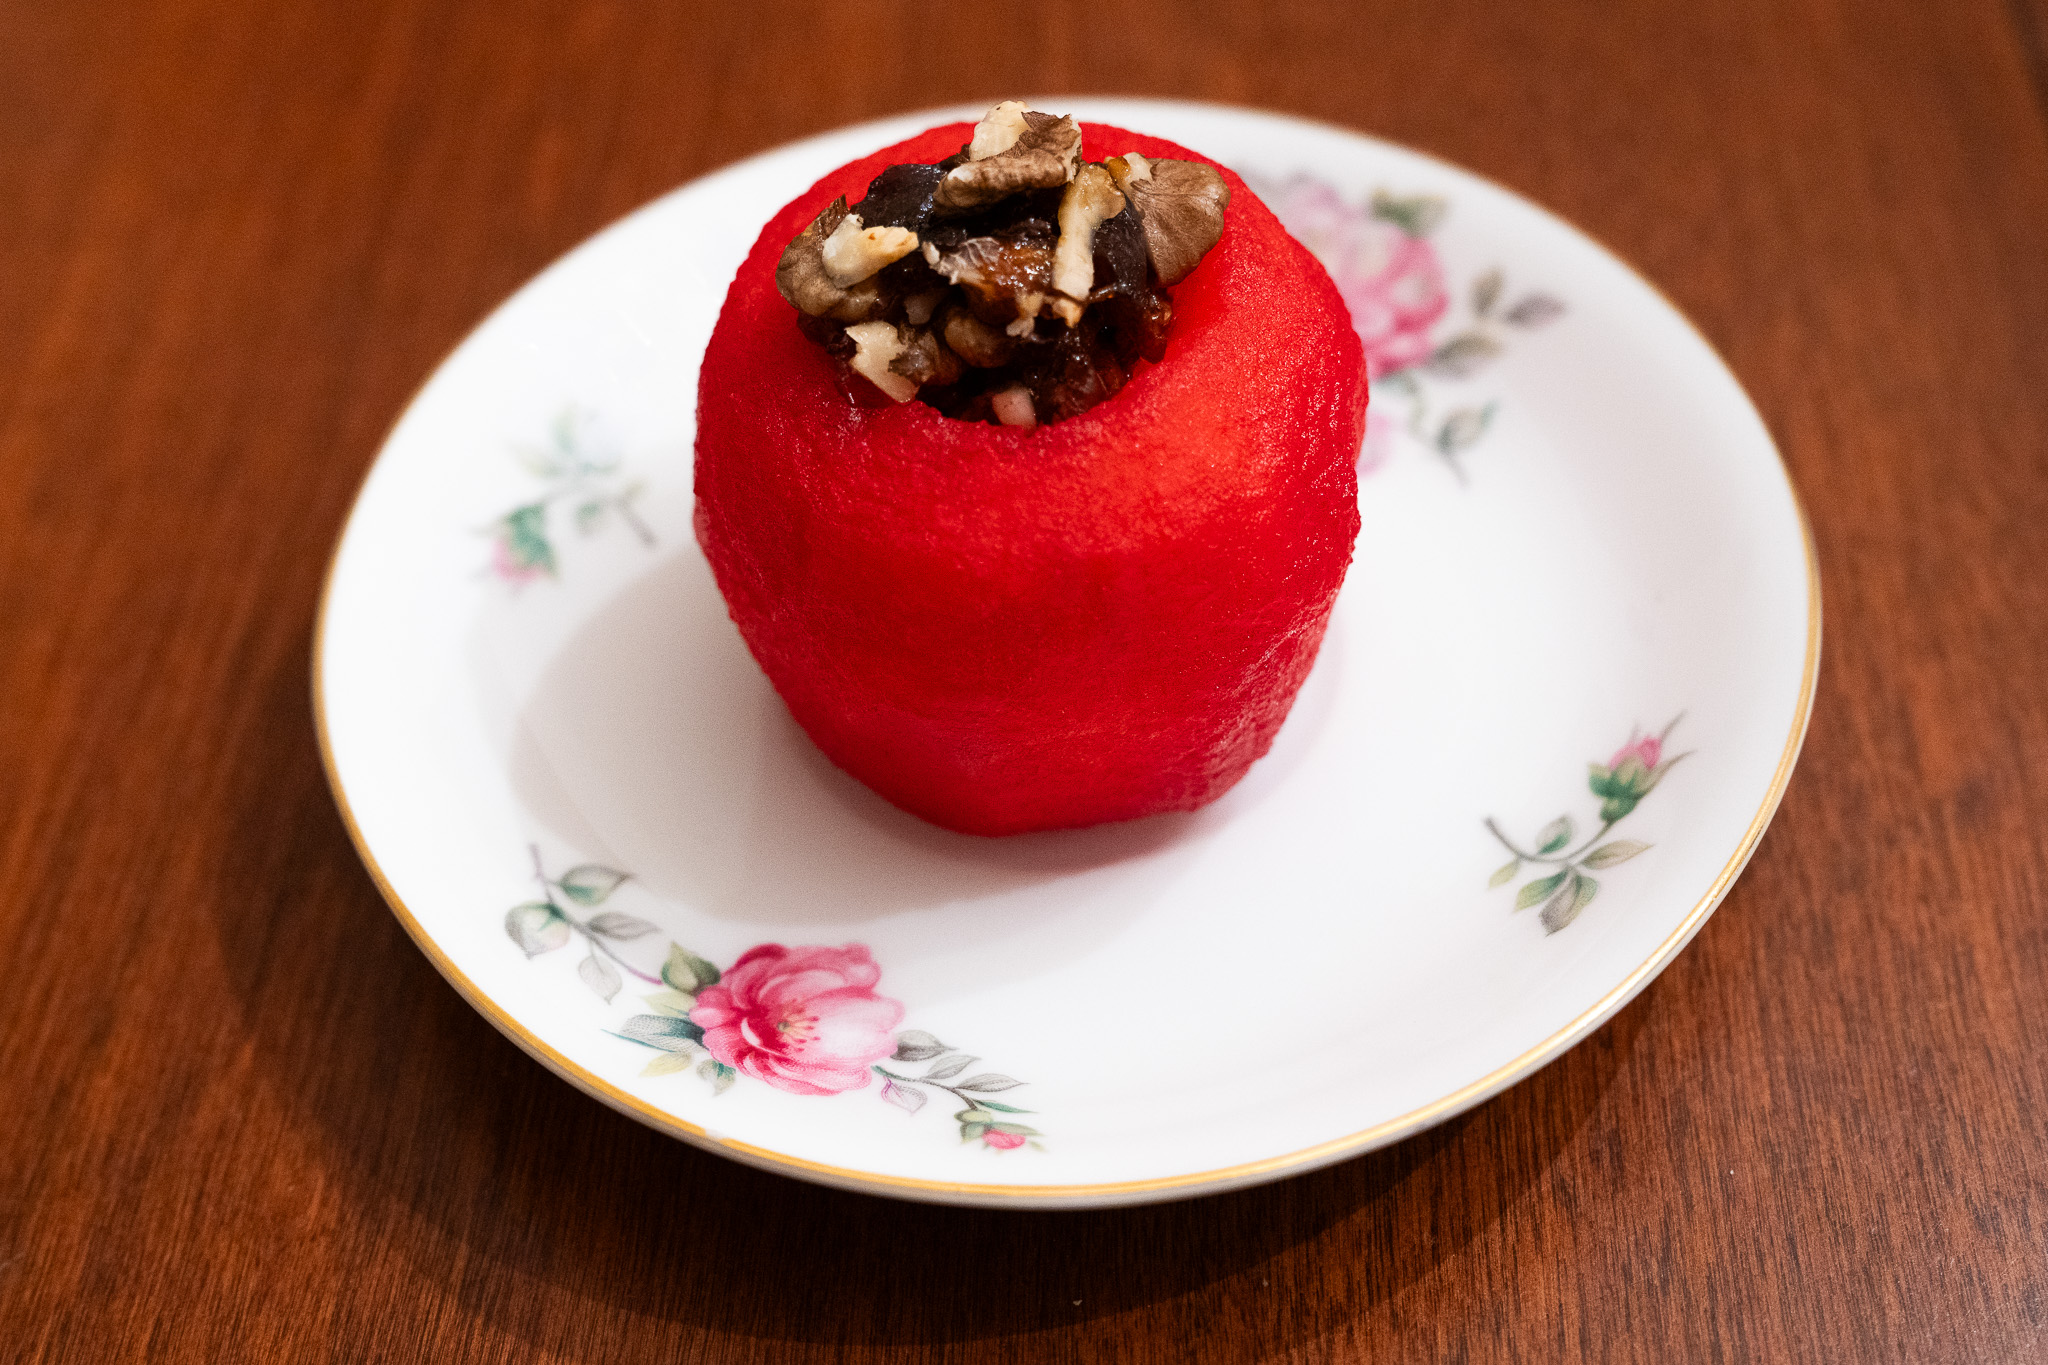
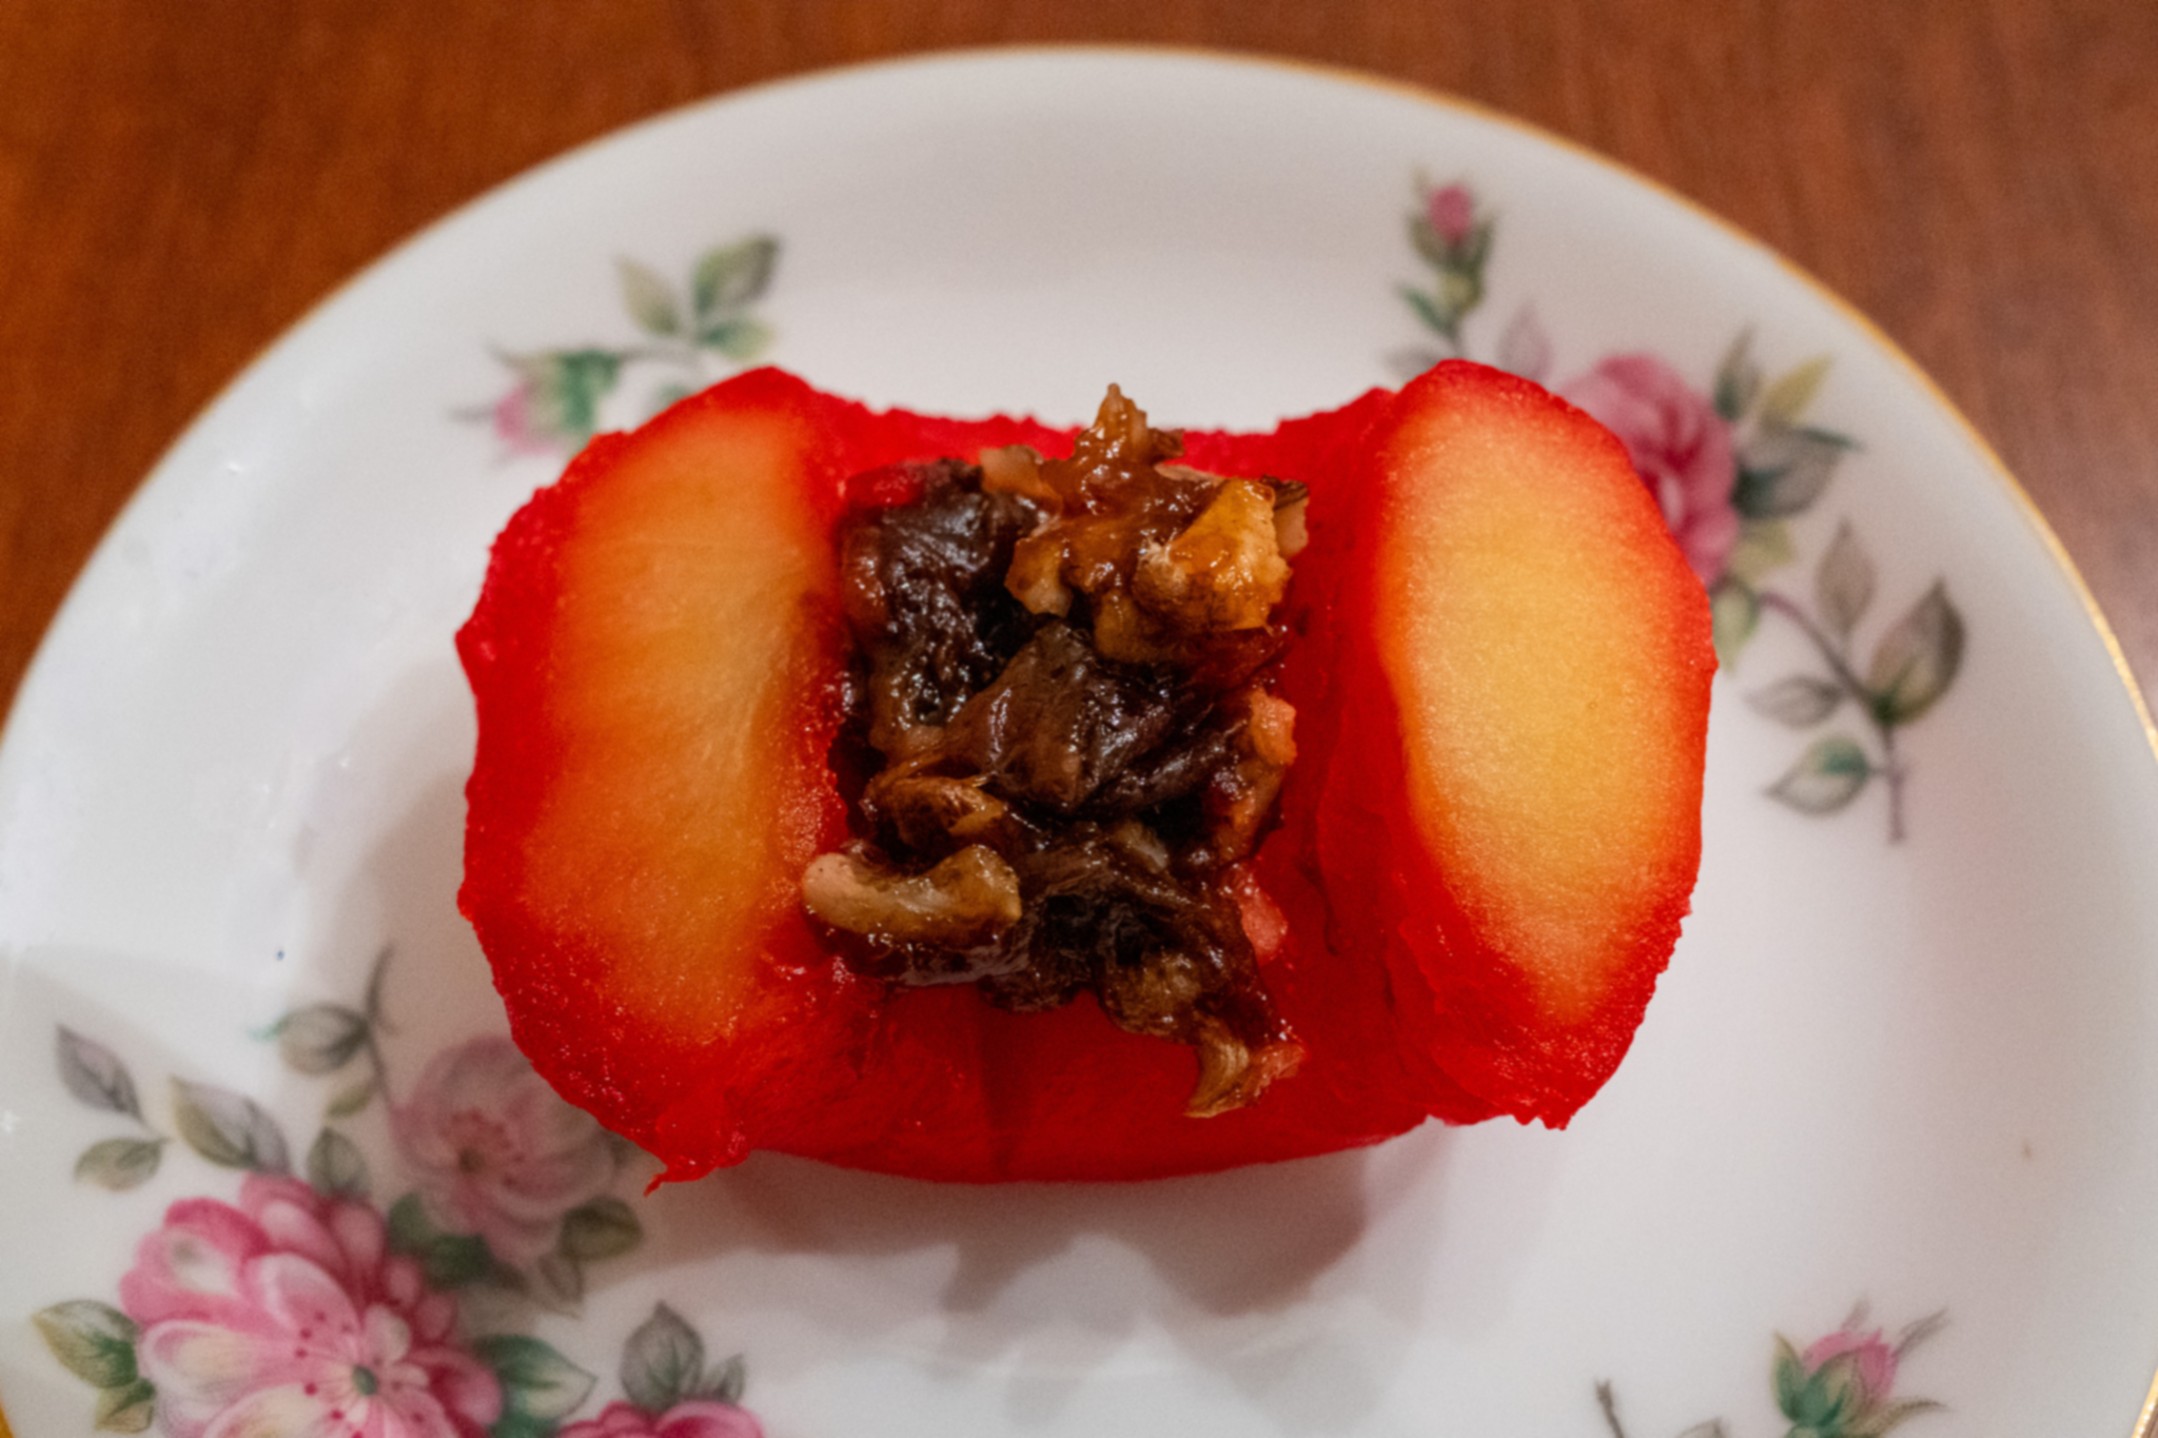
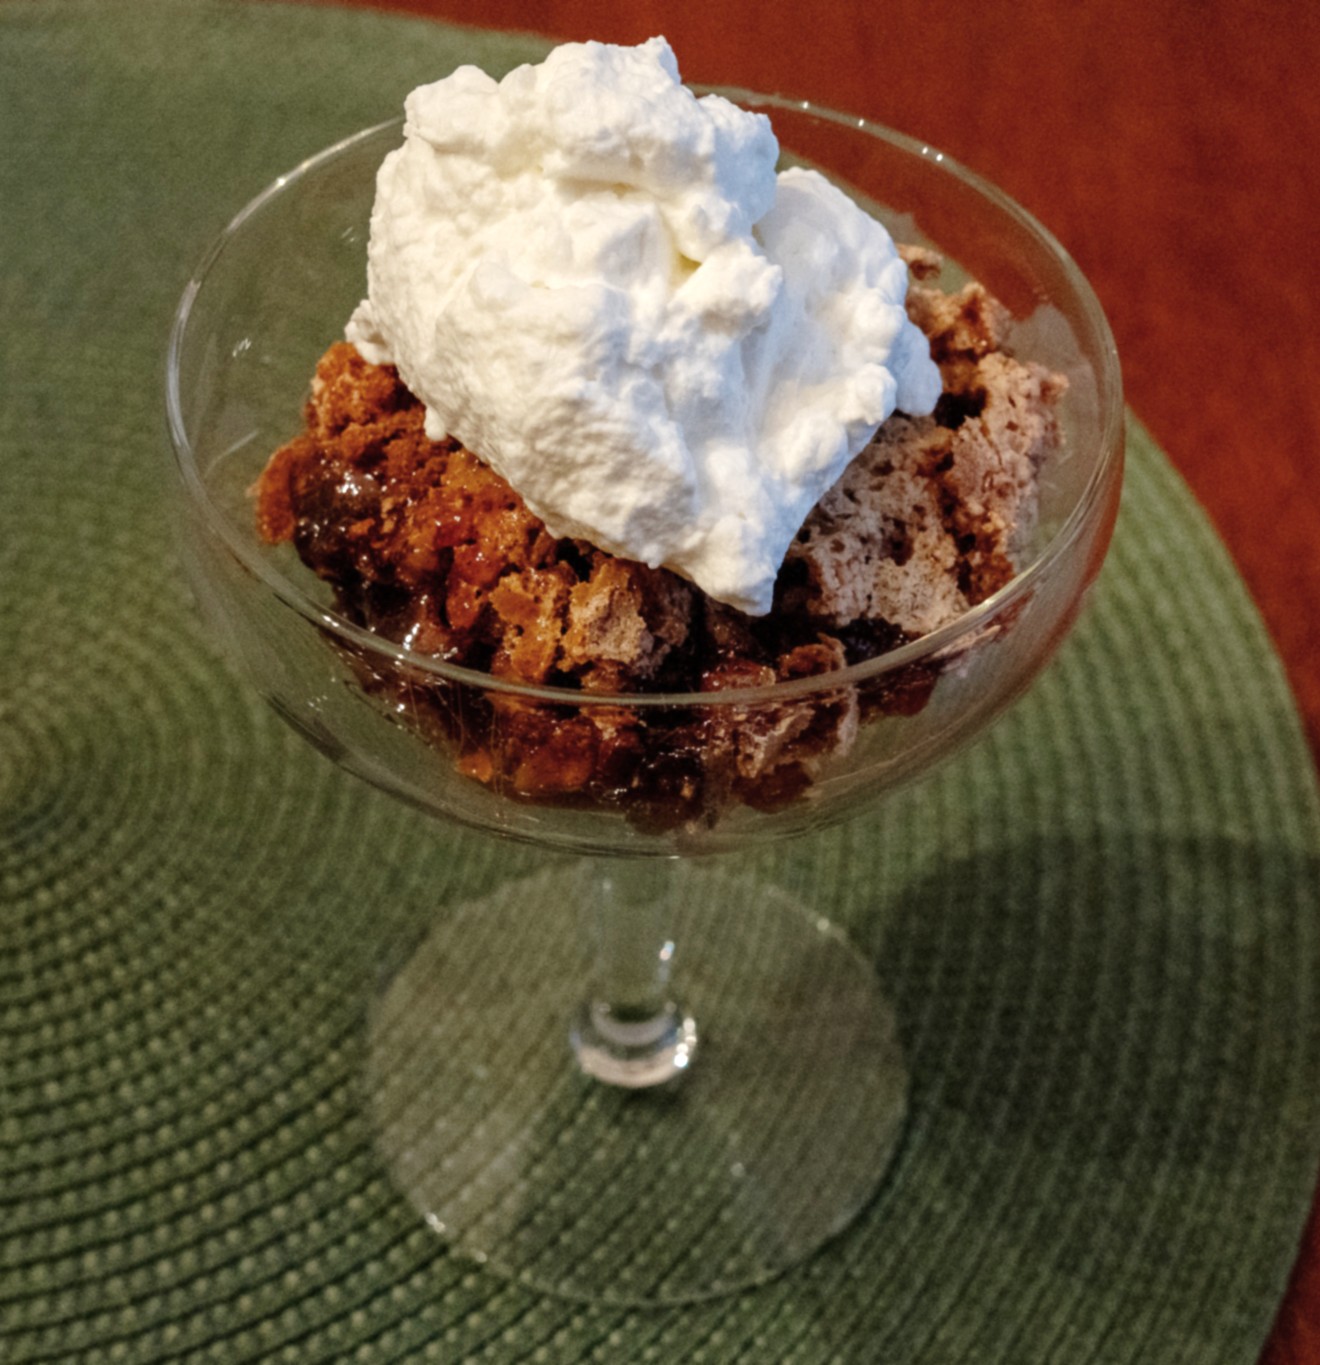 I recently came across an intriguing recipe in a 1925 issue of Farm Journal. The recipe was labeled “food for the gods or date crumbles.” What a bold assertion! Could this recipe possibly be that good? I had to find out, so next thing I knew I was making the recipe.