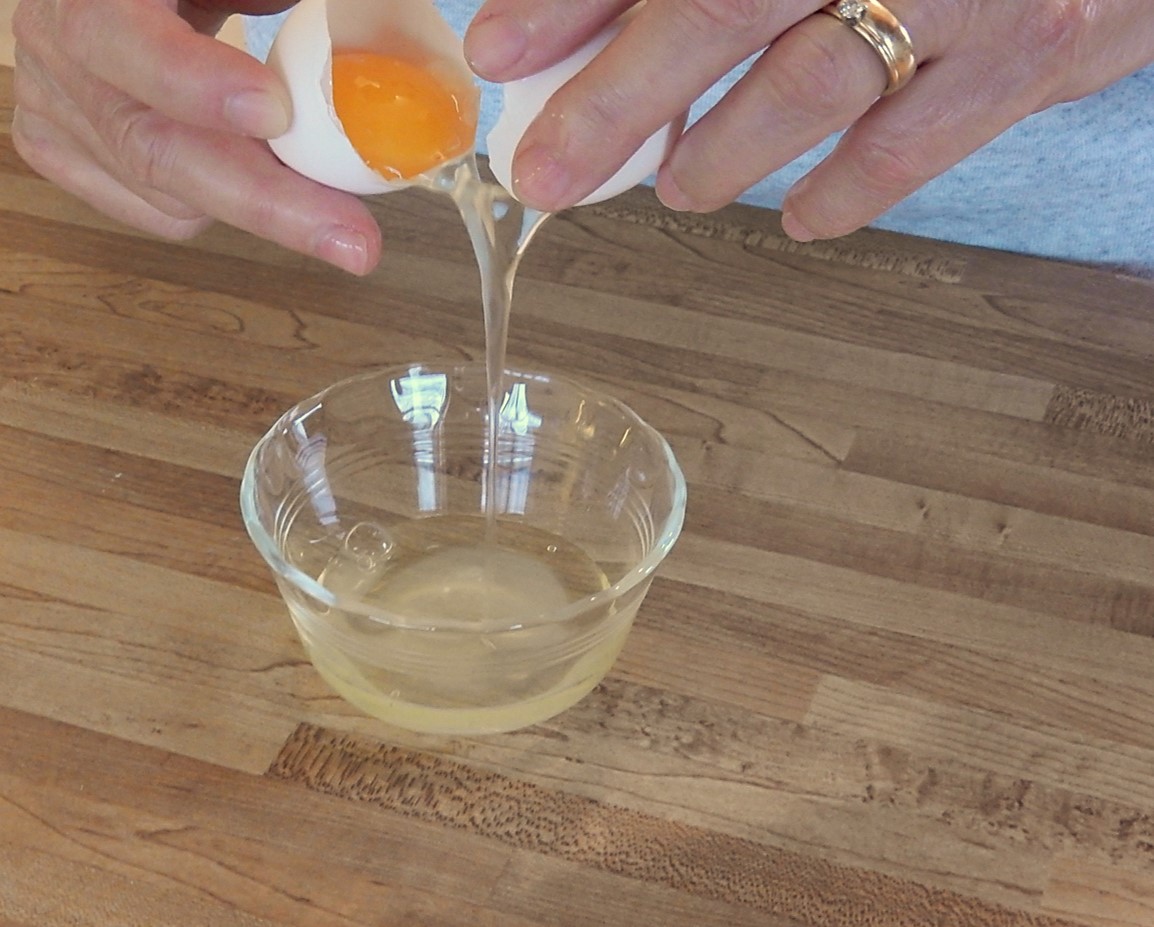
Old recipes call for separating egg whites from yolks much more frequently than modern recipes. For example, a few days ago I needed to separate four eggs to make the hundred-year-old Lemon Meringue Pie recipe that I recently posted. The yolks went into the lemon custard filling and the whites into the meringue.
Old cake recipes also often call for separating the eggs and beating the whites before adding them to the batter to get a lighter, fluffier cake. . . and so do some old omelette recipes. . . . My list could so on and on.
Here are directions in a hundred-year-old home economics textbook for separating eggs:
Separating Whites from Yolks
Break the egg over a bowl, turn the small end down, and pull the shell apart, slipping the yolk from one half of the shell to the other once or twice, so that the white will drop into the bowl. If any of the yolk is mixed with the white, the white will not beat well on account of the fat present.
The Science of Home Making: A Textbook in Home Economics by Emma E. Pirie (1915)
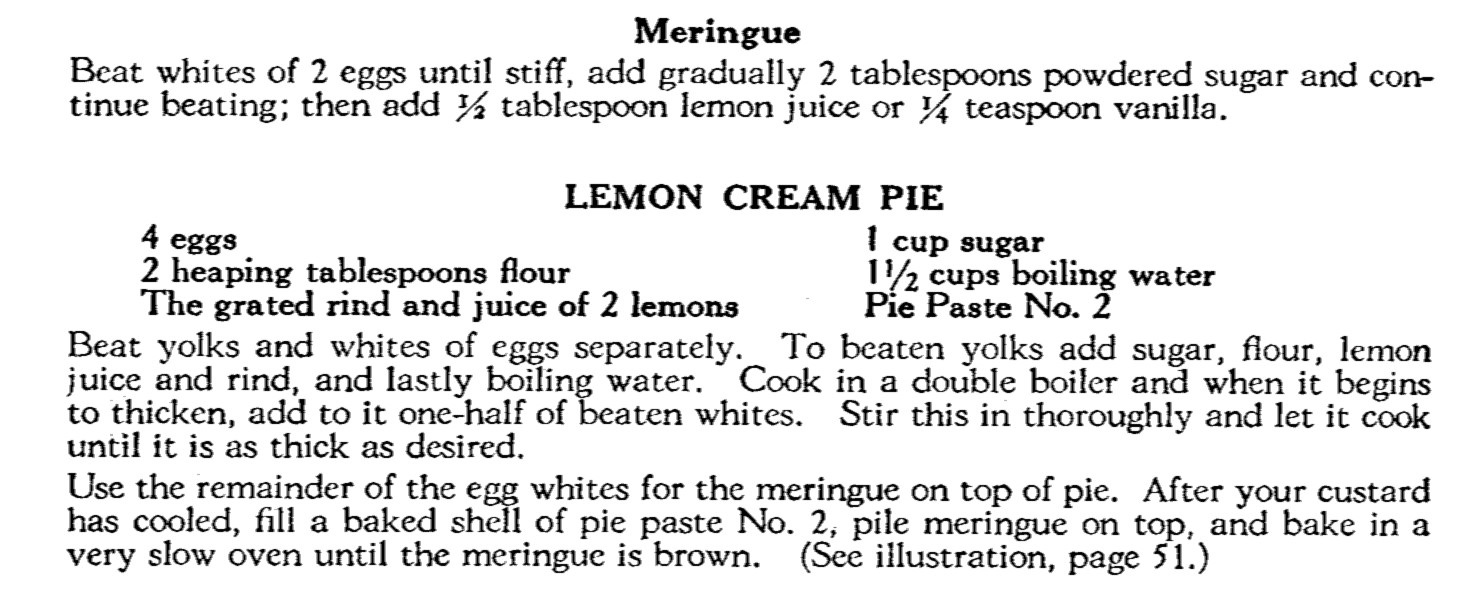
There’s nothing quite as delicious as some of the classic pies. I found a hundred-year old recipe for Lemon Creme Pie – more commonly known as Lemon Meringue Pie – in a small promotional cookbook published by the Calumet Baking Powder Company. The accompanying picture brought back memories of delectable pies made by my grandmother and great aunts at family gatherings – and I immediately knew that I needed to try it.
Source: Reliable Recipes (1912)
The lemon juice and grated lemon peel combine beautifully with the other ingredients to create a refreshingly tart pie covered with billows of light, slightly sweet meringue. This recipe is definitely a keeper.
approximately 1/2 cup lemon juice + 1 tablespoon lemon juice (juice from 2-3 lemons, depending upon size)
grated lemon peel from 2 lemons
1 1/2 cups hot water
1 9-inch baked pie shell
1/4 cup powdered sugar
Preheat oven to 350° F. Combine sugar and flour in a mixing bowl, then stir in egg yolks. Add 1/2 cup lemon juice, grated lemon, and water; beat until smooth. Put mixture into a saucepan; bring to a boil using medium heat while stirring constantly. When the mixture begins to boil, reduce heat and continue cooking for 1 minute or until it thickens. Put filling into the pie shell.
To prepare the meringue, put the egg whites into a mixing bowl. Beat until stiff peaks form, then beat in the powdered sugar and 1 tablespoon lemon juice. Spoon the meringue onto the top of the pie, and then swirl. Bake in the oven for approximately 10 minutes or until the meringue is a light brown.
Here’s the original recipe:
Source: Reliable Recipes, published by Calumet Baking Powder Co. (1912)
Source: Tried and True Cook Book, Compiled and Published by the Willing Workers of The Minneapolis Incarnation Parish (1910)
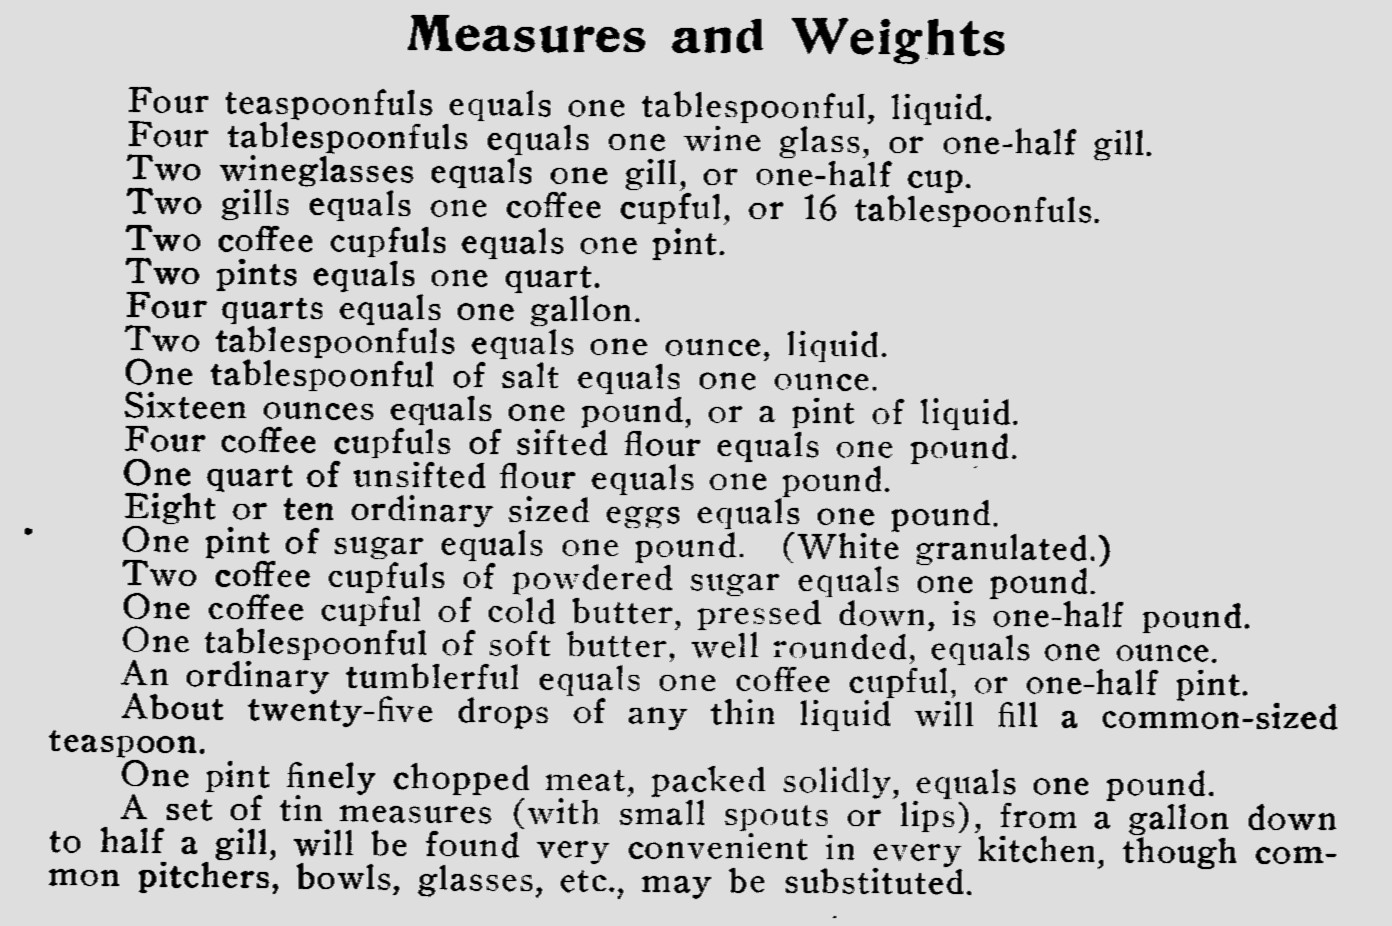
Cookbooks, then like now, often contained measurement equivalents – but the information in the old cookbooks sometimes leaves me scratching my head. What the heck is a gill?
I’ve eaten Fried Asparagus several times in the past year as an appetizer. I was surprised when I saw a recipe in a hundred-year-old church cookbook for Fried Asparagus. It apparently has been around for a long time.
The crisp lightly-browned breading on the asparagus creates an enchanting appetizer or side dish.
The original recipe says, “This is nice and easy to prepare.” I concur. This is a fun and easy recipe.
Bring water to a boil in a large saucepan. Meanwhile wash and trim the asparagus spears, then blanch them by adding to the boiling water. Cook for 2-3 minutes or until al dente. Remove the asparagus from the water and immediately put the spears in ice water to stop the cooking.
Prepare a batter by combining the flour, salt, eggs, and milk in a mixing bowl. Beat until combined. Roll the blanched asparagus in the breading batter.
Heat 1/2 inch of shortening or oil in a large frying pan. Carefully place the breaded asparagus spears in the pan in a single layer. Depending upon pan size, the spears may need to be cooked in several batches. Fry for about a minute or until the bottom side of the asparagus is lightly browned, then gently turn and fry until the other side is browned. Remove from pan and drain the asparagus on paper towels. Serve immediately.
And, here is the original recipe:
Source: Tried and True Cook Book, compiled and published by the Willing Workers of the Minneapolis Incarnation Parish (1910)
The original recipe is lacking in details. It tells the cook to dip the asparagus in batter, but fails to tell them how to prepare the batter. Apparently the recipe author assumed that every cook already knew how to prepare batter. Since I didn’t know how off the top of my head, I decided to adapt an old recipe that I’d previously used to make fritters to make a batter that would work with the asparagus.
I’m often fascinated by even the simplest hundred-year-old advertisements. For example, this advertisement for Heinz Spaghetti is so basic –yet it provides many insights into the use of commercially prepared foods, ‘international cuisine’, and cooking methods back then.
Can I let you in on a secret? March is one of the most difficult months to eat local seasonal foods. Winter staples like squash, onions, cabbage. . . even apples are starting to seen humdrum. And, it will be at least a few weeks until local fresh produce is available. Usually, I cheat a little and buy strawberries and asparagus at the supermarket, and justify it by saying they are March fruits and vegetables. . . somewhere.
But, when I browse through hundred-year-old magazines, I’m keenly aware that people actually ate local foods that had been stored all winter during March back then.
I decided to that today I was going to make an authentic March food and began flipping through the March, 1916 issue of Good Housekeeping. I came across an old recipe for Apple Johnny Cake that intrigued me.
This corn bread contains no sugar and feels healthier than modern sugared corn bread. The apples (I used Braeburn apples) embedded in the Johnny Cake are the sole source of sweetness, and work perfectly in this recipe.
The Apple Johnny Cake was good–though I must admit that I can hardly wait for the local spring fruits and vegetables to arrive on the scene (or I might cheat and buy some more Mexico, California, or Florida produce when I go to the supermarket tomorrow).
Here’s my updated version of the hundred-year-old recipe for modern cooks:
Preheat oven to 375 degrees F. Put corn meal, flour, baking powder, salt, and milk into a mixing bowl; beat until smooth. Stir in apple slices, and then put the batter into a well-greased 9 inch X 9 inch baking pan. Place in oven. Bake 40 to 45 minutes, or until a toothpick comes out clean.
And, here is the original recipe:
Source: Good Housekeeping (March, 1916)
The Apple Johnny Cake was an interesting corn bread, but I wanted to also try eating it crumbled and served with milk as described in the recipe.
I broke a piece of Apple Johnny Cake into a bowl (and sprinkled it with a little sugar), then poured milk on it. It was surprisingly tasty. I can see why children enjoyed this dish a hundred years ago.
This blog addresses mostly food-related topics, but the subtitle of A Hundred Years Ago says Food and More, so today I’m focusing on the More.
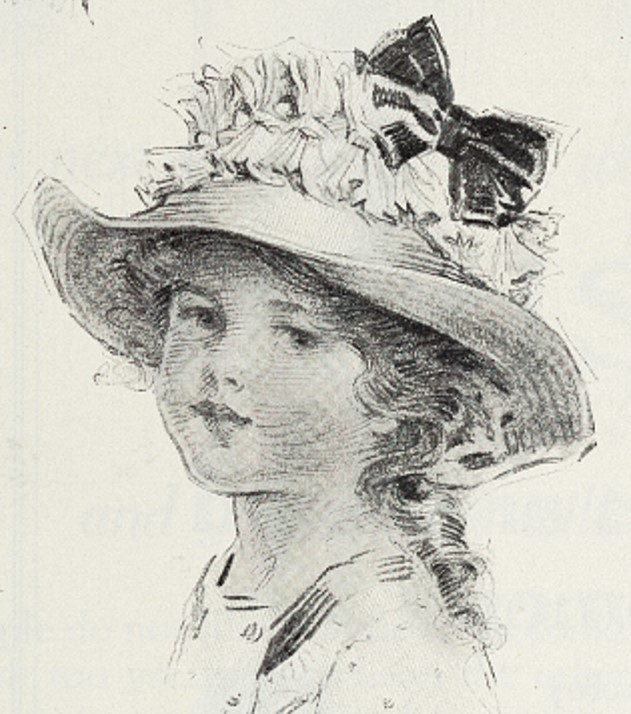
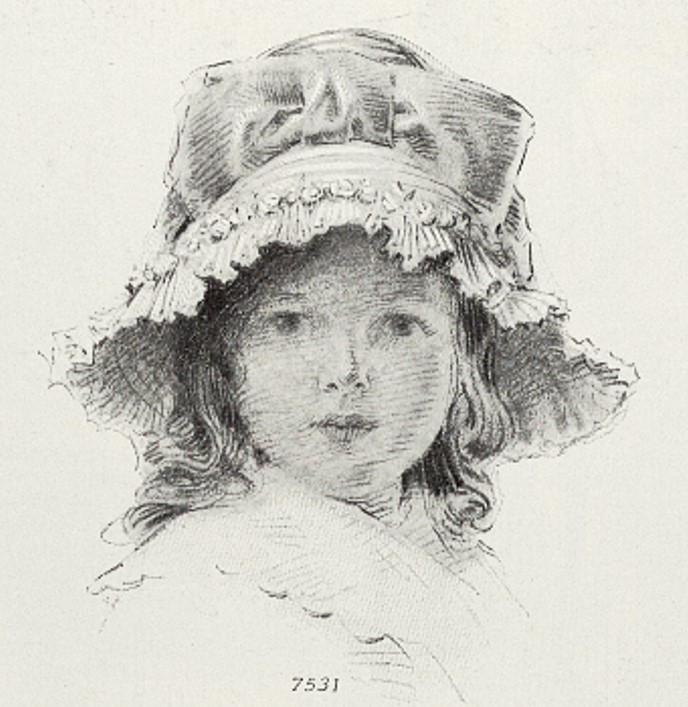
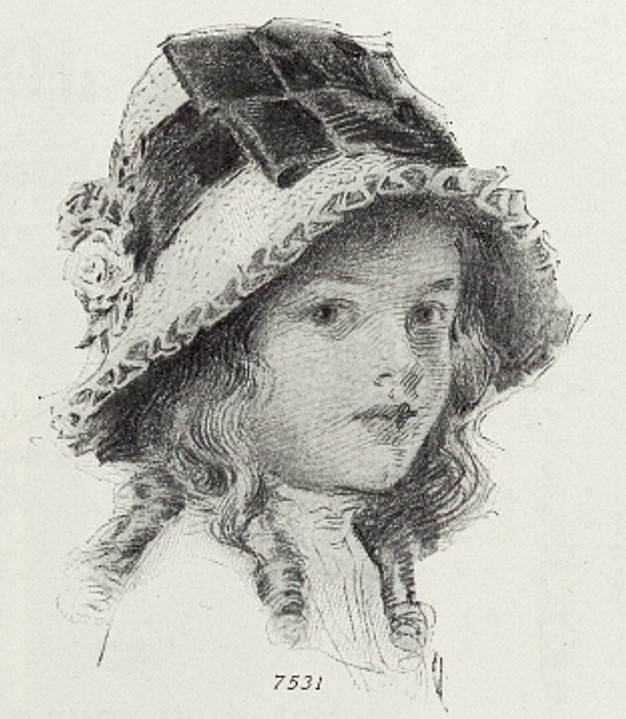
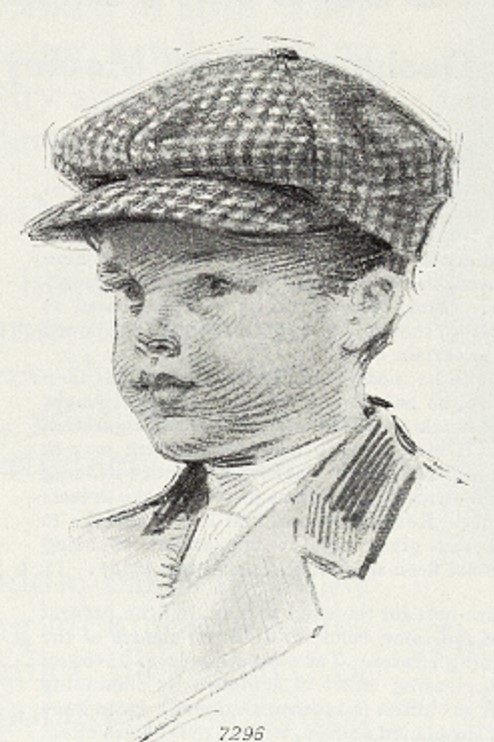
I found some awesome pictures of children’s Easter hats from a hundred years ago that I just needed to share. Amazingly, readers of Ladies Home Journal were encouraged to order patterns from the magazine so they could replicate these hats. Enjoy!
A pretty feature of the hat is the plaited lace joined with tiny flowers at the brim edge.
Fine Tuscan straw was used for the pretty poke bonnet trimmed with flowers and bows of velvet ribbon.
This cap shades the eyes, fits snugly and only needs one good tug to put it on in the most secure manner. Then it has the additional attraction of being soft and small enough to slip into a boy’s pocket when necessary, all of which endears this peaked cap to the little man of the family. Lightweight cloth is the best material to use, with or without a thin sateen or silesia lining.