
Are you feeling stressed about how to make your Thanksgiving turkey?
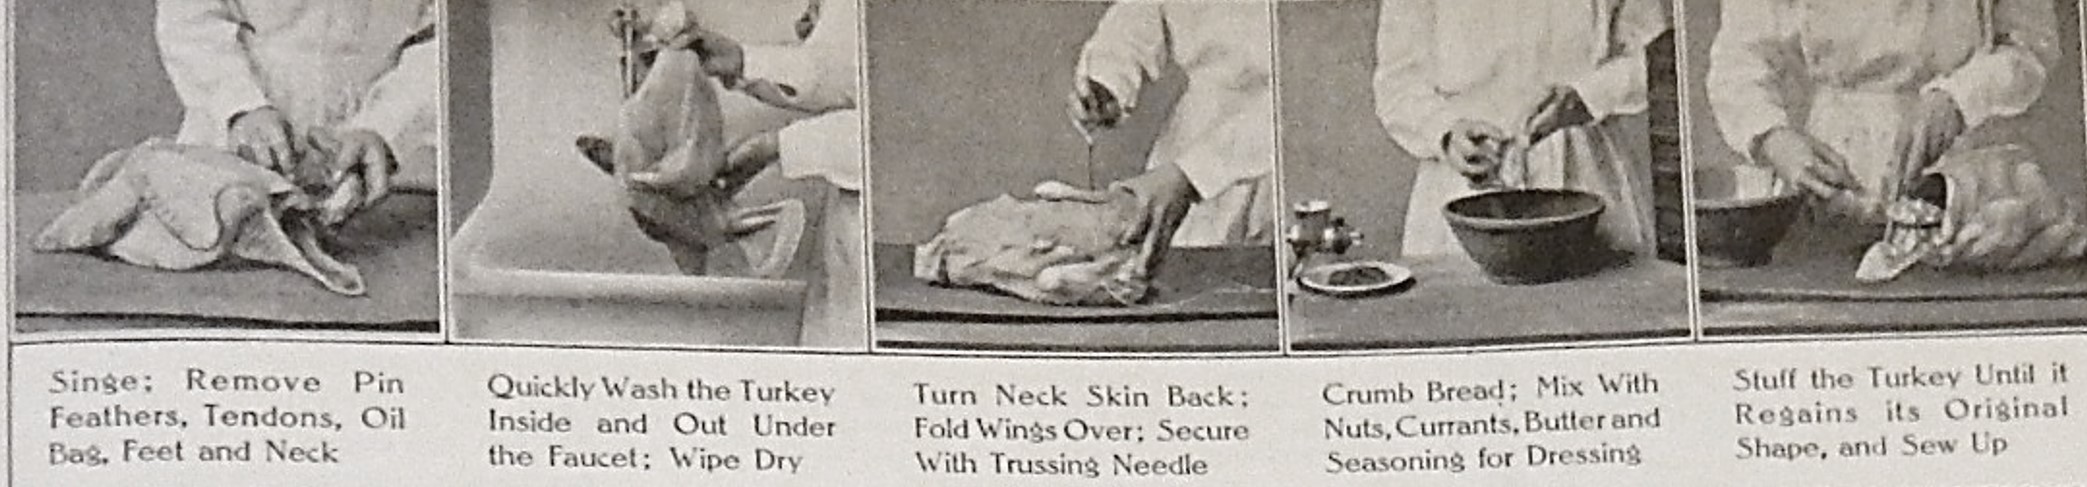
Relax, don’t worry, I’ve got you covered. The November, 1916 issue of Ladies Home Journal had a “Kitchen Movie” that shows how to do it.
HAPPY THANKSGIVING!

Are you feeling stressed about how to make your Thanksgiving turkey?
Relax, don’t worry, I’ve got you covered. The November, 1916 issue of Ladies Home Journal had a “Kitchen Movie” that shows how to do it.
HAPPY THANKSGIVING!
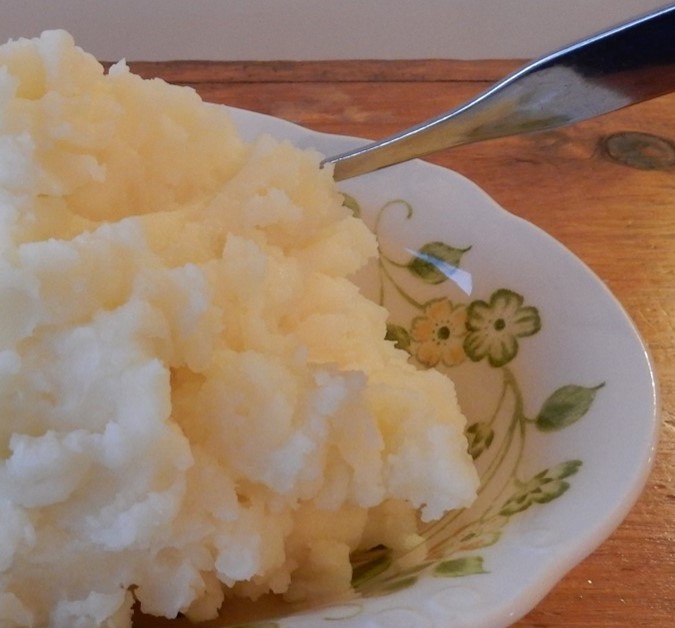
Mashed Potatoes are a quick and easy-to-make comfort food. It’s one of those foods that I never use a recipe to make. Long ago I learned how to boil the potatoes, whip them, add a little butter and milk, and whip a bit more to combine.
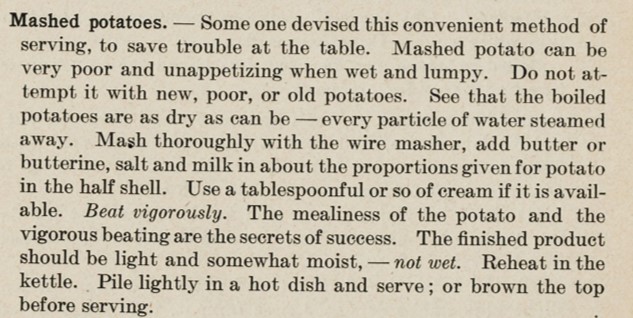
Given how easy it is to make Mashed Potatoes, I was very surprised to discover a hundred-year-old recipe for Mashed Potatoes that contained extensive detail. Back then even the most complex recipes were generally short and lacked details, Why would recipes for difficult-to-make foods leave a huge amount of latitude for interpretation, while a recipe for a basic food be very specific?
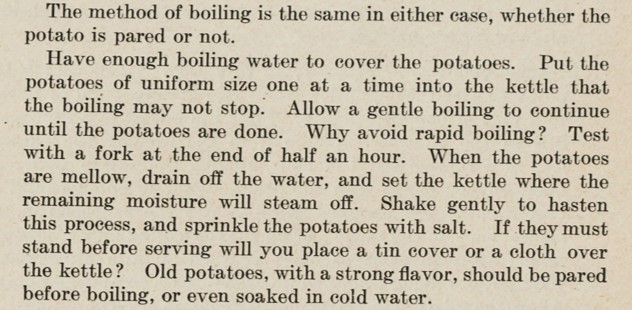
This recipe referred to two other recipes. One explained how to boil potatoes:
The other recipe mentioned in the Mashed Potato recipe was the Potato in the Half Shell recipe, which contained information about how much butter, milk, and salt should be used when making potatoes:

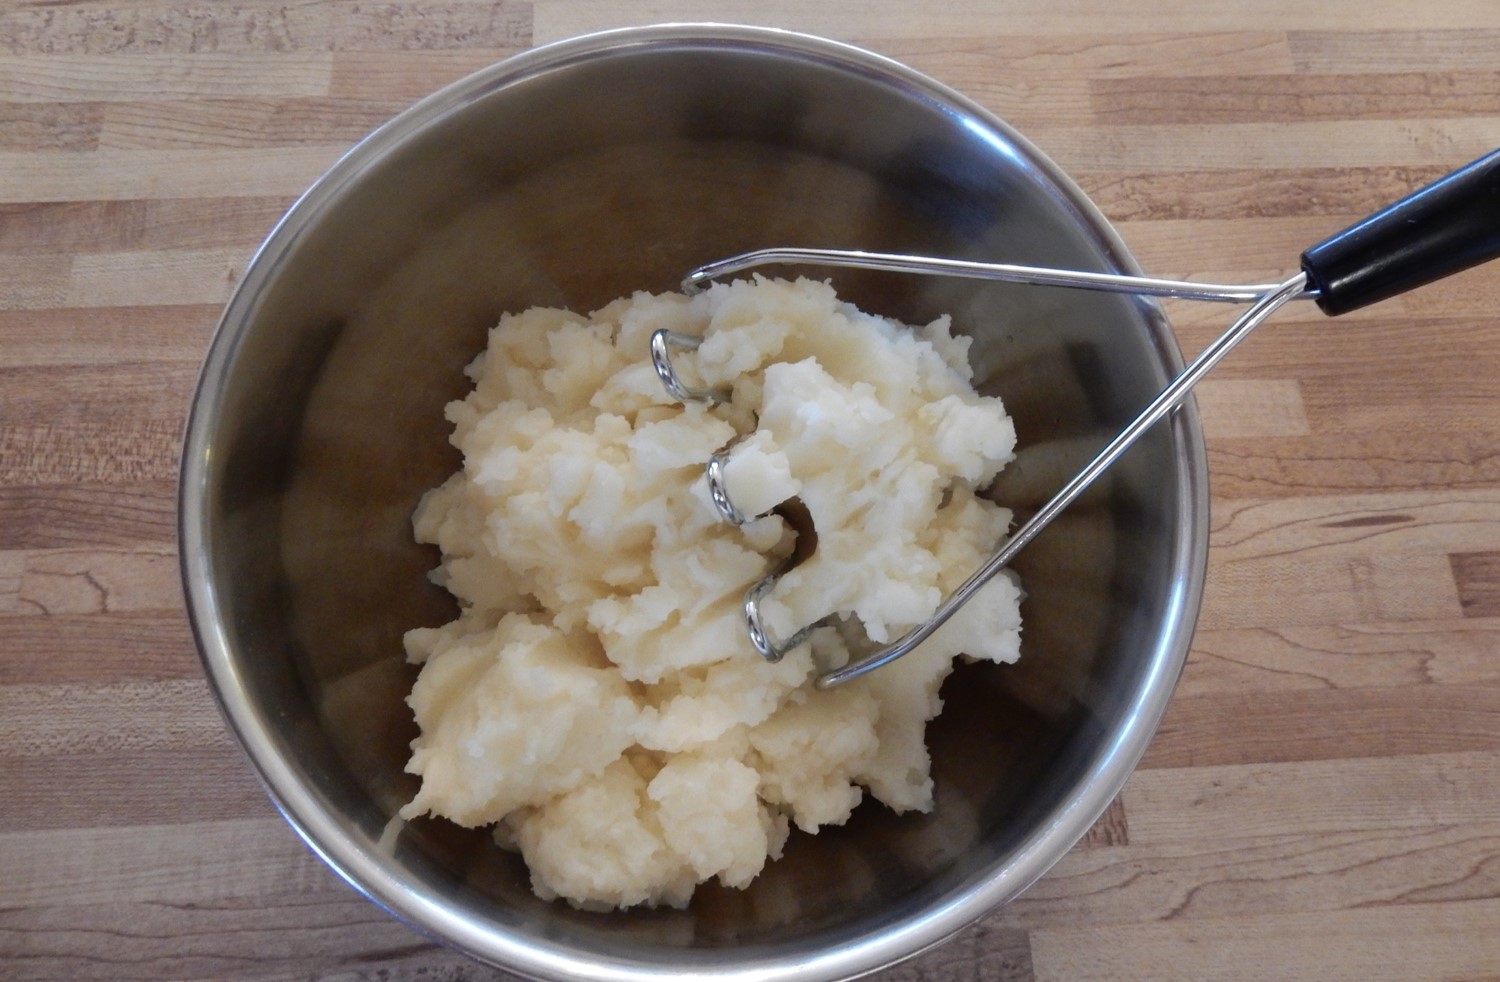
I generally use electric beaters to make “mashed” potatoes, but I decided to give the old-time recipe a try. I dug out my old potato masher out from under all my other seldom-used kitchen utensils in the back of bottom drawer in the kitchen cabinets, and made real mashed potatoes.
Here’s the old recipe updated for modern cooks:
4 cups potatoes, pared and cut into 1-inch cubes (4-6 potatoes) (I used red potatoes – though russets would also work well.)
water
1 teaspoon salt
1 tablespoon butter
approximately 1/4 cup milk
Put enough water into a large saucepan so that it is about 1/3 filled; add salt and bring to a boil using high heat. Add diced potatoes; return to a boil, then reduce heat and simmer 15-20 minutes or until the potatoes are very soft when poked with a fork. Remove from heat and drain. Using a wire potato masher, mash the potatoes until smooth. Add the butter and half the milk. Mash a little more to combine. If the potatoes are too stiff, add additional milk until the potatoes reach the desired consistency. (Do not over-mash or the potatoes will get gummy.) Reheat the mashed potatoes using medium heat To reheat, put the pan with the mashed potatoes back on the stove using medium heat for 15-30 seconds; stir once or twice. Remove from heat and put in serving dish.

Sometimes, I am slightly taken aback by advice in hundred-year-old magazines. The October, 1916 issue of American Cookery gave an explanation of why fruits and vegetables should be washed. The advice was good, but I was amazed that it was considered somewhat controversial to wash fruits and vegetables:
Wash Your Food
The Pennsylvania Health Commissioner, Doctor Samuel L. Dixon, warns against eating raw food unless it is thoroughly washed.
“Care should be exercised in the preparation and serving of green foods, as they are subject to much handling between the garden and the table. Unless the hands through which they pass are absolutely clean they are more or less contaminated. Food exposed for sale in markets is also often subject to indiscriminate handling by prospective purchasers, and is seldom properly protected from dust and dirt.
As a protection, berries and foodstuffs eaten raw should be washed before being served. It is far better to risk a slight impairment of the flavor than to chance eating unclean foods”
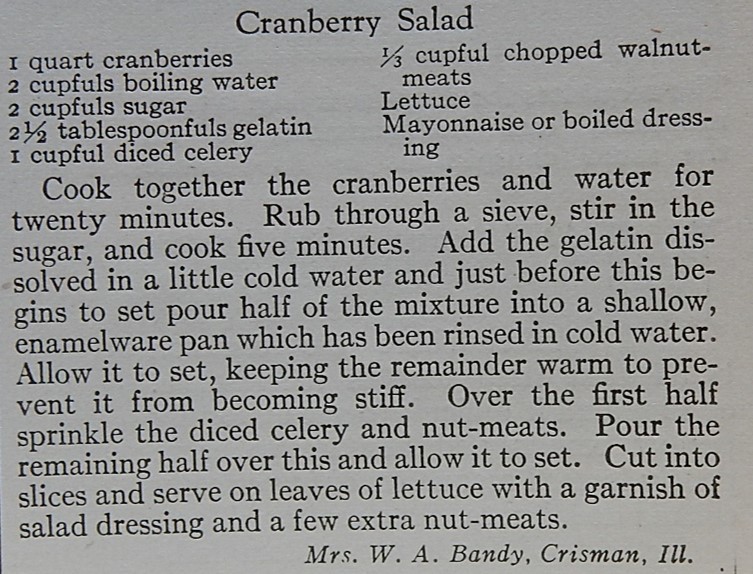
 Remember the old-fashioned gelatin salads with embedded mystery fruits and vegetables that great-aunts inevitably brought to Thanksgiving dinners? Well, I’ve found one of those old recipes. The hundred-year-old Cranberry Salad recipe called for gelatin — and celery and walnuts.
When I made this salad I didn’t want to like it, but I was pleasantly surprised. It tasted similar to jellied cranberry sauce. The colorful, tart jellied sauce was perfectly punctuated with the crunch of the celery and walnuts.
The original recipe was for Cranberry Salad, but when I updated the recipe I renamed it, Jellied Cranberry Sauce with Celery and Walnuts, to more accurately describe the dish. Here’s the original recipe:
I bought a 12-ounce bag of cranberries to make this recipe. When I measured how many cranberries were in the bag, I realized that I only had 3 cups of cranberries, not the 4 cups (1 quart) called for in the old recipe. I reduced all of the other ingredients proportionately and made three-fourths of the original recipe.
When serving the Jellied Cranberry Sauce with Celery and Walnuts, I didn’t cut it into squares, and I skipped the lettuce and mayonnaise. I just put it in a pretty dish and let people serve themselves. Here’s my updated recipe:
3 cups cranberries (1 12-ounce bag)
1 1/2 cups water
1 1/2 cups sugar
2 packets unflavored gelatin
3/4 cup celery, chopped
3/4 cup walnuts, chopped
Put cranberries and 1 1/2 cups water in a medium saucepan, bring to a boil using medium heat, then reduce heat and gently simmer for 20 minutes while stirring occasionally. Remove from heat and cool slightly, then press the cooked cranberries through a sieve or strainer. (I used a Foley mill. A food processor could also be used to puree the berries). Return the cranberry sauce to the sauce pan and sprinkle the gelatin over the puree. Let sit for one minute, then add the sugar and stir. Put on the stove and bring to a boil using medium heat while stirring constantly, then reduce heat and cook for an additional minute. Remove from the heat.
Put half of the cranberry sauce into a serving dish or bowl; refrigerate until just set (about 1 1/2 hours). (Keep the remainder of the cranberry sauce at room temperature.) Remove the set cranberry sauce from the refrigerator and sprinkle with the chopped celery and walnuts. Pour the remaining half of the cranberry sauce over this , and return to the refrigerator until set.

")
Ever wonder what the soldiers ate during World War I? . . . Well, according to a hundred-year-old magazine, one thing they ate was honey.
Honey in the Trenches in Europe
Honey is being used in the European trenches along with sugar. Both of these articles are energy-producers, and in many cases honey is cheaper than sugar.
When the war broke out in 1914 the prices on medium grades of honey began to sag until there was no demand. In the meantime sugar began to climb. The war lords of Europe, when it came to the matter of rations, soon discovered that honey, an energy-producer, was much cheaper than sugar (also an energy-producer), and consequently honey has been going into the trenches, and is going there still.
Apparently, only the medium grades are being used, because they furnish as much energy per pound as the finer and better-flavored table honeys that cost as much or more than sugar.
The American Food Journal (November, 1916)
 Frankly I’m tired of the ubiquitous pumpkin pie recipe that calls for evaporated milk and a 1-pound can of pumpkin. Is it really necessary to use evaporated milk–or would regular milk work? And, of course, I then made the short leap to: How did they make pumpkin pies a hundred years ago?
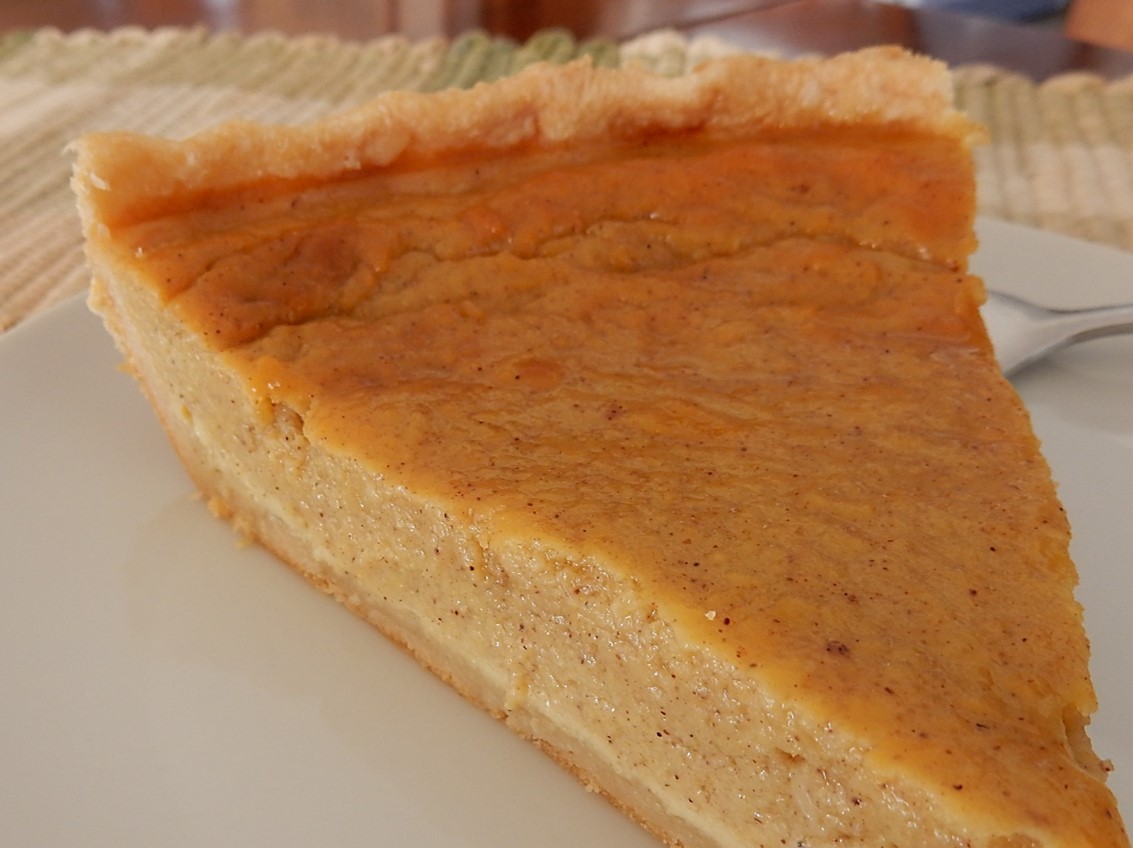
I found an awesome pumpkin pie recipe in the Lycoming Valley Cook Book. It was compiled by “the Ladies of the Trout Run M.E. Church, Trout Run Pa”. in 1907. The pie is similar enough to modern recipes that it won’t alarm your Thanksgiving guests. They’ll just think you used your usual recipe–but that it turned out better than it does in a typical year.
The resulting pie has a nice blend of spices that don’t overwhelm the pumpkin. The recipe calls for just two spices (cinnamon and ginger) rather than the three or four typically used in modern recipes.
It also uses more eggs than are generally used in recipes that call for evaporated milk. Since the milk used in the old recipe contains more liquid, additional eggs are needed to set the custard. This pie also requires more baking time than modern pumpkin pies, but the result is a rich and creamy custard filling.
Here’s my adaptation of the old recipe for modern cooks:
1 cup pumpkin
1/2 cup sugar
2 eggs
1 cup milk
1 teaspoon cinnamon
1 teaspoon ground ginger
1/2 teaspoon salt
1 8-inch (small) pie shell
Preheat oven to 425° F. Combine all ingredients (except pie shell) in a mixing bowl; beat until smooth. Pour into pie crust. Bake 15 minutes; then reduce heat to 350°. Continue baking (about 50-60 minutes) until a knife inserted in the center of the pie comes out clean.
Notes: This recipe filled the 8-inch pie shell to the very rim, and it was a little difficult to get it into the oven without spilling. (Don’t overfill pie shell. If there is too much filling put the extra in a small casserole dish and cook separately.)
Here’s the original recipe:


I’ve often heard parents say that their teen-aged sons “eat them out of house and home.” That’s apparently been an issue for a long time. Here are some excerpts from a hundred-year-old Chicago Evening Post article as reprinted in the December, 1916 issue of American Cookery:
The Russell Sage Institute has just completed a scientific inquiry into the eating capacity of 300 boys at a big boarding school. The whole thing is summarized in one convincing sentence, “The 5,000 calories thus contained in the daily diet of active American boys of school age are half again as much as a farmer at work is believed to require.”
It is well to keep this scientifically ascertained fact in mind if you have boys of your own; it is their perfect justification for trying to eat you out of house and home.
The fixing of the fact by research has its sociological value, too. There are multitudes of boys who do not get their 5,000 calories daily. “Lack of appreciation of this factor,” says the investigator’s report, “and lack of provision for it, are the probable causes of much of the under-nutrition seen in children of school age.”

I used fresh pumpkin, but 1/2 of a can of pumpkin (14-16 oz. can) could be used. This recipe makes a small 8-inch pie. If I used canned pumpkin I’d probably double it, and instead make a large 10-inch pie.
To prepare the fresh pumpkin for the pie, I peeled part of a pumpkin and cut it into one-inch cubes. About 1 3/4 cups of cubed pumpkin will make a cup of cooked pumpkin. I put the cubed pumpkin into a saucepan and covered it with water. I turned the heat to high and brought to a boil; I then reduced the heat to medium and cooked until tender (about 20 minutes). I drained the pumpkin and used my mixer to blend it until smooth. I then proceeded with the pie recipe.
Fresh pumpkin can also be roasted. Cut the pumpkin in half and remove seeds and membranes, then put it in the oven at 400° F. Bake for about an hour or until the pumpkin is tender. Remove from oven. When the pumpkin has cooled, remove the pulp from the pumpkin shell. Use mixer, blender, or food processor to blend the chunks of pulp until smooth. Proceed with the pie recipe.