Old-fashioned Okra and Tomatoes

I seldom eat okra, but I recently saw some beautiful okra at the local farmers’ market, and decided to give it a try. Then, of course, I had to find a hundred-year-old okra recipe. I found a delightful Okra and Tomatoes recipe in 1904 Kentucky cookbook, called The Bluegrass Cookbook.

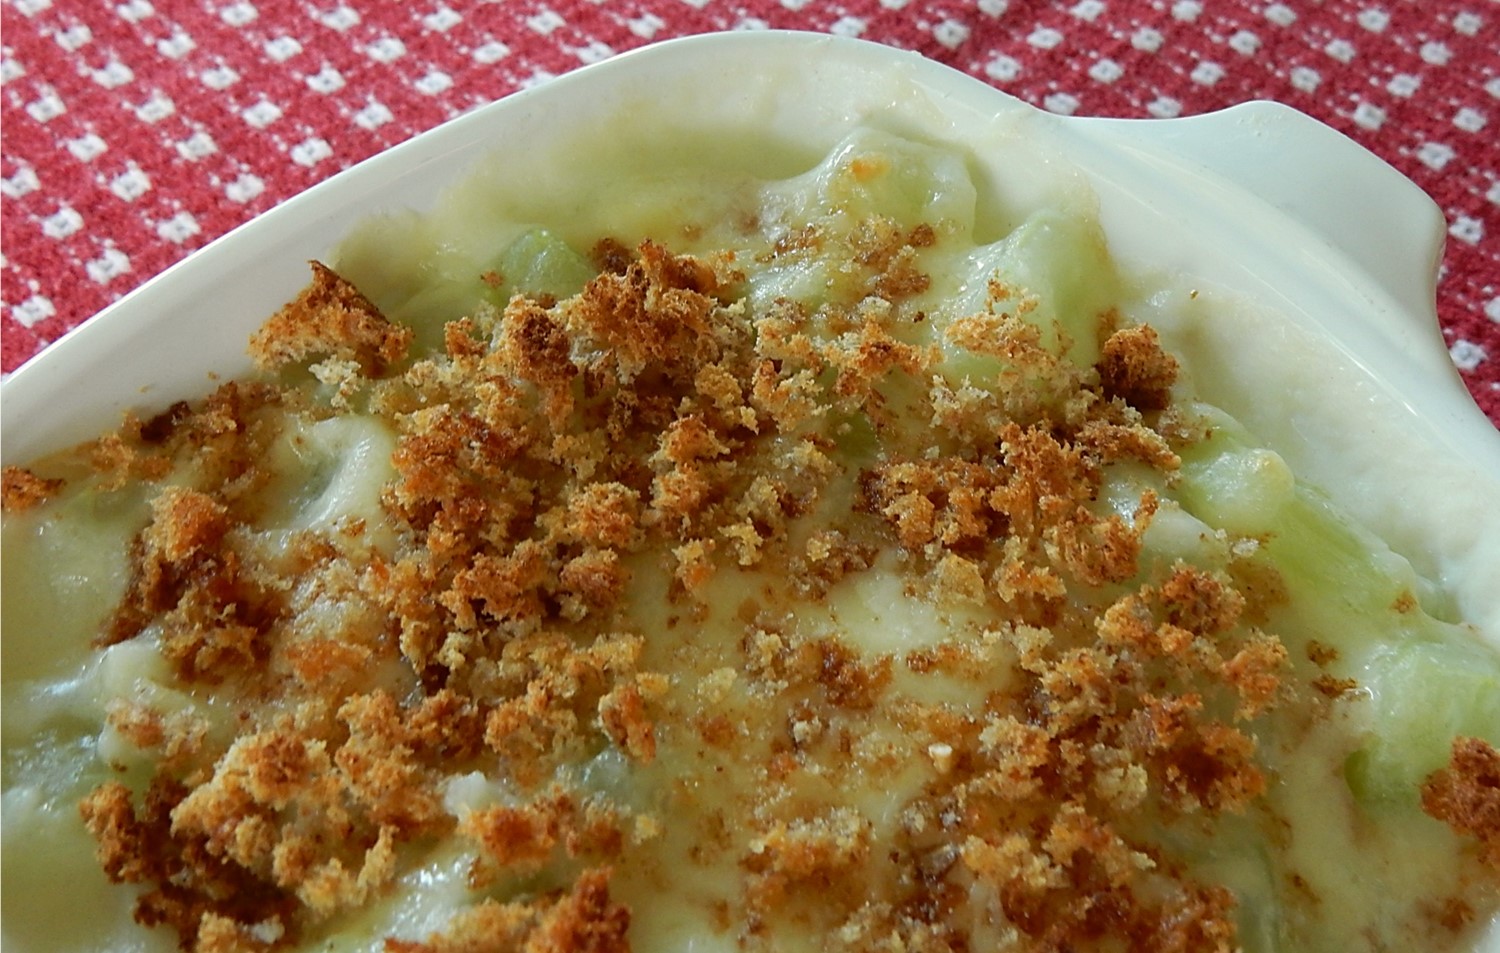
The Okra and Tomatoes (and a little onion) were tasty, as well as easy-to-make and nutritious. One drawback – the okra had a bit of a gooey (some call it a slimy) texture; but that’s just par for the course for this vegetable.  No vegetable’s perfect.

Here’s the original recipe:

Source: The Bluegrass Cook Book by Minnie C. Fox (1904)

And, there’s the recipe updated for modern cooks:

Okra and Tomatoes

  • Servings: 3-4
  • Difficulty: easy
  • Print

1 cup okra, sliced

2 medium tomatoes

1/4 cup onion, diced

1 tablespoon butter

1/2 teaspoon salt

1/8 teaspoon pepper

Put okra in a saucepan, and add enough water to just barely cover it. Bring to a boil using high heat, then reduce heat to low and cook until tender (about 10 minutes). Remove from heat, and thoroughly drain.

In the meantime, put a pan of water on the stove; bring to a boil. Drop the tomatoes into the water for about 15 seconds: remove from heat and gently slip the skin off the tomatoes. Core tomatoes, then dice.  Put the diced tomatoes in a saucepan, and using medium heat cook 5 minutes while stirring frequently; then add onions. Continue cooking and stirring until soft and juicy (about an additional 5 minutes). Stir in butter, salt, and pepper. Add cooked okra, and stir gently to combine. Serve immediately.

Note: See the reader comments. Several readers suggested adaptations to this recipe that might improve the texture and make the okra less gooey.

Hundred-year-old Advice for Buying in Quantity

Basket of Apples (1895) by Levi Wells Prentice (Source: Wikimedia Commons)

Today people often buy food in bulk to save money. A hundred years ago people also wanted to purchase food wisely. Here’s some advice in a 1915 home economics textbook:

For a large family with room for storage it is cheapest to buy supplies in quantity. There is, however, even for the small family a real saving in careful buying. For example, if certain package goods are offered for fifteen cents per package or two for twenty-five cents, buy two if they can be used. The two and one-half cents saved on each package may seem a small saving, but in terms of percent it amounts to sixteen and two-thirds percent, or one-sixth of the whole.

A penny saved is a penny earned, and when it is done by careful buying it is far more easily earned than if some sacrifice is made to save it. In buying canned goods a reduction is often secured by taking a dozen cans or a case at a time.

Frequently a whole basket of fresh fruits and vegetables such as peaches and tomatoes can be purchased for little more than the price of a small quantity. If a whole basket is more than is needed for immediate use, one can preserve the surplus by cooking or canning it.

Science of Home Making: A Textbook in Home Economics (1915) by Emma E. Pirie

Old-fashioned Graham Nut Muffins

Maybe it’s just me, but I’m soooo tired of the sugary muffins typically sold at coffee shops, so I was pleased to recently find a hundred-year-old recipe for Graham Nut Muffins. The recipe called for just a little sugar (and a little molasses). The nuts embedded in the muffin add flavor and texture. This hearty muffin has a nice texture, is tasty, and is a healthy alternative to sweeter muffins.

Here’s the original recipe:

Source: The Housewife’s Cook Book by Lilla Frich (1917)

And, here’s the recipe updated for modern cooks:

Graham Nut Muffins

  • Servings: approximately 16 muffins
  • Difficulty: easy
  • Print

1 cup graham flour

1 cup all-purpose flour

1/4 cup sugar

1/4 teaspoon salt

4 teaspoons baking powder

1 egg, beaten

1 cup milk

2 tablespoons molasses

2 tablespoons butter, melted

1/2 cup nuts, chopped (I used walnuts.)

Preheat oven to 400° F. Grease muffin pans (or use paper liners). In a mixing bowl combine graham flour, all-purpose flour, sugar, salt and baking powder. Add egg, milk, molasses and butter; then stir just enough to combine. Gently stir in the nuts. Spoon batter into muffin  cups; fill each cup about 3/4ths full. Place in oven. Bake approximately 25 minutes or until lightly browned and the muffins spring back when lightly touched.

1918 Quaker Oats Advertisement

Source: Ladies Home Journal (May, 1918)

Food is expensive – both a hundred years ago and now. It’s interesting to see how a 1918 advertisement for Quaker Oats framed the cost of meals around calories. Back then, apparently getting more calories per amount spent was considered a good thing.  Today, are people willing to spend more to get fewer calories?

Old-fashioned Tomato and Nut Salad (Stuffed Tomato with Nut Salad)

The dog days of summer are upon us, but the good news is that delectable garden-fresh tomatoes are plentiful.  So I was thrilled to recently find a hundred-year-old recipe for Tomato and Nut Salad.  This is really a stuffed tomato recipe. The tomato is stuffed with a mixture of chopped tomatoes, walnuts, and green pepper, with a little mayonnaise for added flavor and to bind everything together. The crunchy stuffing reminds me of Waldorf salad – though that isn’t exactly an accurate description since there are no apples in this recipe.

The recipe calls for peeling the tomato. I almost skipped this step- but it’s worth doing. The peeled tomato has a lovely velvety surface which adds to the presentation.

Here’s the original recipe:

Source: Lowney’s Cook Book (1912)

And, here’s the recipe updated for modern cooks:

Tomato and Nut Salad (Stuffed Tomato with Nut Salad)

  • Servings: 1 serving per tomato
  • Difficulty: moderate
  • Print

For each serving use the following ingredients:

1 medium tomato

2 teaspoons walnuts, chopped

2 teaspoons green pepper, chopped

2 teaspoons mayonnaise

lettuce leaves, optional

Put a pan of water on the stove; bring to a boil. Drop the tomato into the water for about 15 seconds: remove from heat and gently slip the skin off the tomato.  Using a knife remove the stem end and the firm core from the tomato and discard. Scoop out the tomato pulp and seeds, place in a strainer and drain off any excess liquid. Place pulp in a bowl; add the walnuts and green pepper. Stir in the mayonnaise, then stuff the tomato with the mixture. If desired serve on lettuce leaves.

Try the “New” Salad Oils: 1918 Good Housekeeping Magazine Recommendations

Source: Good Housekeeping (August, 1918)

Oils are a component of most salad dressings, but in 1918 cooks were urged to reduce their use of fats to support the troops in World War I. And, even if they could get olive oil, it was expensive. An article that year in Good Housekeeping recommended that cooks use the “new” salad oils. Here’s some excerpts:

New Salad Oils

This is the time of year, above all others, when the palate craves the coolness and pungency of salads. Since the salad dressing is often the making of the salad, it is the chief consideration. The main ingredient of most salad dressings is the fat. We have been asked to be sparing in our use of all fats, but fortunately for us the new vegetable oils have come to our rescue.

Olive oil is becoming scarce in this country, and is, in consequence, high in price, but there are plenty of good substitutes in the cottonseed, peanut and corn oils which have been placed on the markets.

While to the lover of olive oil none of these makes quite so good a dressing as the olive oil itself, it is not difficult to prepare satisfactory dressings, and the untrained palate often finds them even better. The more refined and desirable these vegetable oils are for salad oils, the more tasteless they are. They are, therefore, excellent conveyors of condiment. If the flavor of olive oil has become a necessary and fixed habit, a dressing can be made by using one-third olive oil to two-thirds of any substitute oil. For this purpose purchase a heavy, highly-flavored oil oil.

Good Housekeeping (August, 1918)


Old-fashioned Scalloped Cucumbers

Why do we almost always eat some vegetables raw, while others are typically cooked? I don’t have an answer, but I know that I was surprised when I recently saw a hundred-year-recipe for Scalloped Cucumbers. And, since it’s cucumber season, I decided to give the recipe a try.

The Scalloped Cucumbers were delightful. The cooked cucumbers still had a hint of crispness, and when mixed with onion slices in a creamy sauce, and topped with cheese and breadcrumbs, this makes a perfect vegetable side dish. Cucumbers are a  tasty vegetable . . . regardless of whether eaten raw or cooked.

Source: The Housewife’s Cook Book (1917) by Lilla Frich

And, here’s the recipe updated for modern cooks:

Scalloped Cucumbers

  • Servings: 5 - 7
  • Difficulty: moderate
  • Print

4 large cucumbers

6 medium onions

4 tablespoons butter

4 tablespoons flour

3/4 teaspoon salt

2 cups milk

3/4 cup cheddar cheese, grated*

1/2 cup fine bread crumbs*

Preheat oven to 375° F. Peel cucumbers, and quarter length-wise. Remove the seeds, and then dice the cucumbers into bite-sized chunks. Place in a saucepan and cover with water. Bring to a boil and cook until tender (about 10 – 15 minutes). (Cucumbers are still somewhat firm even when cooked.)

Remove the skins from the onions, and then thinly slice. Place in a saucepan and cover with water. Bring to a boil and cook until tender (about 10 – 15 minutes).

In the meantime, in another pan, using medium heat, melt butter; then stir in the flour, salt, and pepper. Gradually, add the milk while stirring constantly. Continue stirring until the white sauce thickens.

In a large buttered casserole dish, layer the white sauce, cucumbers, and onions. End with a layer of white sauce. Then sprinkle the grated cheese and breadcrumbs on the top. Bake in the oven for 20 – 30 minutes or until hot and bubbly.

*The original hundred-year-old recipe also indicated that nuts or cereal could be used as a topping.

I didn’t salt the water when I cooked the cucumbers and onions: instead I put some salt in the white sauce. And, I didn’t “butter and crumb” my casserole dish; I just buttered the dish. It worked fine with the crumbs just sprinkled on top of the dish.