Food makes a wonderful gift, and is sure to please friends and family – both now and a hundred years ago. But, I must admit that some gift suggestions on a hundred-year-old list of edible gift ideas don’t work for me. Why the heck would someone want edible moss for desserts?
The article suggests wrapping the edible gift in tissue paper. The food could also be put in boxes. When giving a gift of candy a century ago, people often made decorative gift boxes. Several years ago, back when I was posting my grandmother’s diary, I did a post on how to make a triangular candy box. The directions originally appeared in the December, 1912 issue of School Arts Magazine.
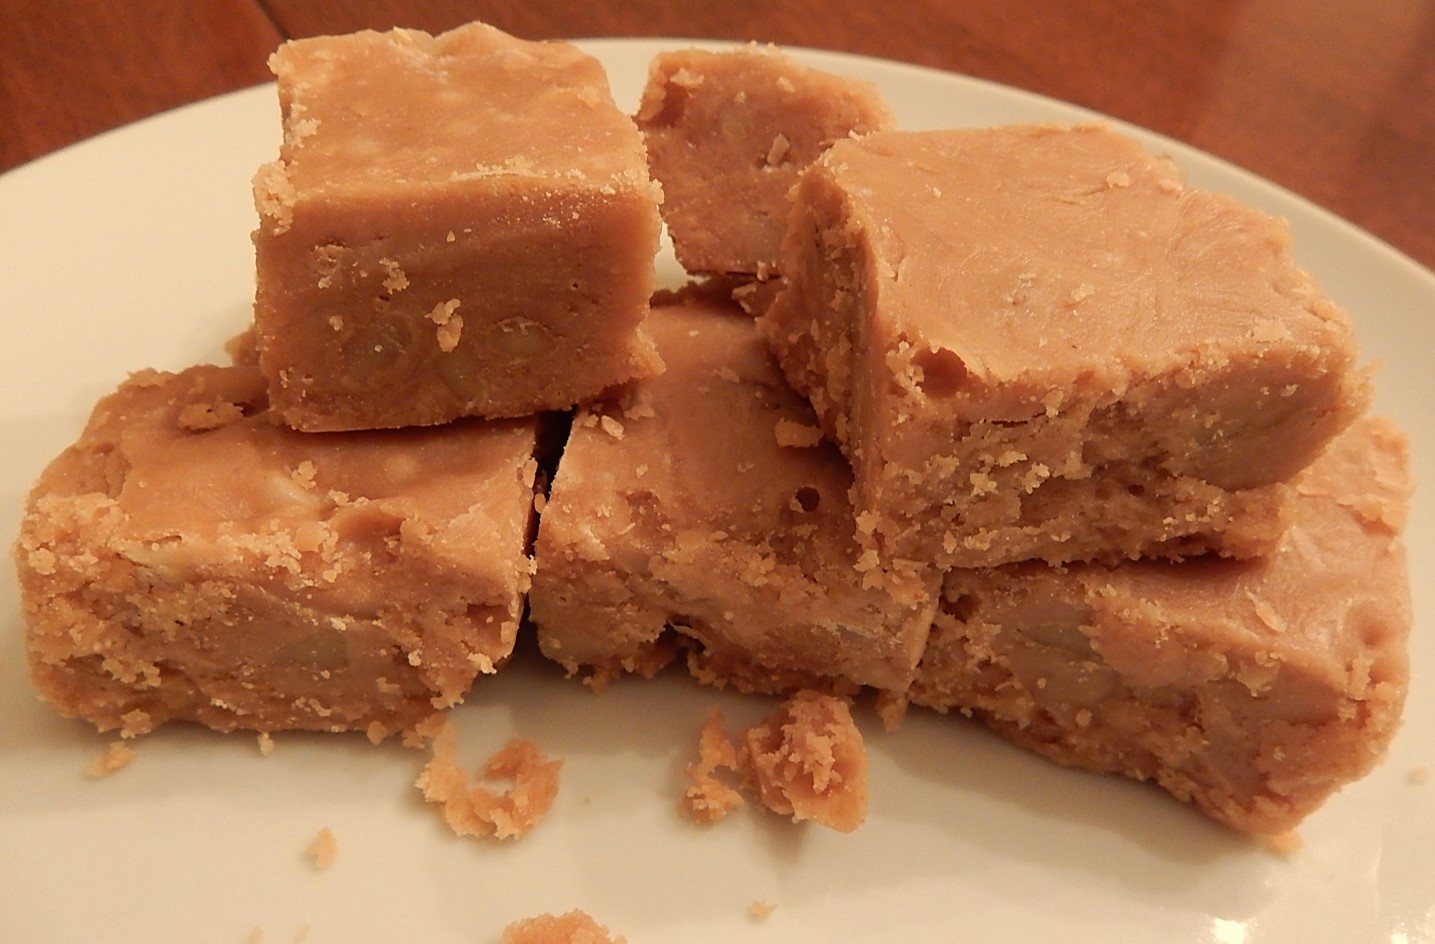
I love the flavor of maple syrup, so was thrilled to find a hundred-year-old recipe for Maple-Karo Fudge. I also was intrigued that the recipe called for Karo corn syrup.
Source: American Cookery (December, 1917)
Many modern candy recipes call for corn syrup, but this is the first century-old candy recipe I’ve seen which listed corn syrup (and branded corn syrup at that) as an ingredient. Times were a-changing.
There are lots of pros and cons to adding corn syrup. The addition of corn syrup makes the fudge smoother and reduces the likelihood that the sugar will crystallize; but, at the same time, corn syrup is a man-made sugar that may not be healthy for us (though the Karo of a hundred years ago was not “high fructose” like modern corn syrups, so it may have been a tad healthier).
The verdict – Maple-Karo Fudge has a nice texture, and a delightful maple flavor. I added walnuts to the fudge mixture, and the nuts nicely complemented the sweetness of the maple syrup.
1/2 cup chopped nuts (walnuts, pecans), dried or candied fruit (optional) (I added walnuts.)
Using low heat melt butter in a saucepan; add sugar, maple syrup, Karo, and half and half. Increase heat to medium, and stir until sugar is dissolved. Using a wet paper towel, wash the include of the saucepan to remove any sugar crystals. Reduce heat to low, cover and let boil two minutes. Watch pan extremely closely to ensure that the mixture does not boil over. (If there is a risk of it boiling over, remove lid in less than two minutes.) Uncover and let boil without stirring until the mixture reaches 238° F (soft ball stage). This will take approximately 45 minutes – 1 hour. Remove from heat
Wipe a large plate or platter with a wet paper towel, and immediately pour the cooked fudge mixture onto the platter. Let cool then use a spatula to “knead” the mixture by lifting the edges and moving them to the center. Continue “kneading” until the mixture stiffens, and is smooth and shiny (about 10 minutes). If desired, the later part of the kneading may be done by hand rather than with a spatula – though I did it all with a sturdy spatula. If desired add chopped nuts or fruit while kneading.
Press into a small buttered pan, about 6″ by 6″. Let sit for several hours. When firm, cut into squares.
Even in the days before Instagram (and blogs) people wanted to present their food in attractive ways. Here’s some hundred-year-old advice for garnishing food:
Garnishing the Dish
All food must be neatly placed in the dish, and arranged or piled with some sort of symmetry, and this is the most that some people have time to do. Many foods may be served in the utensil or dish in which they are cooked, and in the case of a baking dish, if its appearance is not neat, a napkin can be folded about it. The simplest form of garnish is browning on top, which makes many dishes attractive (mashed potato).
Make the garnish simple, and have it eatable when possible. Slices of hard boiled eggs on spinach, shopped parsley and butter on boiled or mashed potatoes, parsley and slices of lemon with meat and fish.
Vegetable borders are attractive and save labor in dish washing. Arrange the meat in the center of the platter, and pile mashed potato, or boiled rice or peas or beans, or a mixture of hot vegetables around the edge. This saves time in table service, too.
Foods and Household Management: A Textbook of the Household Arts by Helen Kinne and Anna M. Cooley (1915)
Similarly to what we believe today, people a hundred year ago believed that healthy eating was important, and that good nutrition could support their health. A 1918 cookbook called the Nature Cure Cook Book is chock full of health advice and interesting recipes.
The recipe for Fruit Omelette intrigued me. Eggs and fruit are both nutritious foods, but I’d never before seen them combined in an omelette.
Source: Nature Cure Cook Book (1918)
This recipe offers lots of options. It can be made using “apple sauce, stewed pears, peaches, plums, berries, raisins, etc.” or, as indicated in the note at the end of the recipe, grated apples. And, either cinnamon or nutmeg could be used to season the omelette. I decided to go with the grated apple option and cinnamon.
I served Grated Apple Omelette at breakfast – though it had a dessert-like essence. The omelette had a nice cinnamon-apple flavor, and the liquid from the grated apples combined with the eggs during baking to create an omelette with a custard-like texture.
The old recipe calls for “sugar to taste.” I used two tablespoons of sugar when I made the recipe – though I think that it would work just fine to skip the sugar.
2 cups grated apples, (2-3 peeled and core apples, grated)
5 eggs, well beaten
1 tablespoon melted butter
2 tablespoons sugar
1/4 teaspoon cinnamon
Preheat oven to 375° F.
Put eggs in mixing bowl, and beat until light and foamy. Add butter, sugar, and cinnamon; beat until combined. Then stir in grated apples.
Put egg mixture in a well-greased oven-proof skillet. Put in oven and bake until the eggs are set (approximately 20 minutes). Remove from oven, loosen the edges with a knife or spatula, then gently flip or slide onto a plate. Fold in half to create the omelette. To make the most visually appealing omelette, it should be folded so that the side which was facing up when in the pan is on the outside of the finished omelette.
Cook’s note: Care must be used when removing omelette from pan and when folding to keep it all in one piece.
Beets are a tasty low-calorie vegetable, have lots of fiber, and are chock full of nutrients including vitamin B, iron, manganese, copper, and magnesium. But I often struggle to find good beet recipes. So I was thrilled to find a hundred-year-old recipe for Beets a la Poitevine. Beet slices are immersed in a light sauce that brings out the natural sweet goodness of the beets. At first I thought that this recipe might be similar to Harvard Beets – but it is very different. The recipe calls for no sugar, and only a minimal amount of vinegar which I could barely taste.
I was curious about the French name of this recipe, and googled it but didn’t come up with much. Poitevine may refer to a place in France. There is a village called Bussière-Poitevine in central France.
Wash and trim beets. Place in a large saucepan and cover with water; add 2 tablespoons vinegar to reduce bleeding. Bring to a boil using high heat, then reduce temperature and simmer until the beets are tender (approximately 30 – 45 minutes, depending upon size). Remove from heat, drain, and cool slightly, then peel beets. The skin is easy to remove after cooking. Slice the peeled beets.
In the meantime melt butter in a saucepan, then add diced onion and saute until tender. Stir in the flour and salt; then gradually, add the chicken broth while stirring constantly. Add 1 tablespoon vinegar. Continue stirring until the sauce boils and thickens. Gently stir in the sliced beets, and cook until hot and bubbly while gently stirring. Remove from heat and serve.
The original recipe called for adding additional butter as well as the vinegar at the very end of the cooking process. This seemed unnecessary to me – so I added all the sauce ingredients prior to adding the beet slices. After I added the beets, I just cooked it until the sauce returned to a boil and the beets were hot.