Old-fashioned Blueberry Pie with Meringue

slice of pie

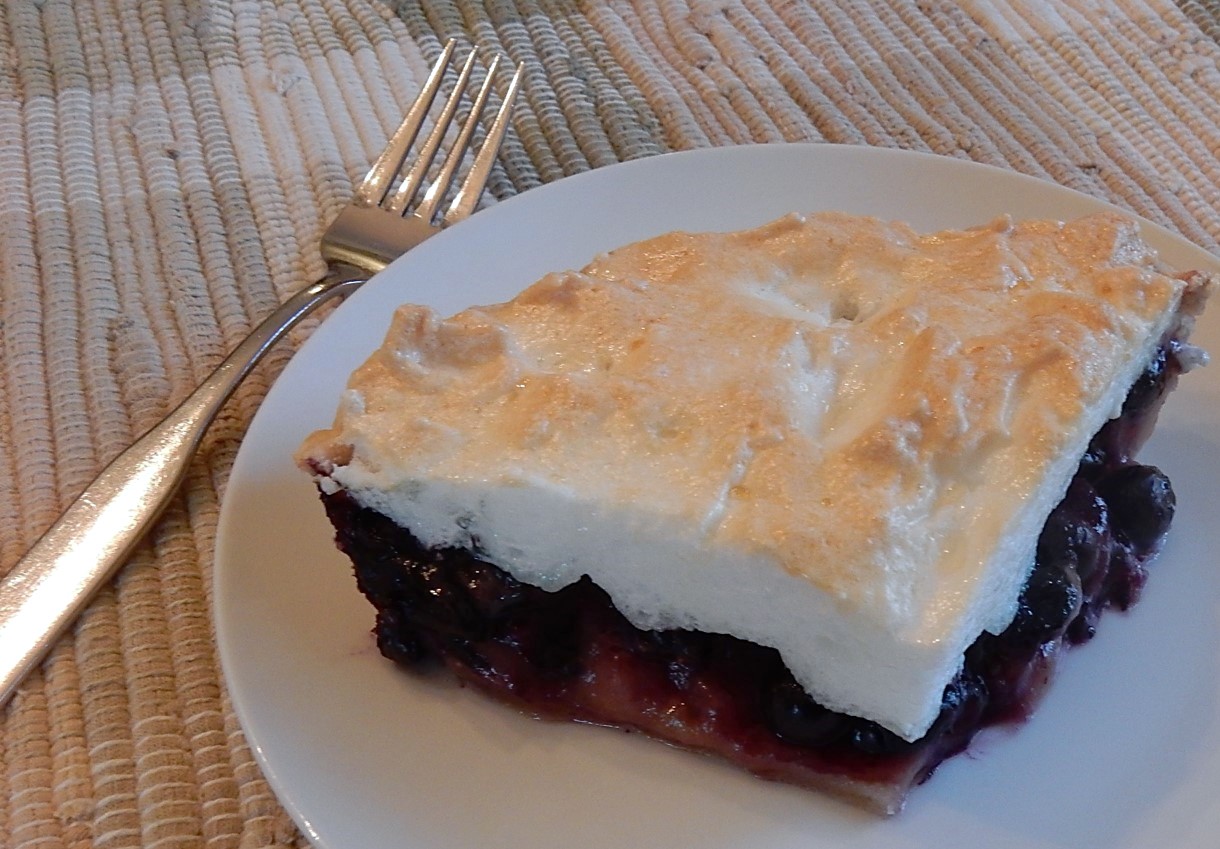
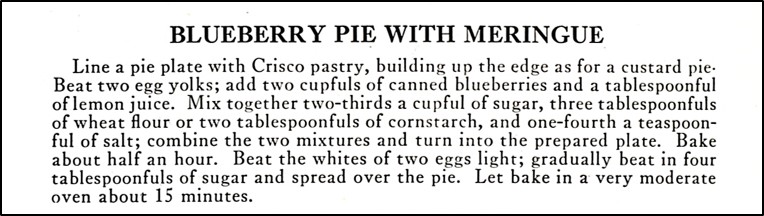
I recently found a 1919 recipe for Blueberry Pie with Meringue that made my mouth water – yet it called for canned blueberries (which didn’t seem very appealing to me). A hundred years ago blueberries were available only a few weeks a year, and to preserve the goodness of the berries for later use, many were canned. As a result, cooks needed recipes that called canned blueberries.

recipe for blueberry pie with meringue
Source: Recipes for Everyday by Janet McKenzie Hill (1919)

I generally permit myself to make only minimal changes when making old recipes, but there exceptions to every rule.  Since I just couldn’t bring myself to use canned blueberries – and since I really wanted to try this recipe, I decided to substitute fresh berries for the canned ones.

The recipe turned out well – though the baking time was longer when fresh blueberries are used. The blueberries in the filling were embedded in a lovely, almost custard-like sauce; and, when topped with an airy meringue, it created an irresistible pie.

Here is the recipe updated for modern cooks.

Blueberry Pie with Meringue

  • Servings: 5-7
  • Difficulty: moderate
  • Print

2 cups blueberries

2 egg yolks

1tablespoon lemon juice

2/3 cup sugar

3 tablespoons flour or 2 tablespoons corn starch

1/4 teaspoon salt

1 8-inch (small) pie shell

Meringue

2 egg whites

4 tablespoons (1/4 cup) sugar

Preheat oven to 425° F. Put egg yolks, lemon juice, sugar, flour (or corn starch) and salt in a mixing bowl; beat until thoroughly combined.  Crush about a quarter of the blueberries with a fork or your fingers, then stir all the blueberries into the sugar mixture. Pour the blueberry mixture into the pie shell. Place in oven, and bake for 10 minutes. Reduce heat to 350° F. Cook an additional 35 minutes or until the filling thickens. (As the filling cooks, it will first be very juicy; and then will become thicker.)

In the meantime, make the meringue. Place egg whites in a bowl, and beat the egg whites until they form stiff peaks. Gradually add sugar while continuing to beat. Then spoon on top of the pie and swirl. Reduce oven temperature to 325 ° F. Place pie back in the oven and bake for an additional 15 minutes or until the meringue is lightly browned.

Kitchen Cabinets a Hundred Years Ago

enambled metal kitchen cabinet
Source: Lippincott’s Home Manuals: Housewifery by Lydia Ray Balderston (1919)

Today built-in kitchen cabinets are the norm. A hundred years ago “modern” kitchen cabinets were moveable.

diagram of kitchen cabinet
Source: Lippincott’s Home Manuals: Housewifery (1919)

Here are some excerpts from the description of kitchen cabinets in a 1919 book:

Kitchen cabinets are combined tables and closets which have been constructed as the outcome of efficiency methods. They represent grouping about the working center the supplies and tools that belong to the work of that center.

Such cabinets may be purchased today in wood or in metal which has an enamel painted or enameled. The wood cabinets were the first on the market, and represent the same points in capacity and convenience that the metal ones do, but the question of cleanliness rather turned the attention to the metal ones. The metal cabinets are more noisy than the wooden ones, but are more likely to be proof against vermin, rats, and mice, and may be easily cleaned by water without becoming water-soaked. Metal cabinets are also nonabsorbent to odors and to any spilled food.

Lippincott’s Home Manuals: Housewifery by Lydia Ray Balderston (1919)

Old-fashioned Escalloped Squash

escalloped squash in baking dishAugust means a plethora of zucchini, so I’m always looking for new ideas (hmmm. . . I think that I really mean old ideas) for using zucchini and other summer squash. And, I lucked out. I found a nice hundred-year-old recipe for Escalloped Squash that is made with mashed squash, egg, and milk – and topped with crispy bread crumbs. If you are looking for a recipe that is a little different from the typical modern summer squash recipe, yet still tasty, this recipe is for you.

The Escalloped Squash has a custard-like texture, and a delightful, mild squash flavor. I used small zucchini when I made this dish, and I peeled the zucchini very thinly with a vegetable peeler. This left a greenish tinge to the zucchini flesh and resulted in Escalloped Squash that had a lovely pale green color.

Here is the original recipe:

Escalloped squash recipe
Source; The Old Reliable Farm and Home Cook Book (1919)

The original recipe is not clear whether it calls for summer or winter squash. I interpreted it to mean summer squash, but winter squash would probably also work.

Here’s the recipe updated for modern cooks:

Escalloped Squash

  • Servings: 4 - 5
  • Difficulty: easy
  • Print

5 cups summer squash (zucchini, yellow squash), peeled with seeds removed, and cut into 1-inch chunks

2 eggs

1/4 cup milk

2 tablespoons butter, melted

1/4 teaspoon salt

1/8 teaspoon pepper

1/3 cup bread crumbs

butter

Preheat oven to 400° F. Put squash in a saucepan and barely cover with water. Using high heat bring to a boil, then reduce heat and simmer for 8-10 minutes, or until squash is tender. Remove from heat and drain. Mash squash and set aside.

Put eggs, milk, butter, salt, and pepper in a mixing bowl, beat to combine. Place a small amount (approximately 1 – 2 tablespoons) of mashed squash into bowl with the beaten egg mixture, stir quickly. Then add and stir in the remainder of the mashed squash. (The egg is first combined with a little of the hot mixture to prevent it from turning into scrambled eggs when introduced into the hot combination.) Pour into ungreased 1 quart casserole. Sprinkle bread crumbs evenly over the top. Dot with butter. Bake in oven uncovered until hot and bubbly (approximately 35-45 minutes.)

1919 Lazy Susan

Lazy Susan on a table
Source: Household Engineering: Scientific Management in the Home by Mrs. Christine Frederick (1919)

I associate Lazy Susan revolving servers with Chinese restaurants, but they actually have been used in other settings for at least a hundred years. Here’s what a 1919 home economics textbook said:

The so-called “Lazy Susan” or servette finds favor with the homemaker who is her own maid. This is a revolving circular wooden or glass disk, supported on a stand placed in the center of the table. Food laid on the disk may be revolved to each person in turn, thus saving “passing,” or frequent rising. It also saves space on the the table by giving a place to bread and butter, sauces, condiments and other small dishes.

Household Engineering: Scientific Management in the Home by Mrs. Christine Frederick (1919)

Old-time Coffee Ginger Cream Recipe

glass filled with Ginger Coffee Cream

During these dog days of summer, there’s nothing better than an iced coffee drink. Coffee Ginger Cream is made using a hundred-year-old recipe, and contains coffee, cream, and ginger ale. The coffee and cream combine perfectly with the fizzy, sweetness of the ginger ale to create a refreshing summer drink.

Here’s the original recipe:

Recipe for Coffee Ginger Cream
Source: American Cookery (May, 1919)
Recipe for Sugar Syrup
Source: American Cookery (May, 1919)

And, here’s the recipe updated for modern cooks:

Coffee Ginger Cream

  • Servings: 1
  • Difficulty: easy
  • Print

2 tablespoons strong cold coffee

1 tablespoon sugar syrup (see recipe below)

1 tablespoon heavy cream

enough ginger ale to fill glass

ice

Put coffee, sugar syrup, and cream in a glass; stir to combine. Fill glass with ginger ale and stir. If desired, add ice.

Sugar Syrup

1 cup sugar

1/2 cup warm water

Put the sugar in a sauce pan. Pour the warm water over the sugar, and stir. Let sit a few minutes until the sugar is dissolved, then using medium heat bring to a boil. Remove from heat. Store in a covered jar for use when needed.

Hundred-year-old Tips for Storing Honey

honey in jar

I keep a jar of honey in one of my kitchen cupboards, but never really thought about how to best store it until I read a short article in a hundred-year-old magazine. (When I read the article, I also realized that I never even considered storing honey in some of places where people apparently put it in 1919.)

How to Keep Honey

In using honey as a substitute for sugar, the housewife may encounter some difficulty through lack of knowledge in storing this product according to the American Food Journal. Housewives usually put their honey in the cellar for safekeeping, probably the worst possible place, as honey absorbs moisture from the atmosphere, and will become thin and in time sour. Comb honey kept in a damp place will be hurt in appearance, as well as in quality. A practicable rule is to keep honey in any place where salt remains dry. If honey has granulated or candied, put the can containing it in a large vessel holding water, not hotter than the hand can be borne in. If the water is too hot, there is danger of spoiling the color and ruining the flavor of the honey. The can of honey should be supported by a block of wood in the vessel of water, so that the heat from the stove will not be too intense.

American Cookery (January, 1919)

Raspberry Patties en Surprise

Raspberries on round puff pastries

I’m always intrigued by hundred-year-old recipes that include drawings of the finished product since such recipes are few and far between. So when I recently came across a drawing of a beautifully presented recipe for a raspberry dessert called Patties en Surprise in a 1919 advertisement for Minute Tapioca, I decided to give it a try. This dessert is basically puff pastry cut into rounds, and filled with a raspberry and tapioca filling.

Here’s the picture and original recipe:

Picture of, and recipe for, Raspberry Patties en Surprise
Source: Ladies Home Journal (June, 1919)

The verdict: Raspberries Patties en Surprise is a very pretty dessert. The filling is delightfully refreshing with a vibrant, fruity flavor. I had left-over filling after I used all the puff pastry rounds, so I spooned the left-overs into a small dishes – and it was even better than when served with the pastries. I will definitely make the filling again – I may (or may not) make the pastry portion of this recipe again.

Since the original recipe did not provide directions for making puff pastry, I bought a package of puff pastry at the store when I made this dessert rather than making puff pastry from scratch (though I realize this is not a fully authentic way to approach this recipe).  Here’s the recipe updated for modern cooks:

Raspberry Patties en Surprise

  • Servings: 8 - 10
  • Difficulty: moderate
  • Print

2 cups water

1/2 cup Minute Tapioca

1 pint (2 half-pint boxes) red raspberries, crushed (approximately 1 cup pulp)

1/2 cup sugar

1 package puff pastry (2 sheets)

Raspberry Filling:  Using high heat, bring water to a boil in a saucepan; reduce heat to medium and stir in tapioca. Continue cooking while stirring constantly until the tapioca is clear (about 5 minutes); stir in raspberry pulp (including juice) and sugar. Continue cooking and stirring an additional two minutes, then remove from heat and put the mixture into a bowl. Chill in the refrigerator for at least three hours.

Pastry Shells: Preheat oven to 400° F. Unroll puff pastry sheets, and cut rounds (approximately 4-inches in diameter) using a cookie cutter (or an inverted water glass can be used as a cutter). Place on a lightly greased baking sheet. Using a smaller round cutter (about 1 1/2 inches in diameter) cut another circle in the center of the large circles of puff pastry dough. (Press firmly when cutting the small circles. It is okay if it goes all the way through. It is more problematic when assembling this recipe if the small circles aren’t cut deeply enough than if they are cut all the way through.). Bake 20 minutes or until puffy and lightly browned. Remove pastries from baking sheet. Allow to cool before serving.

To Assemble: For each pastry, gently remove the top portion of the small pastry circle. Spoon the chilled raspberry tapioca mixture into the center of the pastry. Put the circular “cap” back on the pastry.