Last week the eggplants at the farmers’ market just seemed to call me. Their beautiful deep purple color, and smooth curves made them aesthetically pleasing. I also knew that eggplants are known for their versatility because they have little flavor of their own, but rather absorb the flavors of the foods and spices that they are cooked with.
Once I had purchased an eggplant, I had a new challenge – finding a hundred-year-old recipe that called for eggplant.
After browsing through old magazines and cookbooks, I think that I found a winner. Scalloped Eggplant is made by slicing eggplant, then layering it in a casserole dish with grated cheese, and smothering with tomato sauce. It is then baked in the oven until the eggplant is tender.
The Scalloped Eggplant was delicious, and can be served as either a meatless main dish or a hearty side dish.
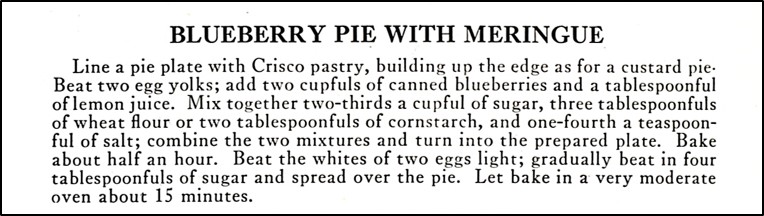
Here’s the original recipe:

Today eggplant is generally written as one word, but that has not always been the case. Based on the way it was written in this recipe, it was two words a hundred years ago.
I used cheddar cheese when I made this recipe. And, I didn’t sprinkle the layers in the casserole dish with salt because I had previously soaked the eggplant in salt water. There is also salt in the cheese and tomato sauce. Sometimes I think that people in 1919 liked saltier foods than what we do today.
Scalloped Eggplant
Here’s the recipe updated for modern cooks:
I eggplant
1 tablespoon salt
1 quart water
1 1/2 cups grated cheddar cheese
1 15-ounce can tomato sauce
pepper
Peel eggplant and slice it into 1/2 inch slices. In a large bowl, combine the water and salt. Add the eggplant slices. Put a plate or other weight on the eggplant slices to keep them from floating. Let soak for 30 minutes. Drain and rinse.
Preheat oven to 375° F. Pour one-fourth of the tomato sauce in a 1 1/2 quart casserole dish. Next put one-third of the eggplant slices in the dish. Add another fourth of the tomato sauce, then add one-third of the cheese and sprinkle with pepper. Continue layering until all of the ingredients are used, ending with the cheese.
Cover dish and bake in oven for 35 minutes. Remove lid and continue baking until the eggplant is tender (about another 10-20 minutes). Remove from oven and serve.