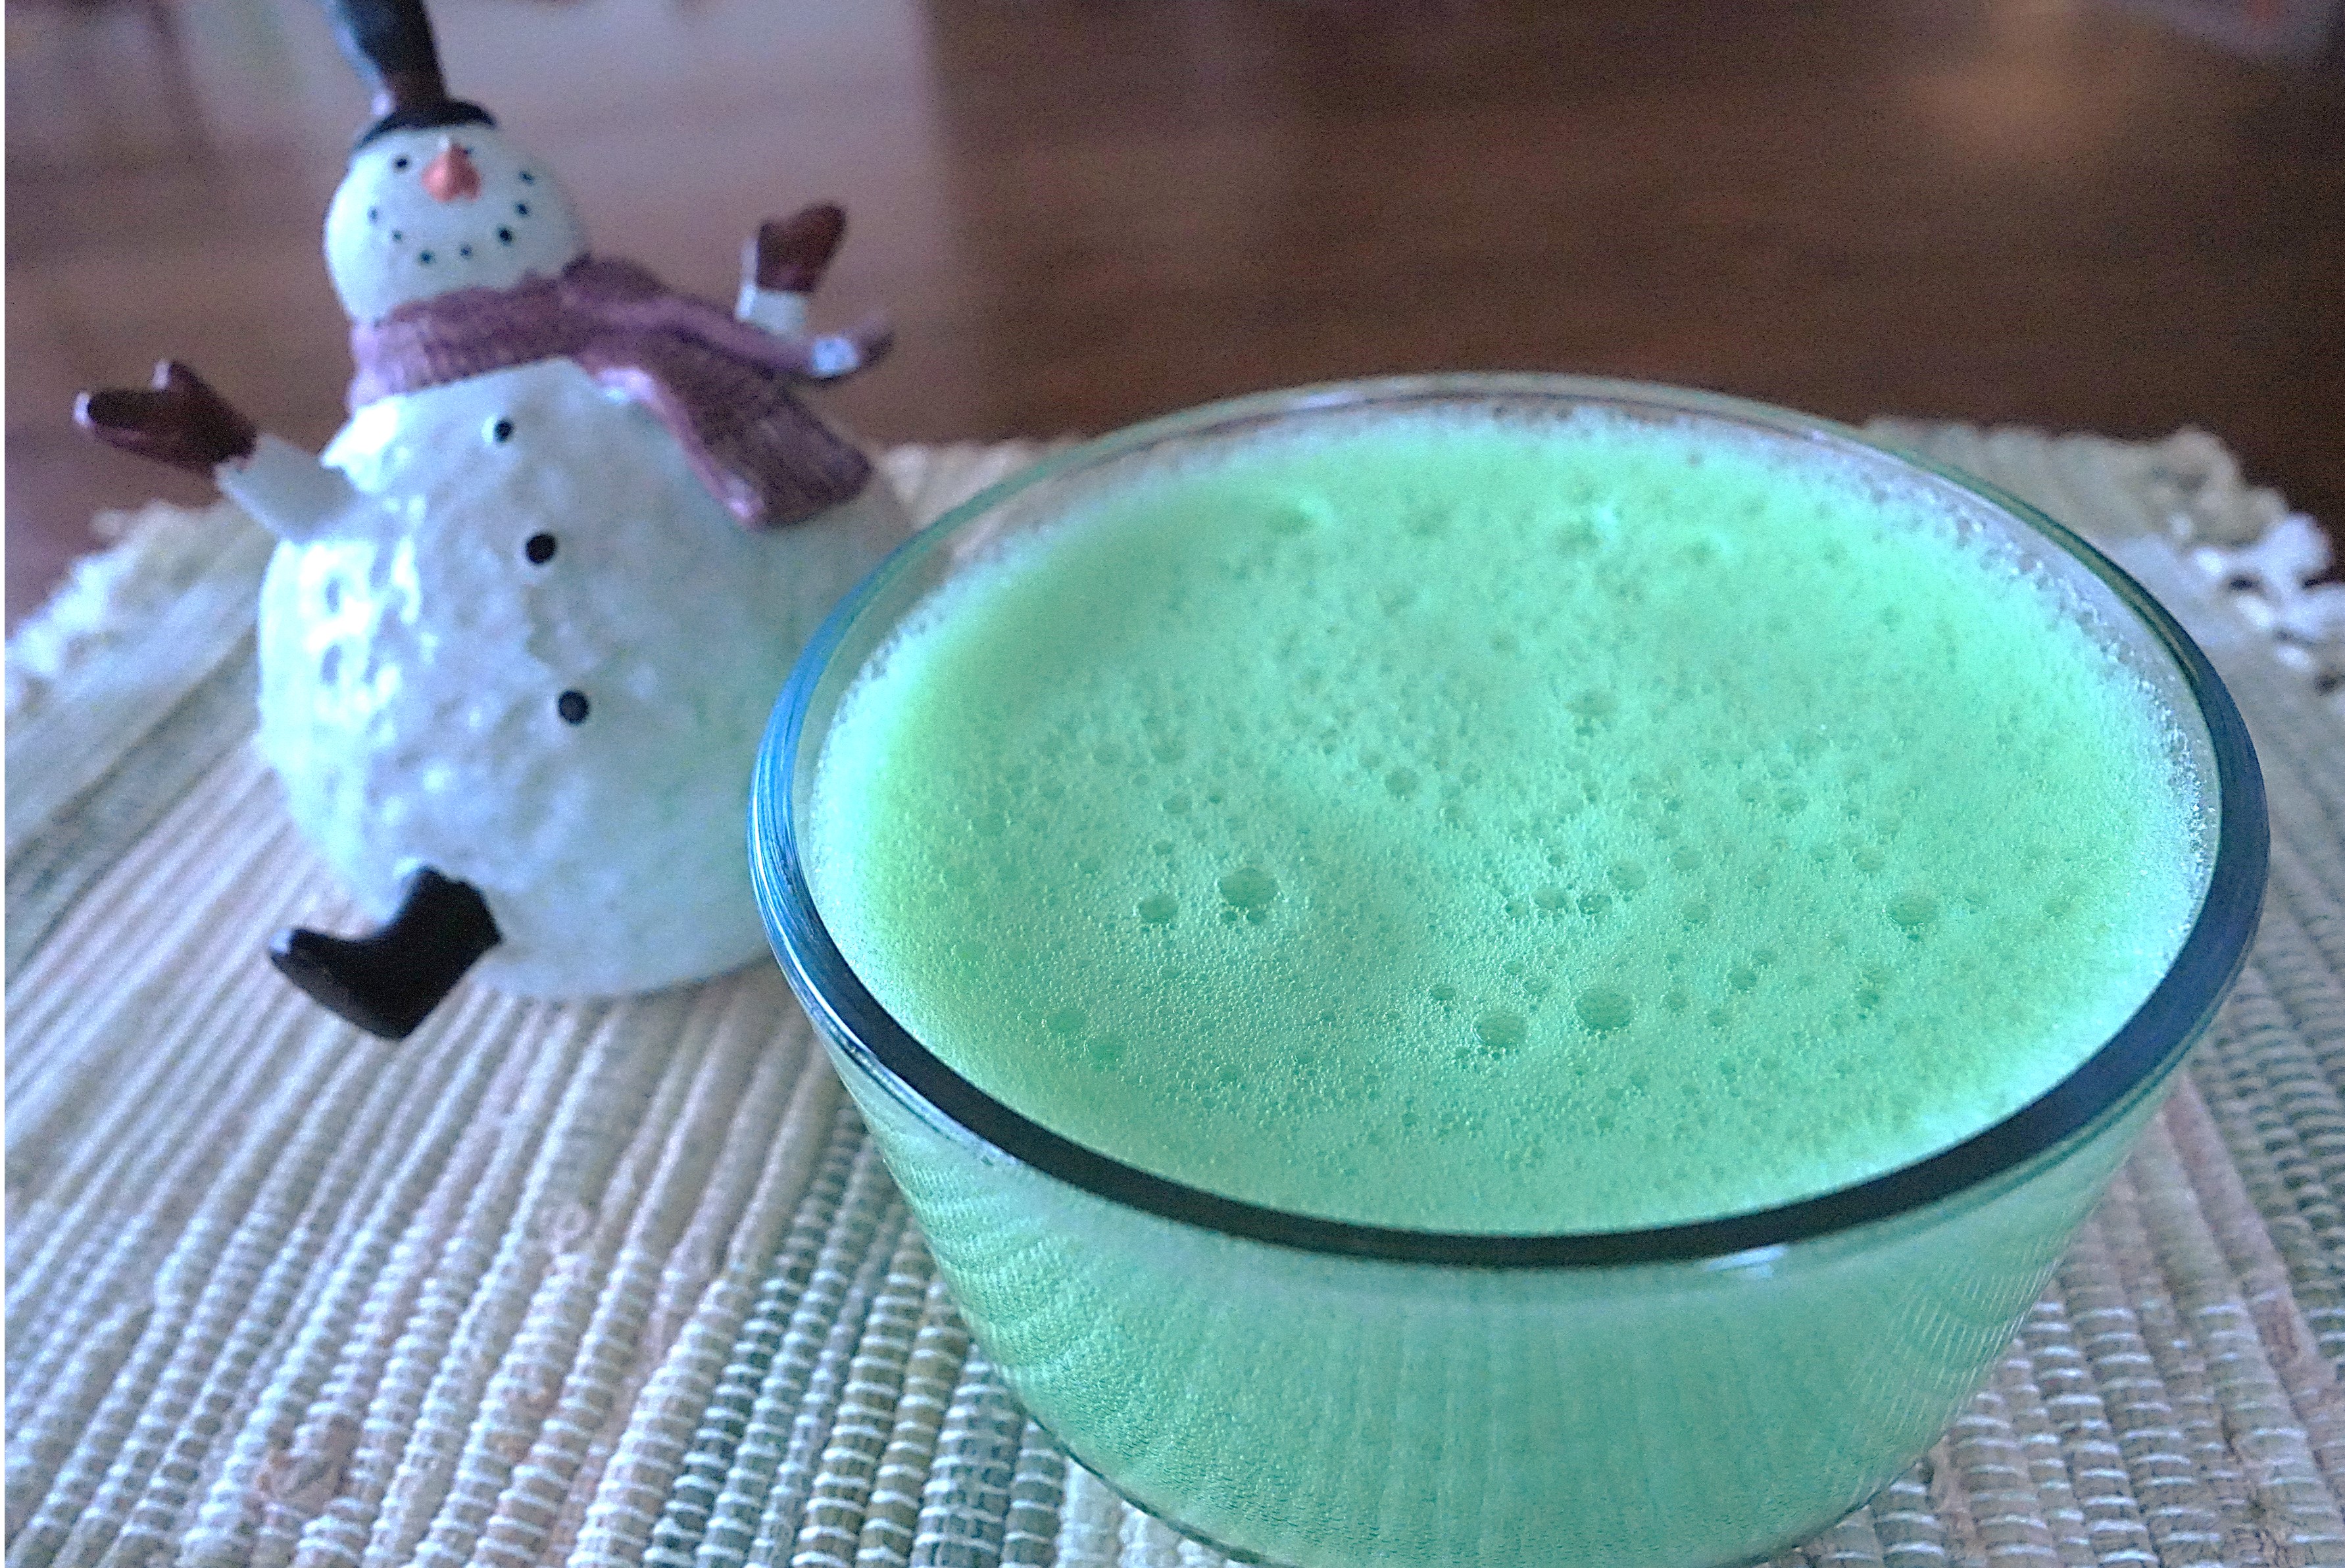
 When my mother hosted family Christmas gatherings when I was a child, she always made two bowls of “Fluffy Jello;” one made using red gelatin and the other green. She said that “the kids like Fluffy Jello.” She made it by using electric beaters to add lots of air and foam to cooled gelatin that was almost ready to set. I hadn’t had Fluffy Jello in years and had forgotten all about it until I saw directions for making whipped gelatin in a hundred-year-old cookbook.

I decided to whip some gelatin. It was airy and light – and brought back lots of warm memories of day and people from long ago. It’s not just kids who like “Fluffy Jello.”
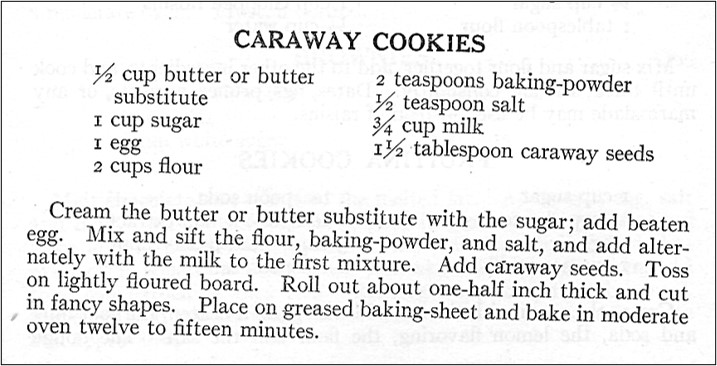
The 1924 directions called for using a Dover mixer, which is a hand-turned rotary mixer, to whip the gelatin but otherwise it is very similar to how I remember my mother doing it. The old directions also called for using a metal mixing bowl and setting it in ice water to keep everything very cold. This worked well and the gelatin whipped very nicely. I used a box of gelatin that called for using 2 cups water, and said that it made 4 servings. The gelatin did double in volume, and in my opinion it would make 6 to 8 servings, not the 12 mentioned in the directions. This suggests that the author of the directions used a larger package of gelatin than what I used.
Here’s the recipe updated for modern cooks:
Whipped Gelatin
1 3-ounce box of flavored gelatin
Prepare gelatin in a mixing bowl according to package instructions. Put the mixing bowl with the gelatin in the refrigerator. Refrigerate until the gelatin just begins to thicken, then set in a pan of ice, and beat with electric beaters until the gelatin is very foamy. Pour into serving dish (a 1-quart bowl works well) and refrigerate until set (at least 2 hours).