When I update hundred-year-old recipes for baked goods, I regularly get comments that say something like, “I can only eat gluten-free foods. Would it be possible to convert this recipe to a gluten-free one?”
Since I’m not gluten-free, I had never revised a recipe to make it gluten-free, but I decided that now was the time to give it a try. And, I knew just the person who might be able to help. My friend Christine Rooney at The Rustic Foodie posts seasonal gluten free recipes.
I asked Christine if she’d help me adapt a hundred-year-old recipe to make it gluten free, and I was thrilled when she generously agreed.
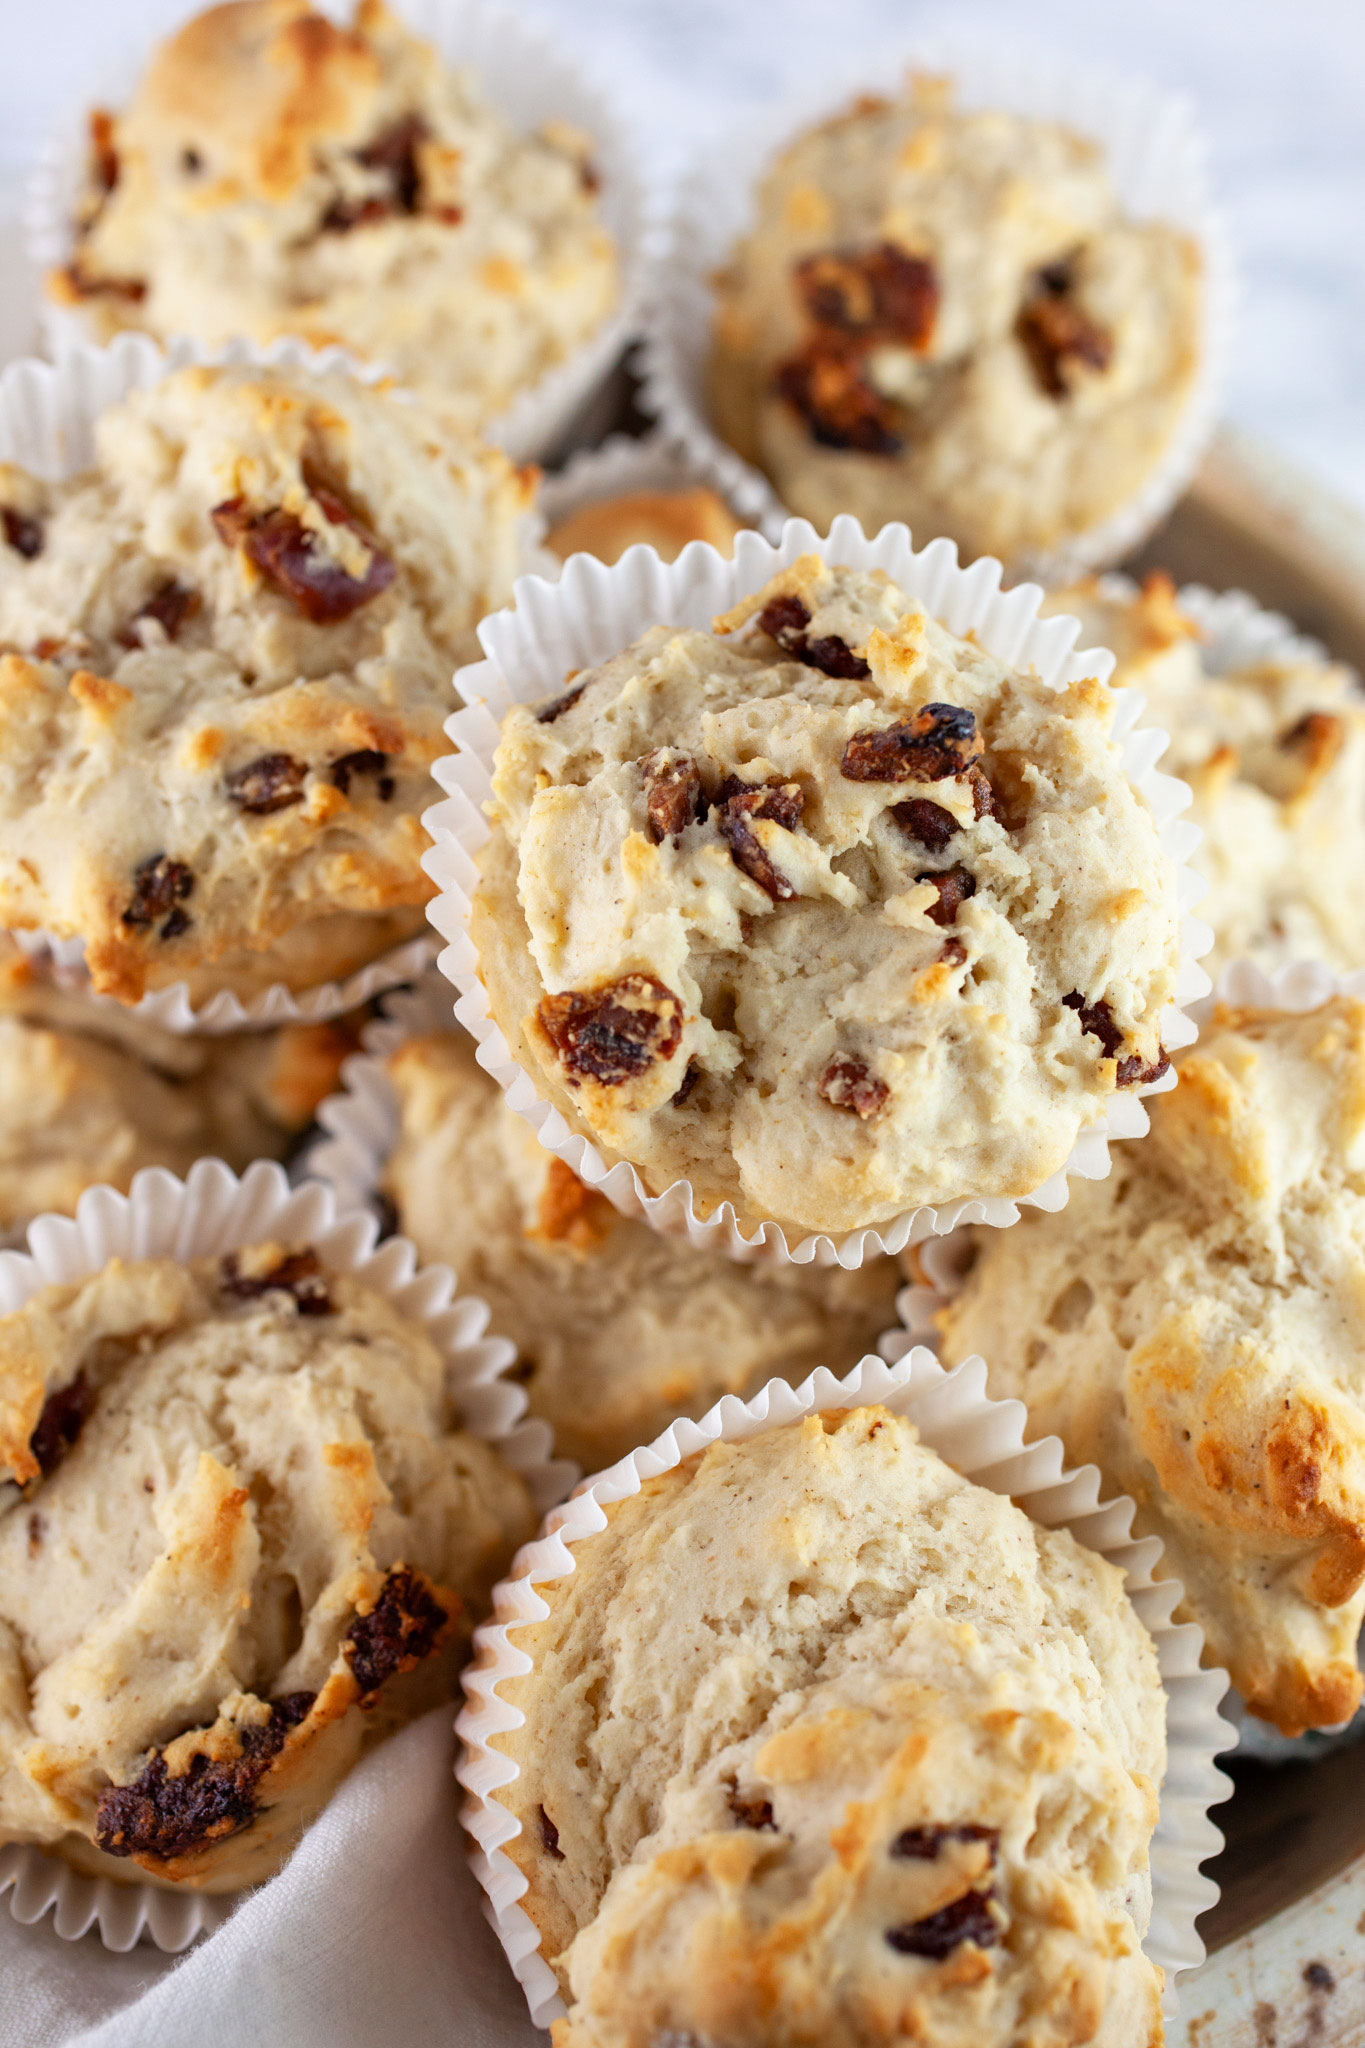
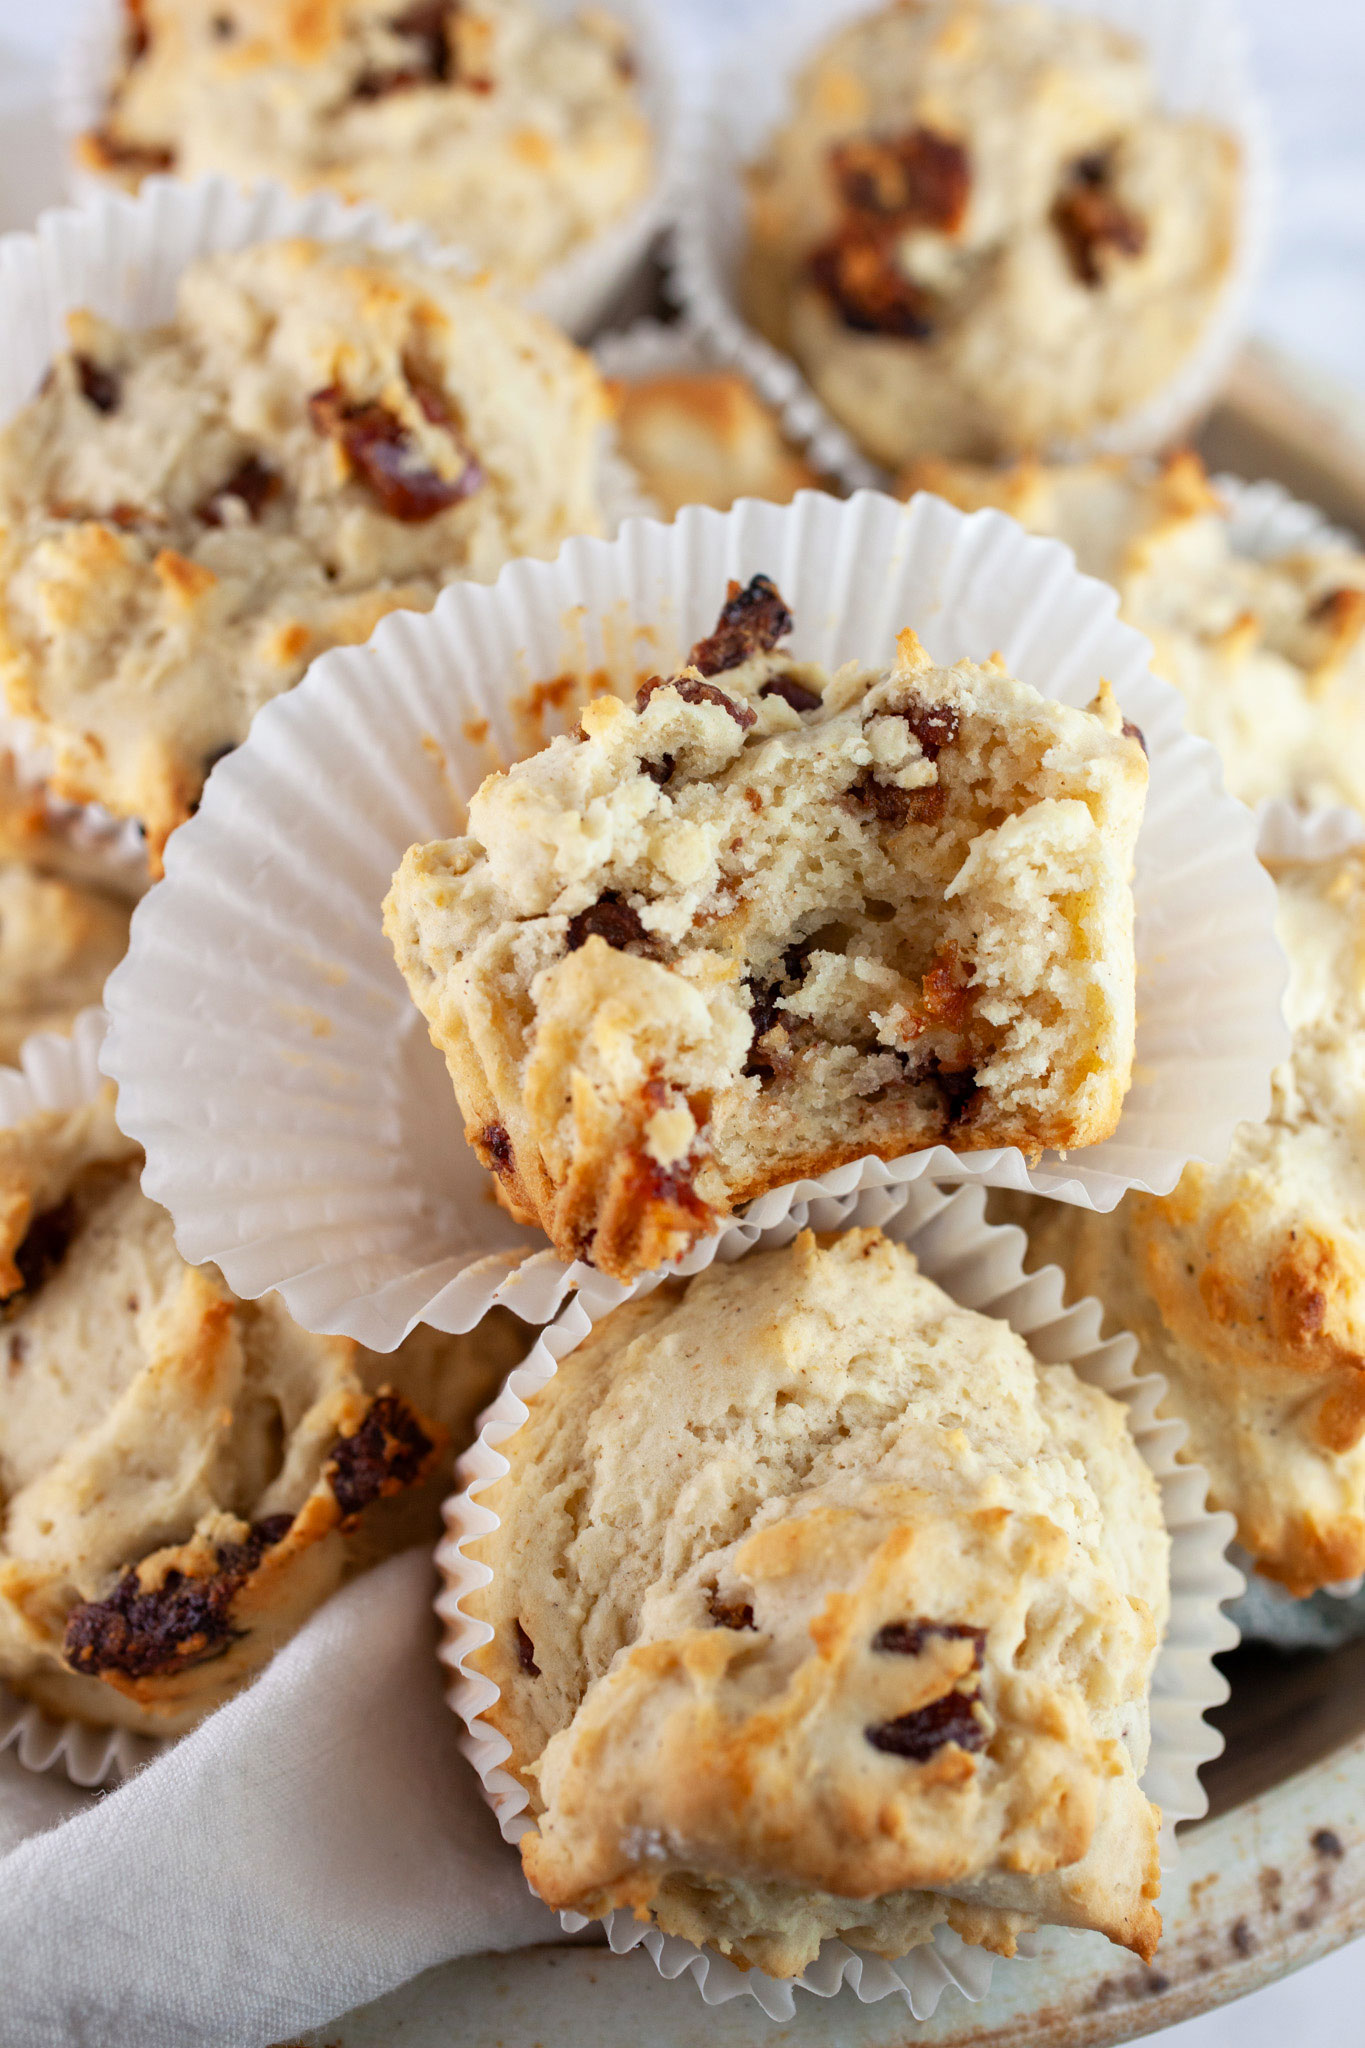
We decided to adapt a recipe for Date Muffins. A hundred years ago, the muffins might have been served at any time during the year, but they probably were primarily a winter food. Years ago, dried dates were a very popular winter fruit. Back then, most fresh fruits weren’t available in the winter, and those few that were available (such as oranges and other citrus fruits) were quite expensive in most parts of the U.S.
Christine adapted the recipe to make it gluten free. She then made the muffins and photographed them. I also made the muffins and took them to a coffee group gathering. We then made a few final tweaks to the recipe directions.
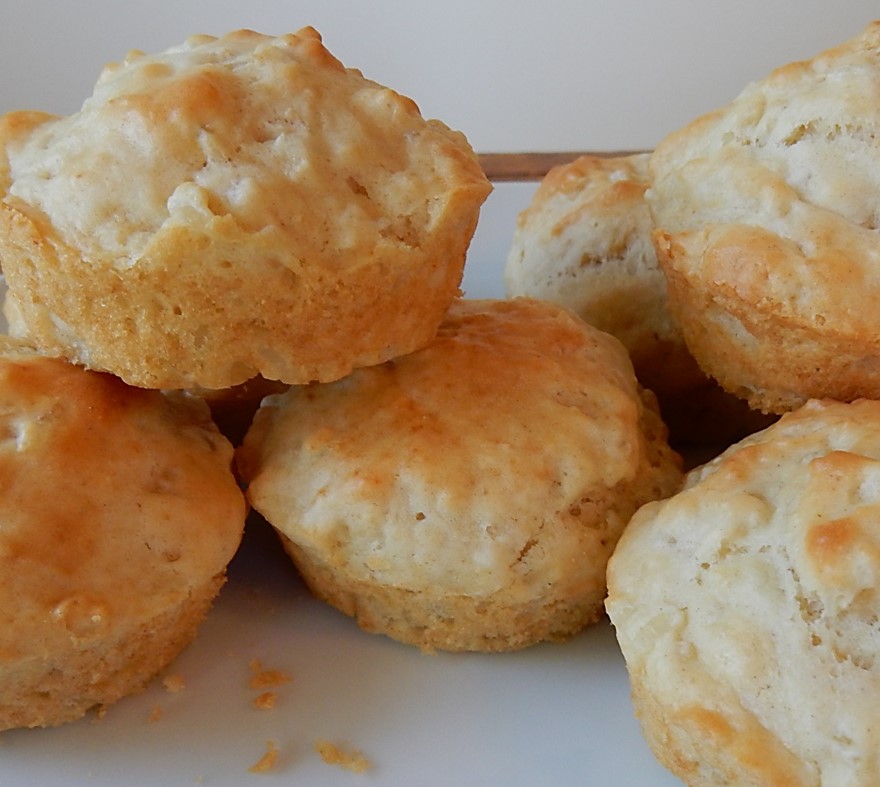
Our adventure adapting the recipe was a success. The date muffins had a great taste and texture. The texture was somewhere between a drop biscuit and a scone; the outside was a bit crispy and the inside was moist. They were sweet; but not overly sweet. The dates gave them lovely bursts of rich caramel.
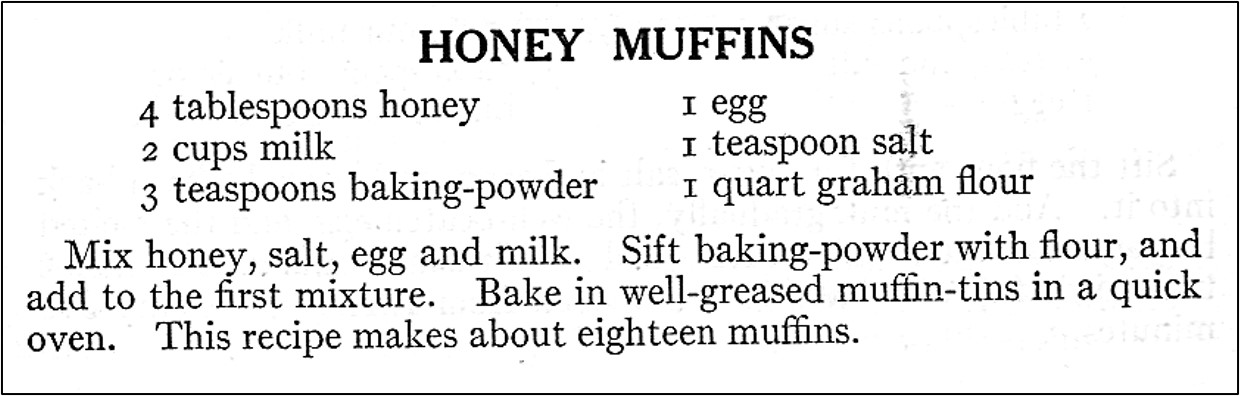
Here’s the original recipe:

Gluten free baked goods sometimes tend to crumble. The key to making them less crumbly is to use the right gluten free blend flour, to ensure that the batter has sufficient moisture, and not to overbake them.
Christine said that a gluten free 1-to-1 blend flour (Bob’s Red Mill Gluten Free 1-to-1 Baking Flour, Cup4Cup Gluten Free Multi-Purpose Flour, or other similar gluten free blend flour) should be used. The flour should contain xanthan. Baked goods made with gluten free flours can be crumbly because of a lack of binders in some gluten free flours. Xanthan is a binder that mimics the elasticity provided by gluten in wheat flour recipes. It helps ensure that gluten free baked goods are not crumbly. (Do not use gluten free all-purpose flour, or other gluten free flours, such as almond flour or oat flour, when making the recipe as this will likely yield different results).
Christine suggested adding a little additional milk when making the batter. Gluten free flour is a little denser and absorbs more liquid than all-purpose wheat flour. The additional milk also reduces the chance that the muffins will be crumbly.
It is also important not to overcook the muffins (they will tend to crumble) or to undercook them (they will be gummy).
And, here is the updated recipe:
Date Muffins
1/3 cup unsalted butter, softened (Do not melt.)
1/4 cup sugar
1/4 teaspoon kosher salt
1 egg
3/4 cup milk + an additional 2 – 3 teaspoons milk
2 cups 1-to-1 gluten free flour blend (Bob’s Red Mill Gluten Free 1-to-1 Baking Flour, Cup4Cup Gluten Free Multi-Purpose Flour, or other similar gluten free flour that contains xanthan)
4 teaspoons baking powder
1/4 pound (4 ounces) dried dates, chopped
Step 1. Preheat oven to 350 degrees Fahrenheit.
Step 2. Place muffin liners in a 12-cup muffin pan.
Step 3. Put the butter and sugar in a bowl, then use an electric mixer to beat until light and fluffy.
Step 4. Add egg to the butter and sugar mixture, and beat until light and fluffy.
Step 5. In a separate bowl, put the 1-to-1 gluten free flour blend, baking powder, and kosher salt. Stir until completely combined.
Step 6. Add the butter mixture and 3/4 cup of milk to the dry ingredients alternately, stirring to combine after each addition. Continue until all of the ingredients are combined. The batter will be very thick; Add an additional 2-3 teaspoons of milk to thin it out a bit and stir again until combined. (It will still be quite thick).
Step 7. Add chopped dates to the batter and fold until combined.
Step 8. Place an equal amount of the batter into each muffin cup. (An ice cream scoop can be used to measure to help ensure that an equal amount is put in each cup.)
Step 9. Place the muffin tin in the oven and bake for approximately 20 minutes. A toothpick poked into the center should come out clean when done baking.