Source: School and Home Cooking (1925) by Carlotta C. Greer
Sometimes I learn bits of cooking trivia when browsing through hundred-year-old books. For example, a 1925 home economics textbook explains that when there is pressure (such as when the lid is on a pan), the steam is hotter than if there is no pressure.
Steam Under Pressure
Which is hotter, – the “steam” (i.e., water vapor) coming from boiling water in an uncovered saucepan or teakettle or the “steam” which has been held underneath the lid of a covered saucepan or teakettle? Steam confined in a small space or held under pressure may reach a temperature higher than that of boiling water.
School and Home Cooking by Carlotta C. Greer (1925)
Since seafood is very healthy, I try to make it several times a week, but I tend to get into a rut and make the same few recipes over and over. So when I came across a hundred-year-old recipe for Parsley Sauce, I immediately thought about making it to serve over some perch that I had in my refrigerator.
The Parsley Sauce turned out well, and was delightful when served with the fish. It only took a few minutes to make. It is basically white sauce with chopped fresh parsley and a bit of lemon juice added. Parsley Sauce would also be tasty on meat or other foods.
My daughter called while I was working on this post, and she asked what recipe I made. I told her, “Parsley Sauce.”
She said, “Oh, that sounds so good. I went to a fancy restaurant last week and had a similar sauce on my steak.”
I said, “Really? I didn’t think that white sauce-type sauces were very popular now.”
She said, “They’re very popular. Many dishes use white sauce as a basis.”
I clearly am behind the times (which I guess shouldn’t be a surprise), but it’s good to hear that some of the foods that were common a hundred years ago are once again popular.
Here’s the original recipe:
Source: Rumford Complete Cook Book (1925)
I thought that the sauce would get too thick if I boiled it for five minutes, so I removed it from the heat just as it came to a boil and began to thicken.
I used 1/2 teaspoon of salt and a dash of pepper, and that worked well.
The old recipe gave lots of details about how to prepare the chopped parsley to ensure that any green liquid created by the chopping process was removed so that the sauce would not be discolored. The recipe called for putting the chopped parsley in a cloth and then holding it under a water faucet. Instead, I put the chopped parsley in a tea strainer and ran water over it; I then dried the parsley by putting on paper towels that I rolled and squeezed.
2 tablespoons chopped parsley (Stems and stalks should be removed before chopping.)
2 tablespoons butter
2 tablespoons flour
1 cup milk
1 teaspoon lemon juice
1/2 teaspoon salt
dash pepper
Put the chopped parsley in a strainer (I used a tea strainer.), then run water over it to wash away the green liquid created during the chopping process. Gently press the parsley to remove some of the water, then put the washed, chopped parsley on paper towels. Roll the paper towels then squeeze to remove the water. Set aside.
Melt butter in a saucepan, then stir in the flour. Gradually, add the milk while stirring constantly. Continue stirring until the white sauce begins to thicken. Stir in the lemon juice, salt, and pepper. Remove from heat and stir in the parsley.
Source: School and Home Cooking by Carlotta C. Greer (1925)
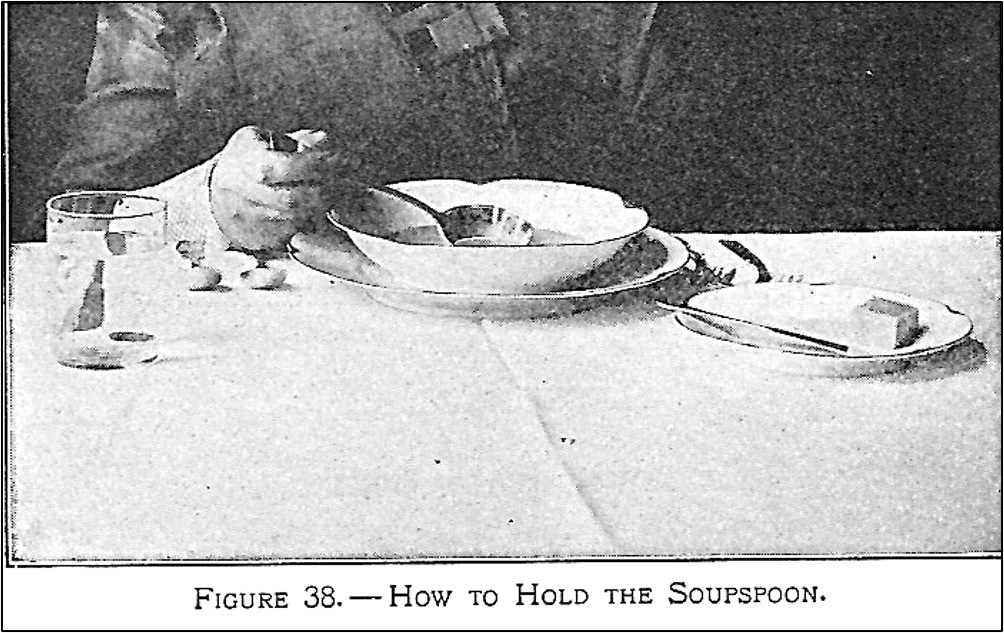
I know that when I eat soup, I’m supposed to use my spoon to scoop it away from me in the bowl, but that’s one, of many, etiquette “do’s and don’ts” that I don’t always follow. Directions for eating soup haven’t changed in a hundred years:
When using a spoon for serving, or for sipping soup, there is less danger of spilling the food if the spoon is moved away from, rather than toward, oneself (see Figure 38).
School and Home Cooking by Carlotta c. Greer (1925)
Source: School and Home Cooking by Carlotta C. Greer (1925)
A 1925 home economics textbook provides recommendations for how to divide each dollar spent on food across the various food groups.
How Much to Spend on Food
Whether one is purchasing food for all the meals of a family or is only selecting a luncheon or one meal, it is desirable to spend money wisely.
The five food groups may serve as a basis for the purchase of foods. It has been suggested that each dollar used in buying foods be divided into 5 parts of 20 cents each.
Out of each dollar use:
20 cents, more or less, for vegetables and fruits
20 cents, more or less, for milk and cheese
20 cents, more or less, for meat, fish, eggs, etc.
20 cents, more or less, for bread and cereals
20 cents, more or less, for sugar, fat, tea, coffee, chocolate, flavoring
(A footnote indicates that this is from the United States Thrift Leaflet #15.)
School and Home Cooking by Carlotta C. Greer (1925)
Sometimes I wonder if I spend too much on food, but I’ve never really thought about how it should be divided across food groups. I wonder if the hundred-year-old breakdown still holds, or if the division across food groups should be different now.
I recently had some friends over and wanted to serve a nice dessert (and, of course, I wanted to make a hundred-year-old recipe), so I pulled out my 1925 recipe books and found a lovely recipe for Maraschino Cherry Cake.
The cake was colorful with cherry fragments throughout that gave it a delightful sweet, yet tart, flavor.
Here’s the original recipe:
Source: The Home Makers’ Cooking School Cook Book (1925)
This recipe calls for 1 cup of liquid. When, I made it, I used 1/4 cup of liquid from a jar of Maraschino cherries and 3/4 cup of milk.
The stores where I shop do not carry pastry flour, so I used all-purpose flour. It worked fine.
When I updated this recipe, I reduced the amount of baking powder from 4 teaspoons to 3 teaspoons. Four teaspoons seems like a lot, and I had a little difficulty with the cake falling. A possible cause is the use of too much baking powder, so I decided to reduce the amount.
Preheat oven to 350◦ F. Beat egg whites until stiff, then set aside.
Put butter and sugar in a mixing bowl, then cream. Stir in Maraschino cherry liquid and milk. Add salt, baking powder, and flour; beat until smooth. Stir in the chopped Maraschino cherries, then fold in the beaten egg whites. Put into prepared pans. A large loaf pan, round layer cake pans, or a rectangular cake pan may be used. Bake until a wooden pick inserted in the center comes out clean (about 35 minutes for cake pans or 45 minutes for a loaf pan). If desired, ice. (I iced the cake with a buttercream frosting. I substitute liquid from a jar of Maraschino cherries for some of the milk when making the frosting.)
Old-cookbooks occasionally refer to recipes as “receipts.” A hundred years ago, “receipt” was already considered an archaic term. Here’s what it said in a 1925 magazine:
“Receipt” or “Recipe”?
When our grandmothers wrote out the ingredients for any dish and the method of making it, they called this “a receipt,” and in their times the apothecaries had a monopoly of the word “recipe,” which meant to them the physician’s prescription. The tendency, today, is towards the use of the word “recipe” for the cooking formula, while “receipt” is more logically reserved for the written form of acknowledging payment, or the receiving of money.
Rhubarb is one of my favorite spring foods, so I was pleased to find a hundred-year-old recipe for Rhubarb Turnovers. The turnovers were lovely.
Here’s the original recipe:
Source: American Cookery (1925)
I was intrigued by the idea of using syrup from canned fruit as the topping for the Rhubarb Turnovers, so I used the syrup from a can of peaches canned in heavy syrup. A lemon sauce would also be tasty.
The instructions called for “red strawberry rhubarb.” The rhubarb I used was not particularly red, so the turnovers may not have been as attractive as they would have been if a redder rhubarb had been used, but they still looked nice.
I interpreted the instructions to roll the dough out to “less than 1/2 inch thick” to mean about 1/3 inch thick. I ended up with a few more turnovers than the 12 indicated in the recipe.
lemon sauce or syrup from any kind of canned fruit (I used syrup from peaches canned in heavy syrup.)
Combine the sugar and 1/2 cup water in a saucepan. Using medium heat bring to a boil, then reduce heat and simmer until the sugar syrup reaches the thread stage (225◦ F.). Add rhubarb pieces and cook until the rhubarb is soft and tender. Remove from heat.
In the meantime, preheat oven to 400◦ F. Sift flour, salt, and baking powder into a mixing bowl; then cut in the butter until the pieces are small (about the size of a peas). Add milk and mix using a fork until dough starts to cling together. Roll the dough on a prepared surface to about 1/3-inch thick. Cut the rolled dough into 4-inch rounds. (I used an inverted champagne coupe glass to cut the rounds.)
Using a slotted spoon, put a tablespoon of the cooked rhubarb in the center of each round. Fold in half. Moisten edges with water and seal by pressing edges with a fork. Put on baking tray, and bake for 18 minutes or until lightly browned. Removed from oven and use a pastry brush to brush with water, and then sprinkle with sugar. Return the turnovers to the oven for an additional two minutes. Remove from oven.
Serve hot with lemon sauce or the syrup from any kind of canned fruit.


 Since seafood is very healthy, I try to make it several times a week, but I tend to get into a rut and make the same few recipes over and over. So when I came across a hundred-year-old recipe for Parsley Sauce, I immediately thought about making it to serve over some perch that I had in my refrigerator.


 I recently had some friends over and wanted to serve a nice dessert (and, of course, I wanted to make a hundred-year-old recipe), so I pulled out my 1925 recipe books and found a lovely recipe for Maraschino Cherry Cake.
 Old-cookbooks occasionally refer to recipes as “receipts.” A hundred years ago, “receipt” was already considered an archaic term. Here’s what it said in a 1925 magazine:

