
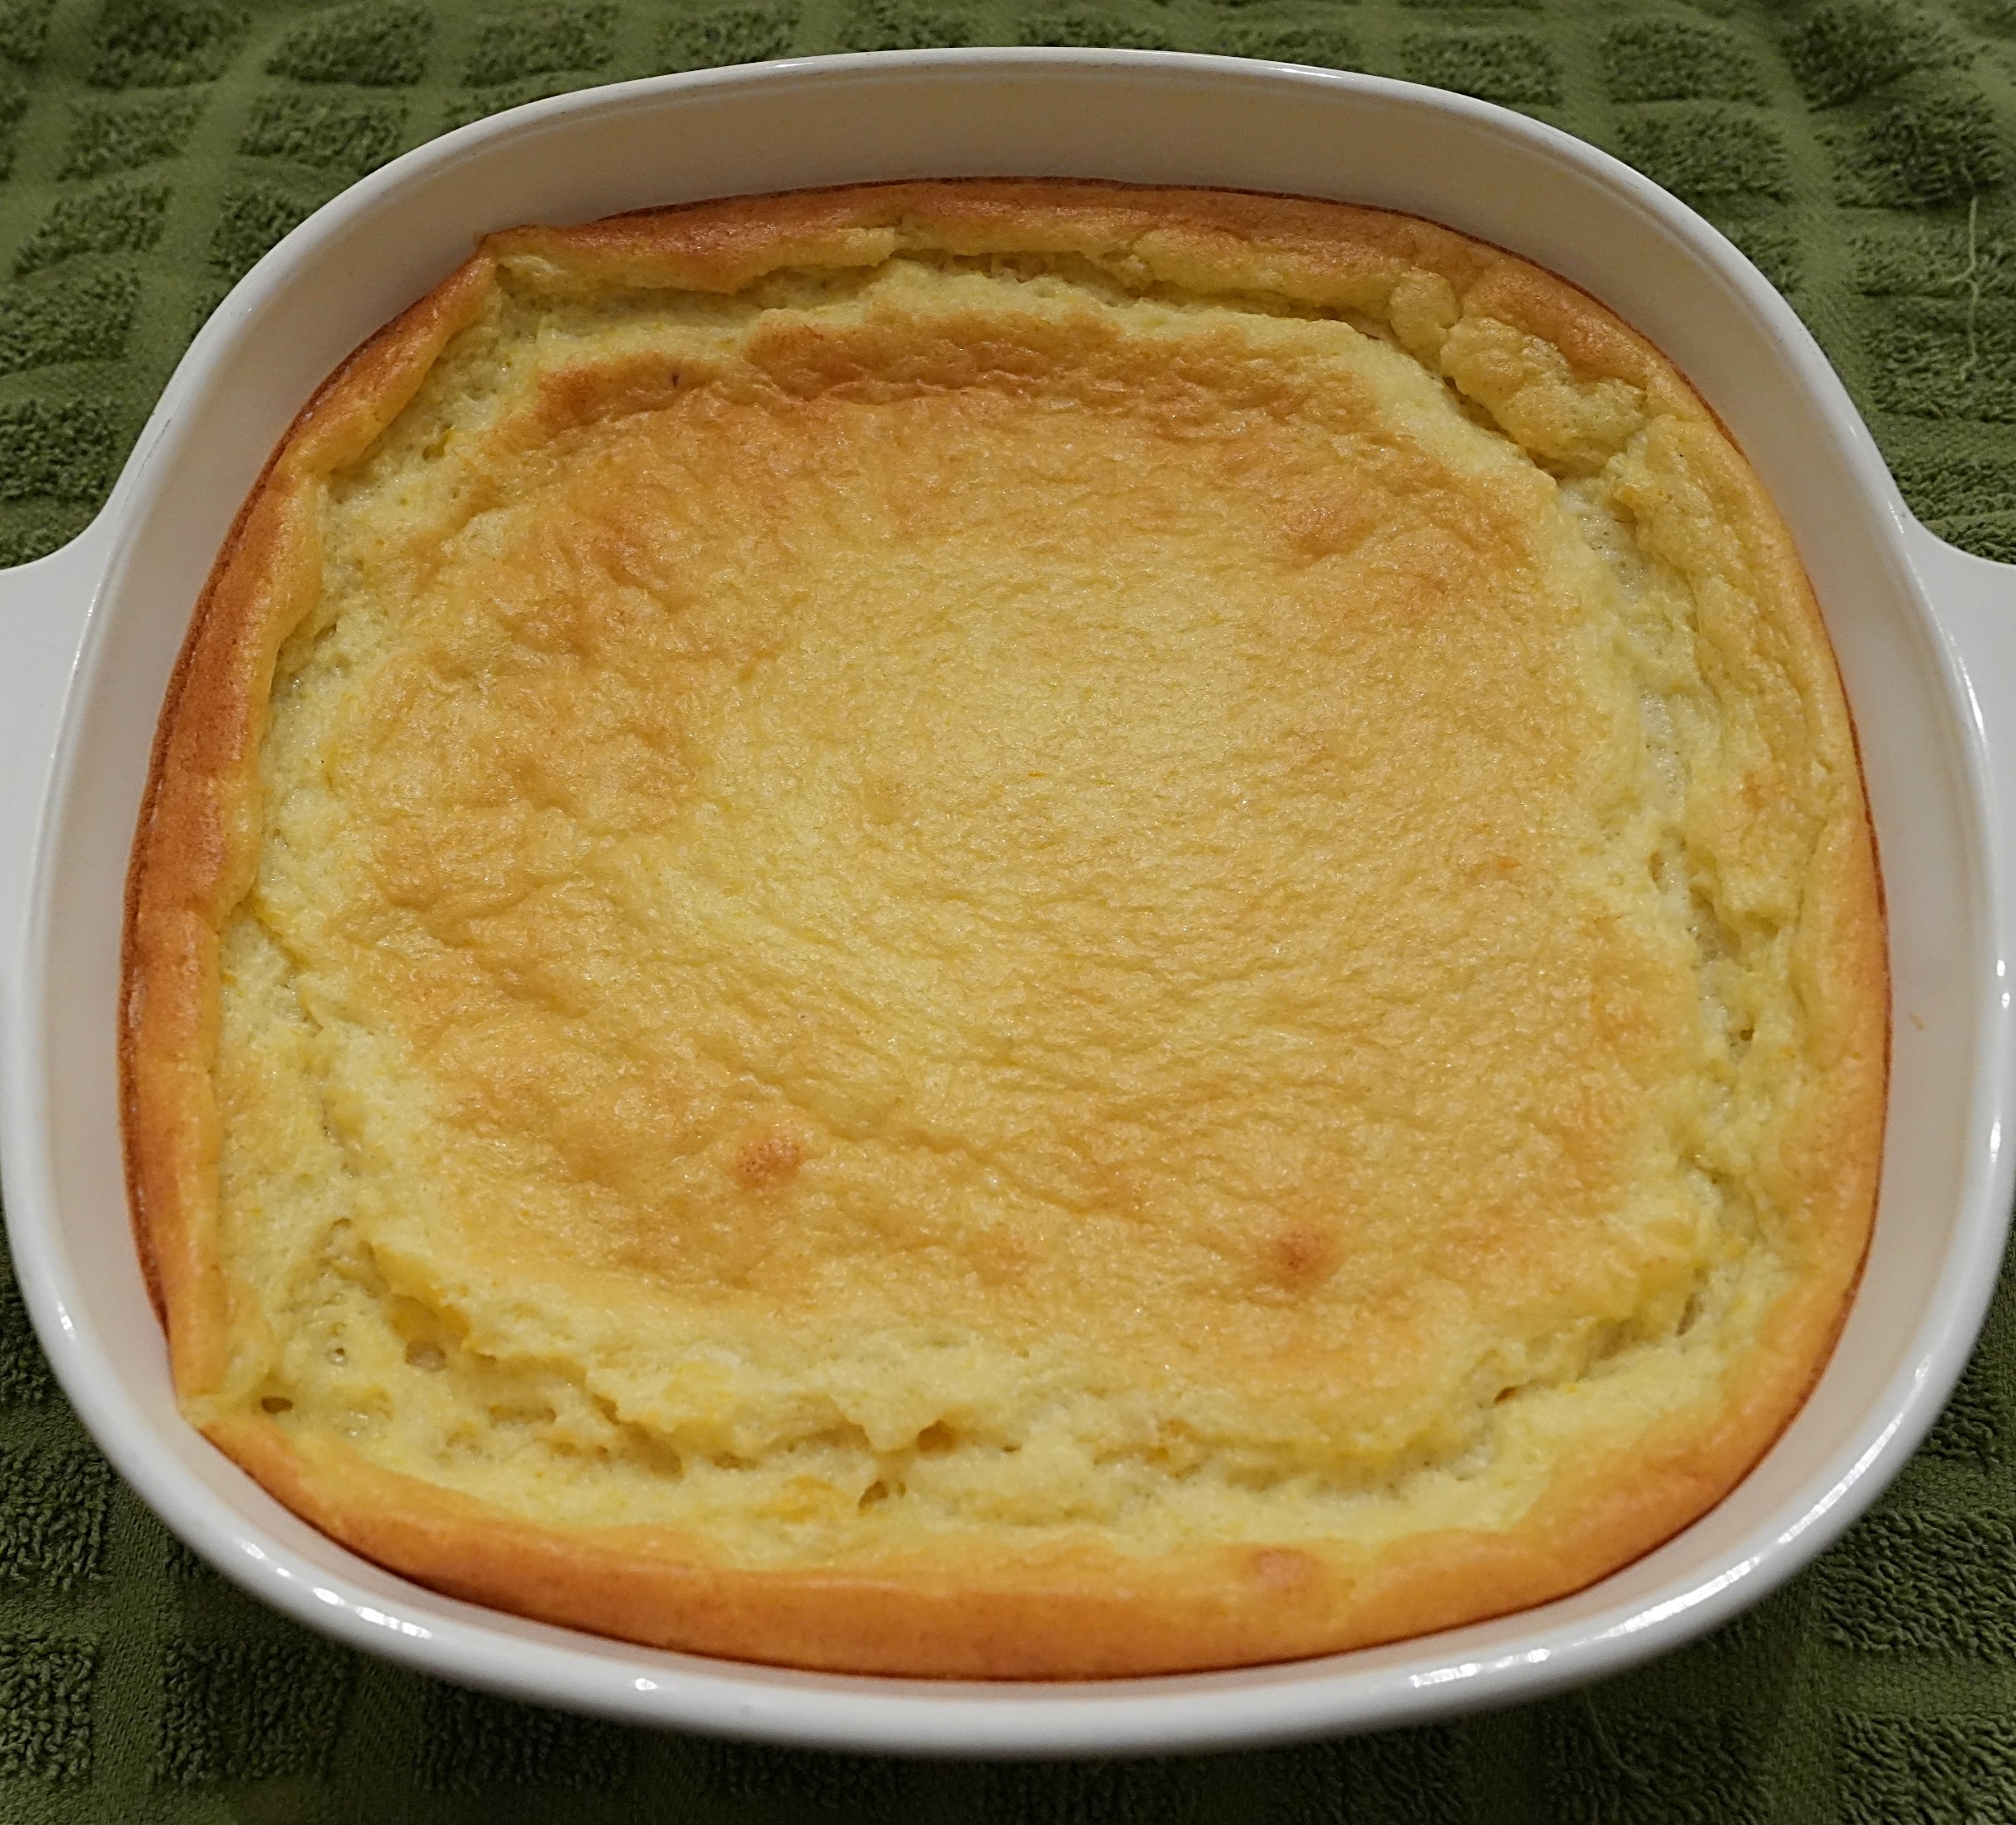
 Where I live March came in like a lion, and I wanted to make a cheery dessert. I found a hundred-year-old recipe for Apricot Souffle that fits the bill. It was light and had a lovely apricot flavor with a hint of almond.
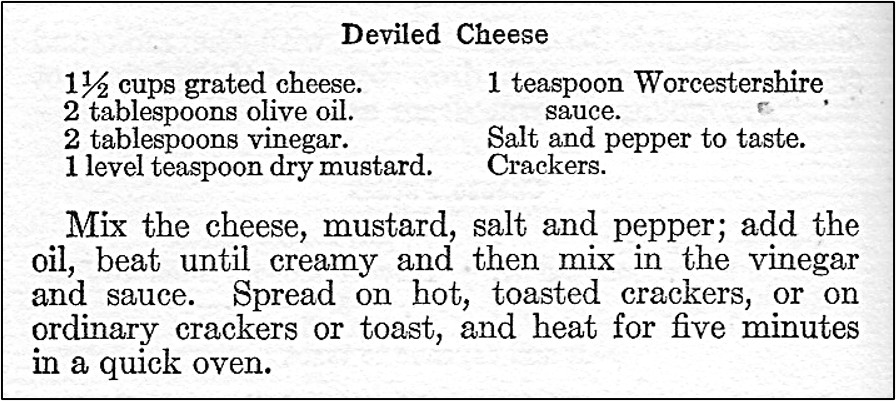
Here’s the original recipe:

I got this recipe out of a cookbook that I bought off eBay. It had a penciled checkmark at the top which suggests that the original owner of the cookbook made it.
I used a 15-ounce can of apricots. I drained them, and then measured the apricots and had about 1 cup of them which I then pureed. I baked the apricot souffle in custard cups. I did not grease and sugar the cups because I thought it might make the top portion of the cups that was above the apricot mixture look messy. It worked fine not to grease them.
Here’s the recipe updated for modern cooks:
Apricot Souffle
1 can (15-16 oz.) canned apricots
1/2 cup sugar
6 drops almond extract
3 egg whites, stiffly beaten
Preheat oven to 350◦ F. Drain apricots and puree. Put pureed apricots in a saucepan and bring to a boil using medium heat. Remove from heat and stir in the sugar and almond extract. Put a small amount of the apricot mixture (1 – 2 tablespoons) in the beaten eggs whites, and fold in. (The egg white is first combined with a little of the hot mixture to prevent it from immediately cooking when introduced into the hot combination.) Fold the egg whites into the remaining apricot mixture, then put into individual custard cups. Put the custard cups in a pan containing enough hot water to come halfway up the cups. Bake until set and just beginning to brown (about 20 minutes).


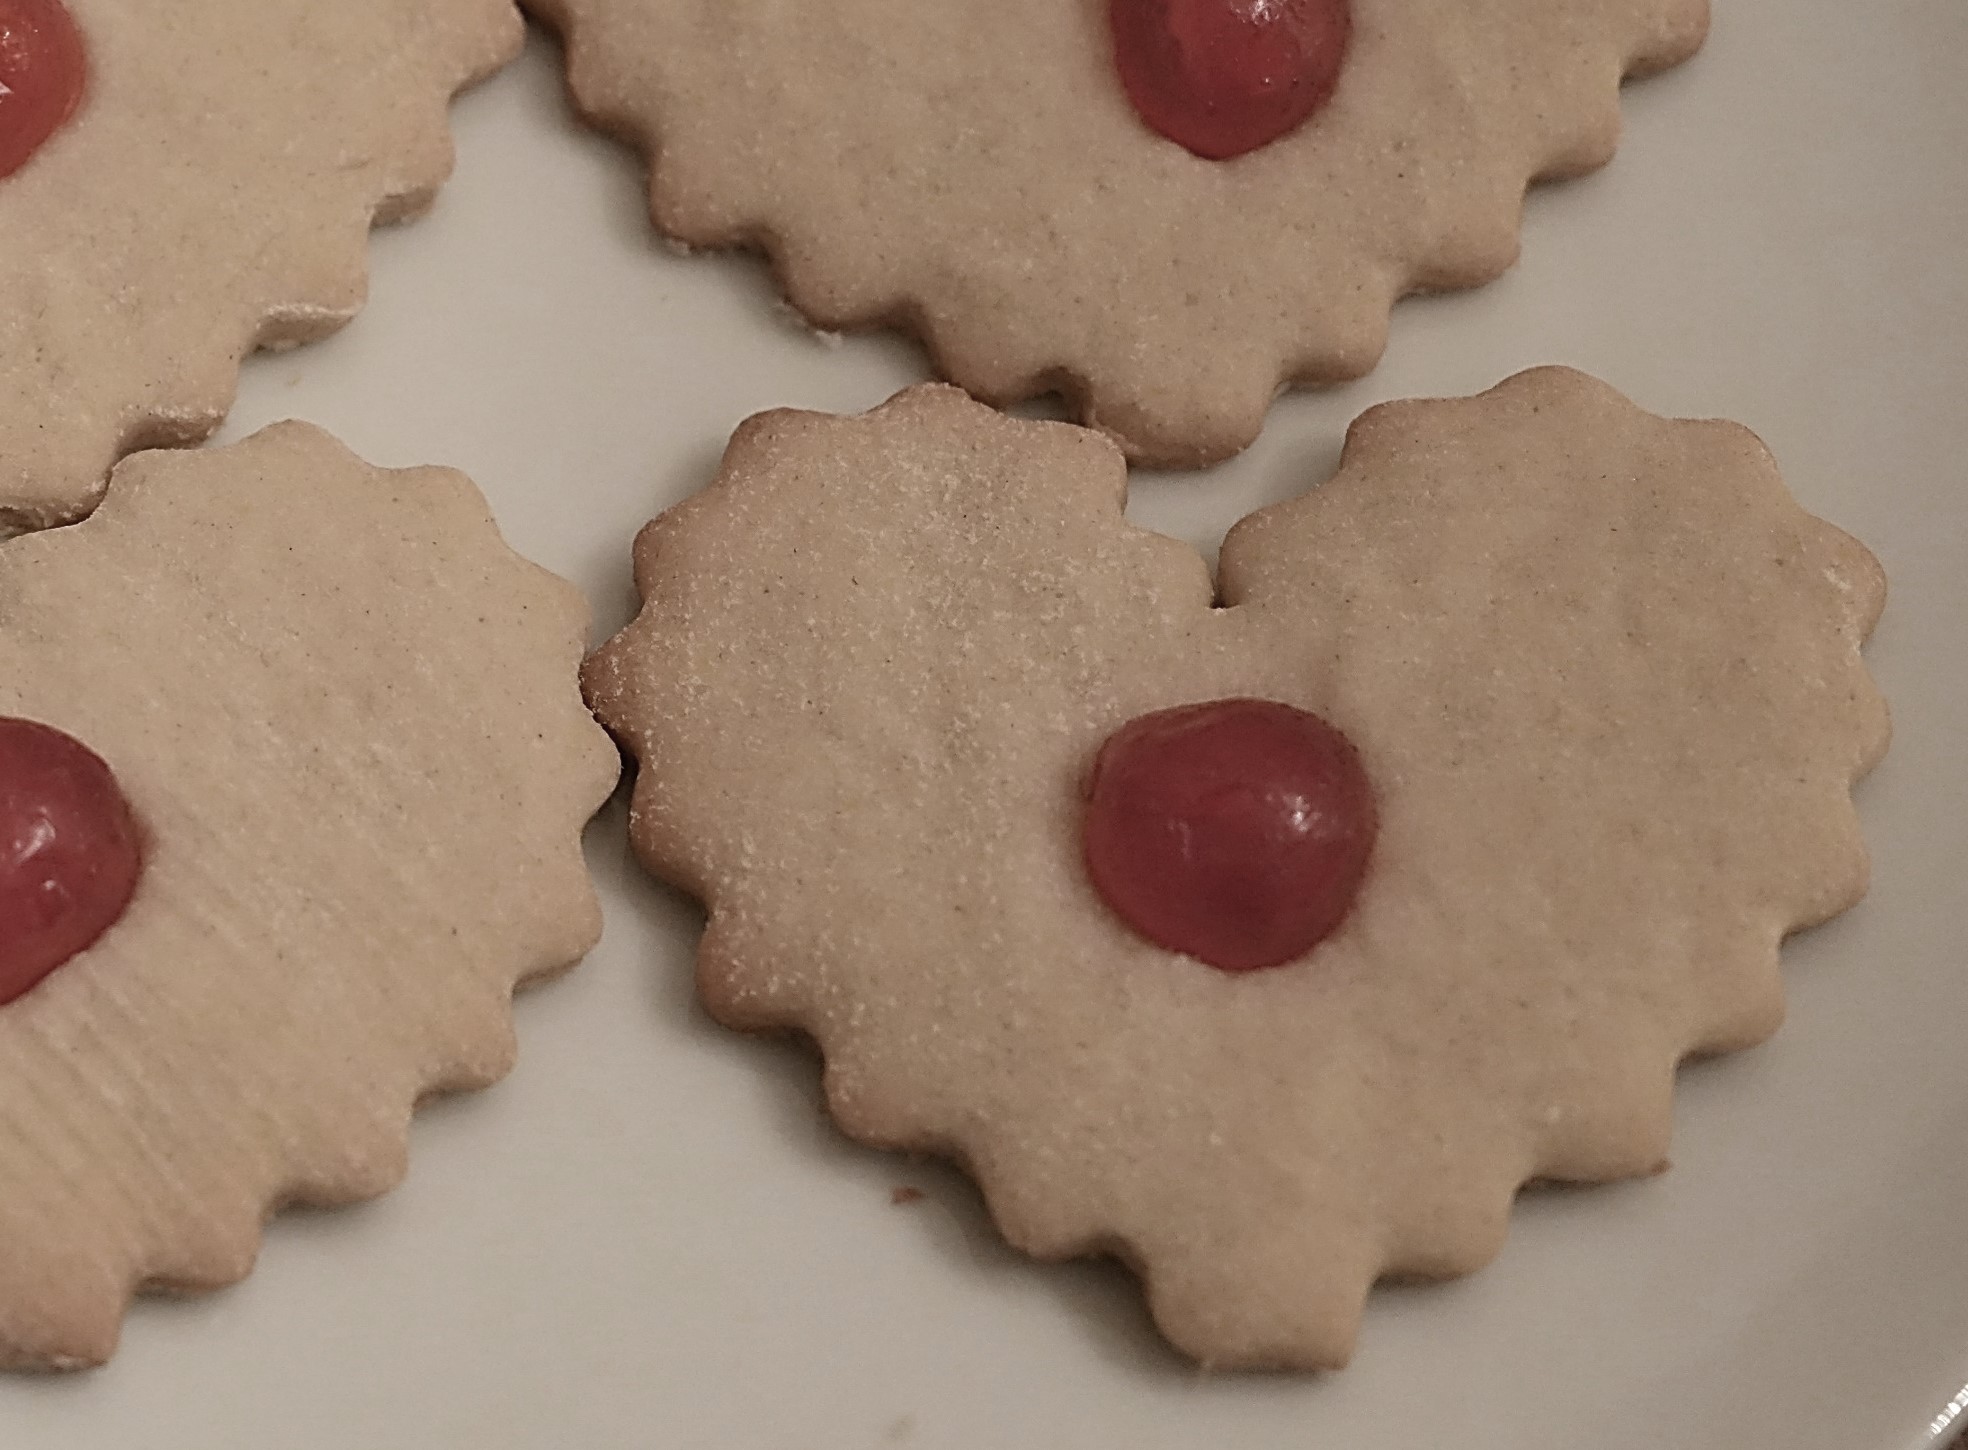 In some ways it is hard to believe that it is already February, and time to start thinking about Valentine’s Day. I have warm memories of helping my children prepare valentines to distribute at school and baking heart-shaped cookies, so when I saw a hundred-year-old recipe for Valentine Wafers, I decided to give them a try.


